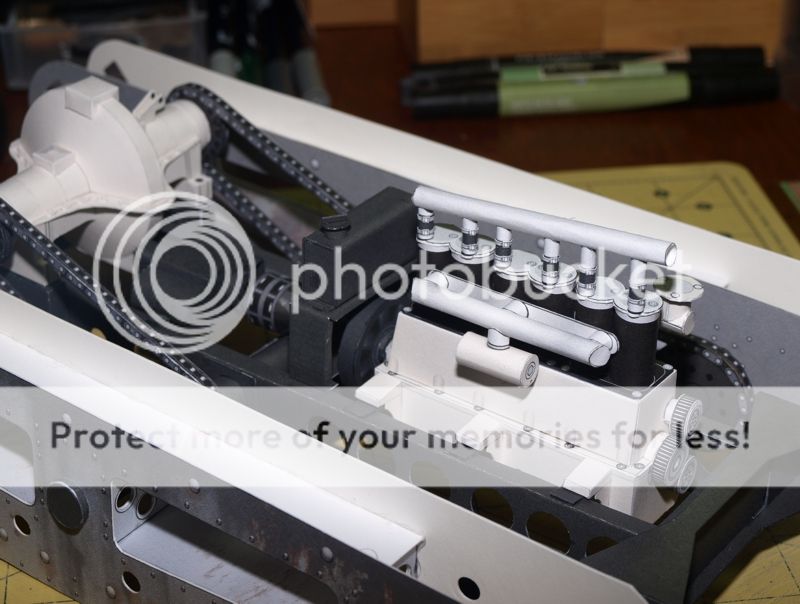
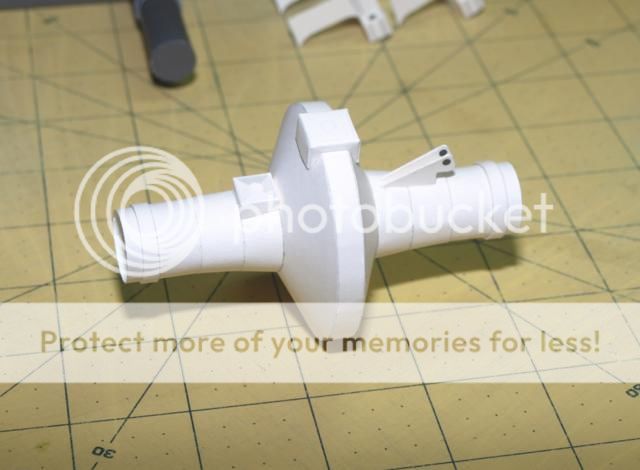
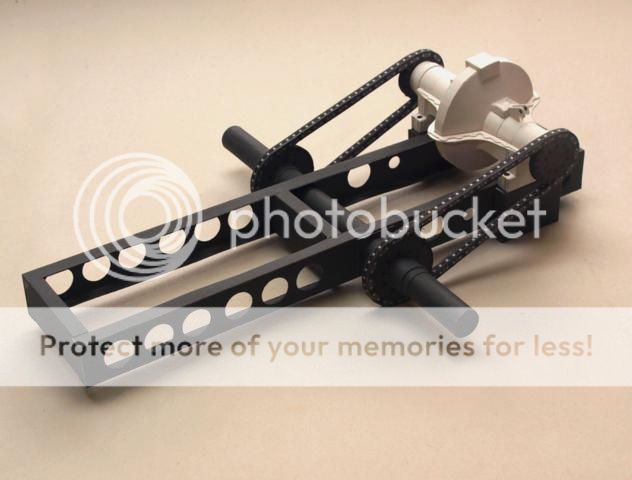
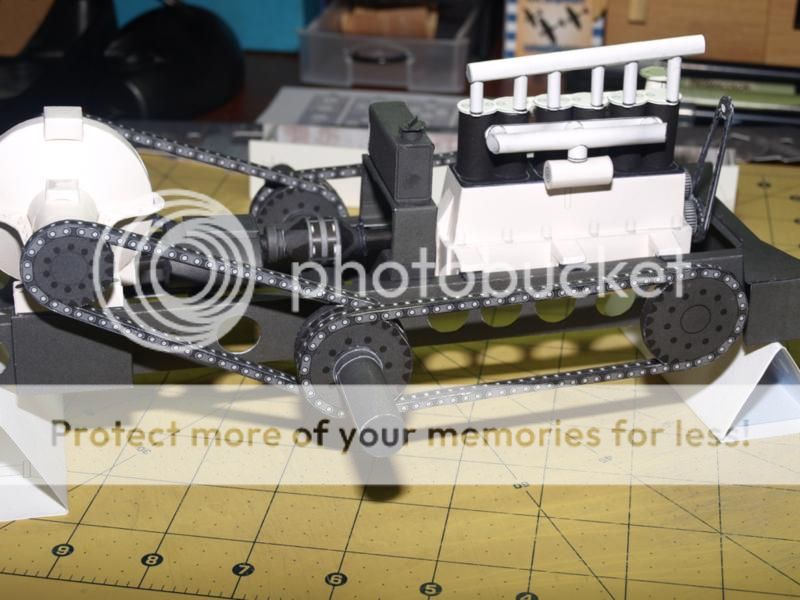
To the existing build I have: -cut out an unwanted Frame Member, -modified the forward Frame Member, -built and installed a new Motor, -installed a newly designed Driveshaft, Gear Box and mounting plates.
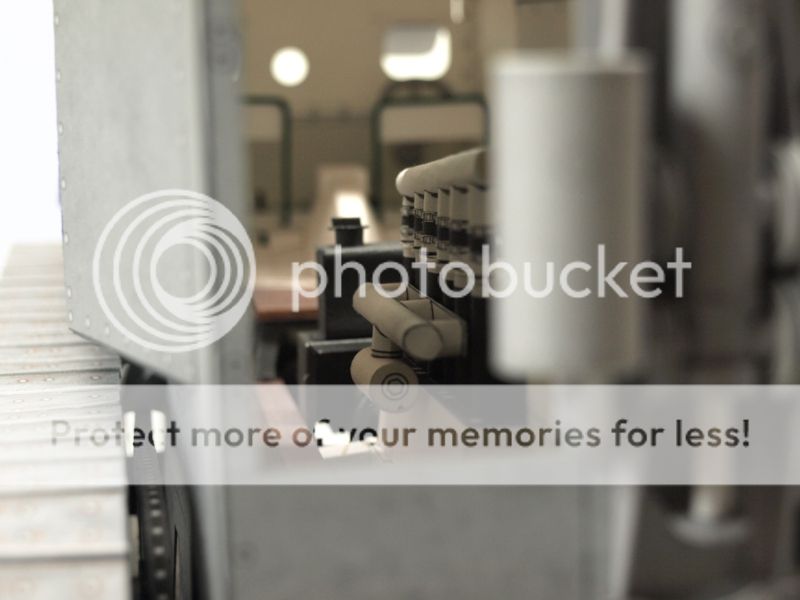
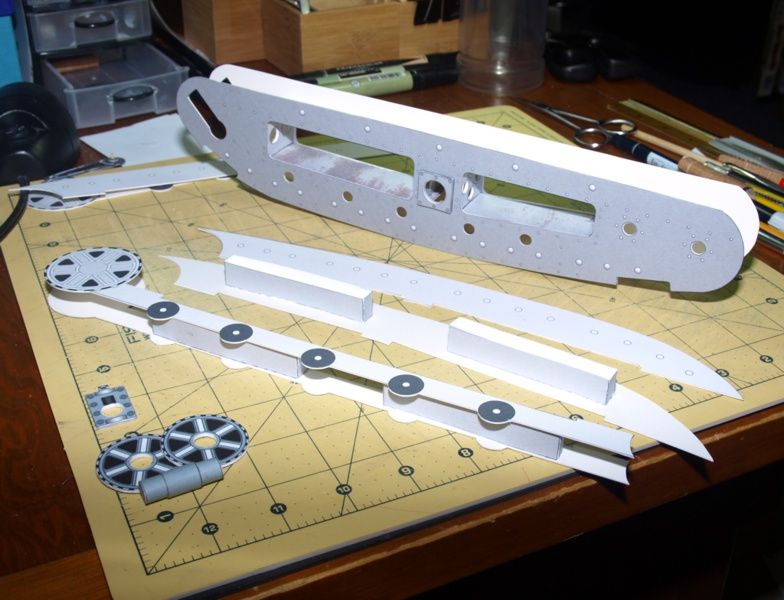
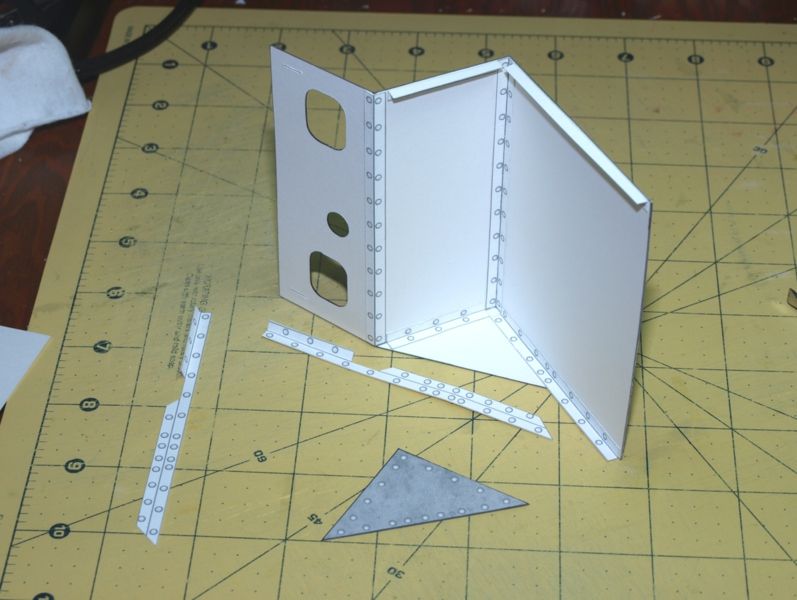
I am now getting ready to install the remaining substructure parts for the Track Housings.
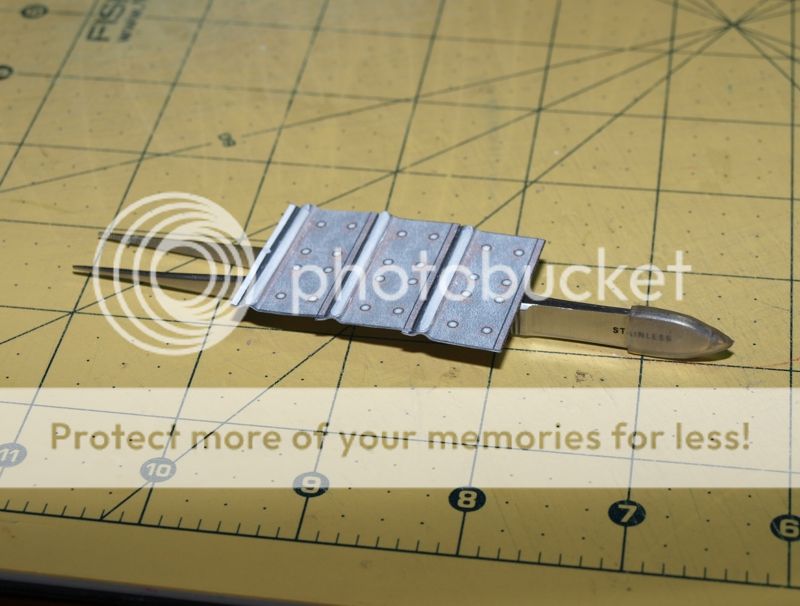
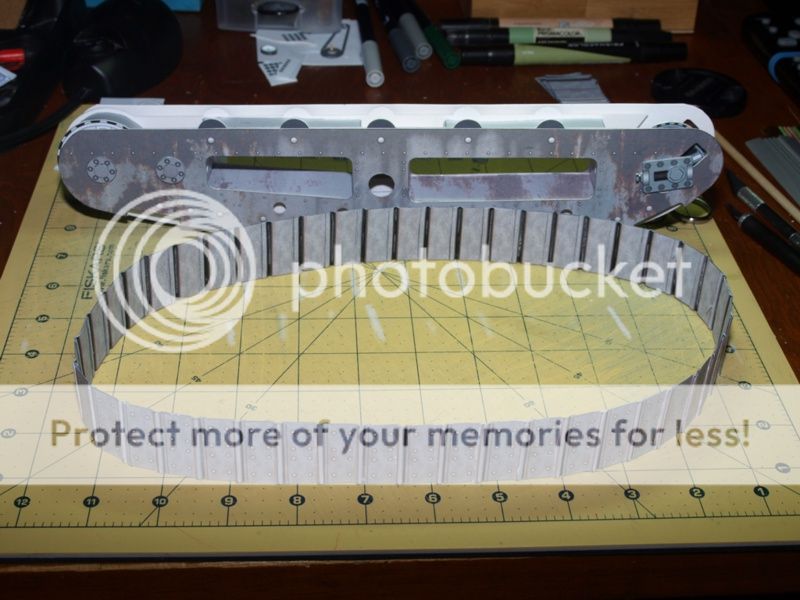
But for fun, I tested out the Track links last night. I will be creating a linked track...however the links will be glued together (not pinned or hinged) The Track is still fairly flexible and should wrap around the Housing easily. I am hoping my calculations are correct and the overall length of each Track will fit the Housing. The Track should be a touch long, and I am installing the front Track tensioners so you can tighten the Track to the Housing.
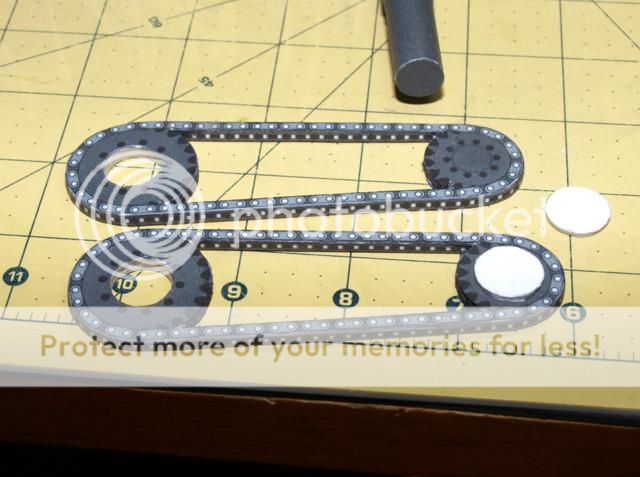
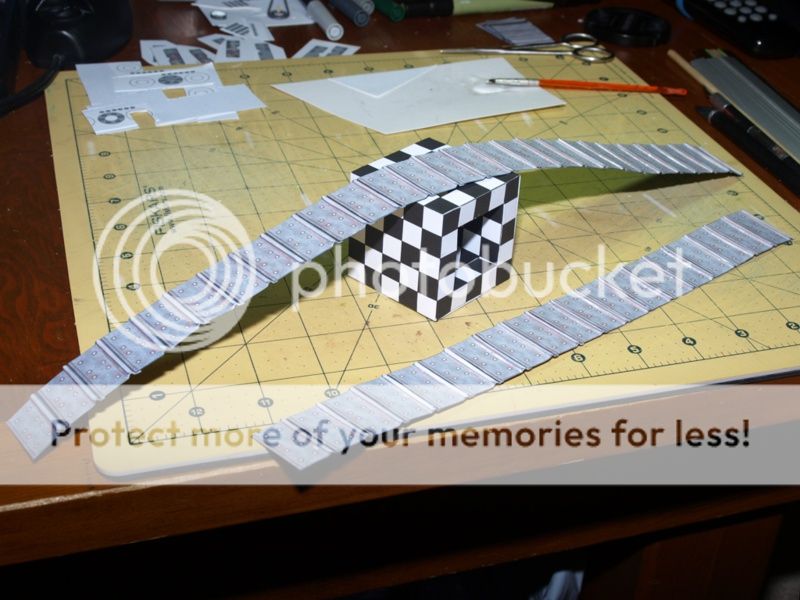
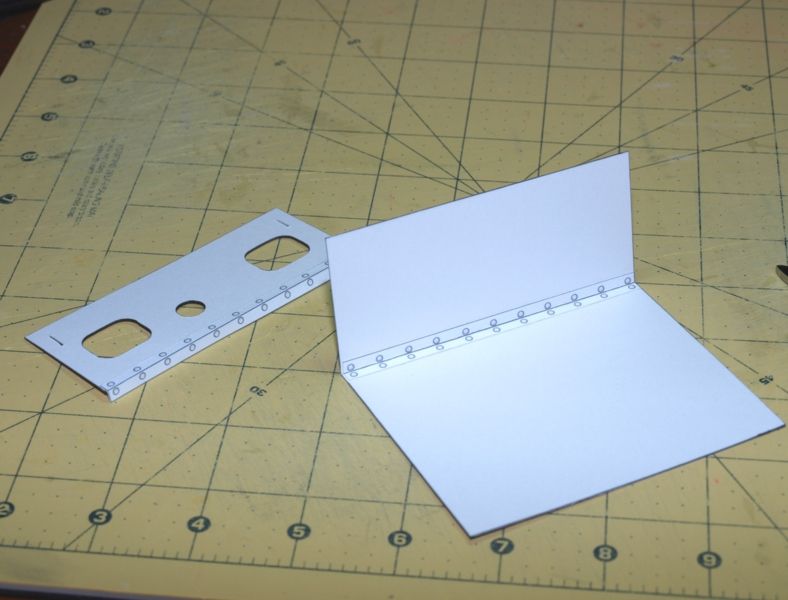
Heres a test link assembly... Each link is folded and glued. Then you have to shape the tread. Attach the extra Tread part. Then overlap and glue the links.
-- Edited by airdave on Monday 30th of July 2012 02:19:58 PM
I said I would eventually post here (about this project). Hopefully some of you are interested.
Just to remind you, I am a paper modeler (I design, build and sell paper/card models). Last year I built a 1/12 scale model of the WW1 Canadian Autocar Armored Car (there is a thread here deatiling the entire build)
You guys gave me a lot of support and help with my design and I appreciate it! One of your members suggested doing a model of Little Willie and I thought it would be an interesting project.� That member has also helped me with a ton of reference material including some scale parts plans.
Anyway, I have been at this design for a couple of months now and I am posting build reports on my papermodeling forums. I'll start copying over some of those posts.
The model is all paper...actually 65lb and 110lb cardstock. (110lb cardstock is about the same as Business card material) Often I will use some small wooden dowels, wooden toothpicks, fine metal wire, etc in my models, but so far, none of that.
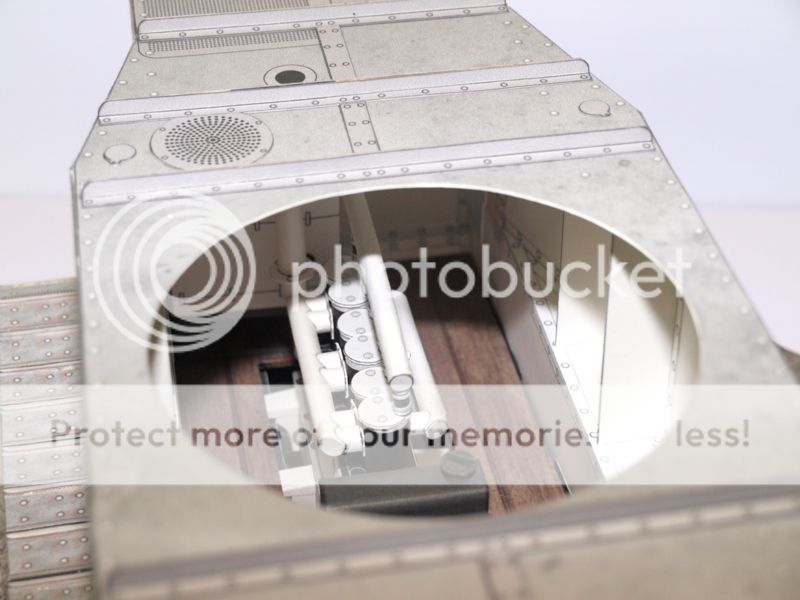
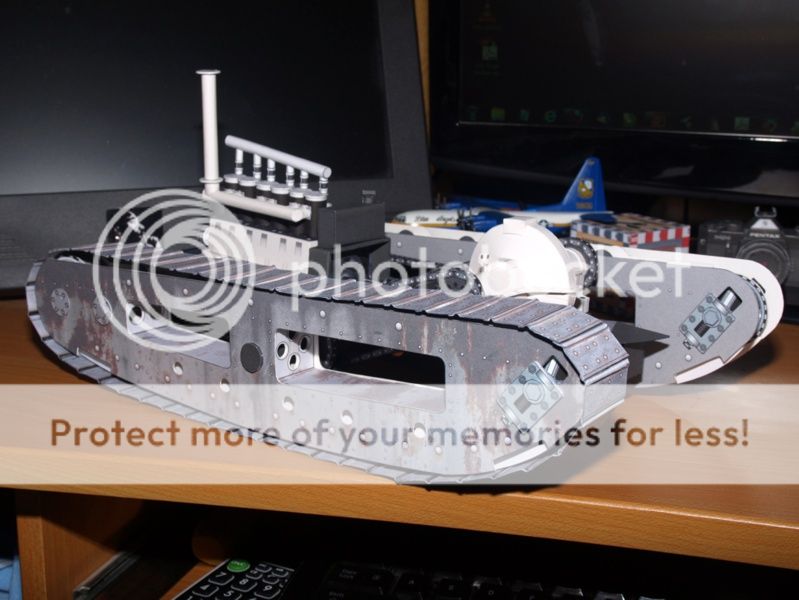
The finished model will be about 14" long, and about 9" tall. And the plan is to have a lift off Body to reveal a full chassis. The lack of actual plans and photographic reference for the interior means I have to use Mk.1 Tank reference and some educated guesswork. Keep in mind, interior parts will be simplified and stylized as a result of this lack of information and to keep the design less complicated. (Serious modellers will add their extra detailing touches as they wish)
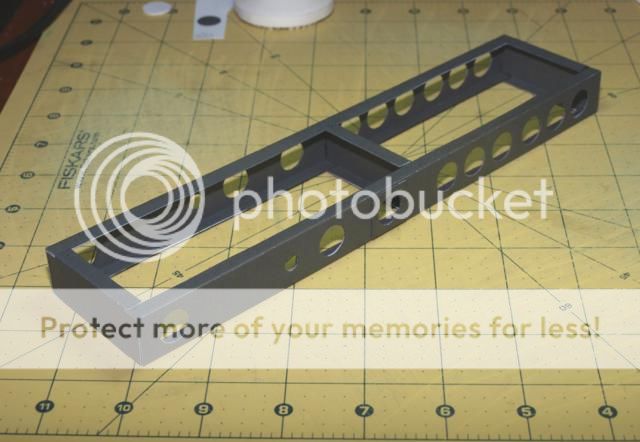
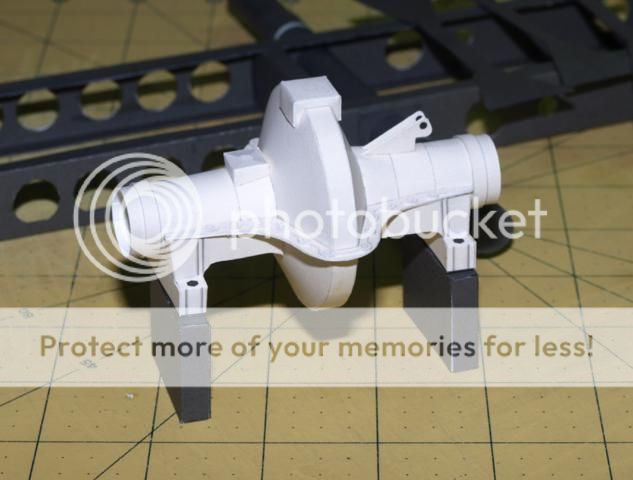
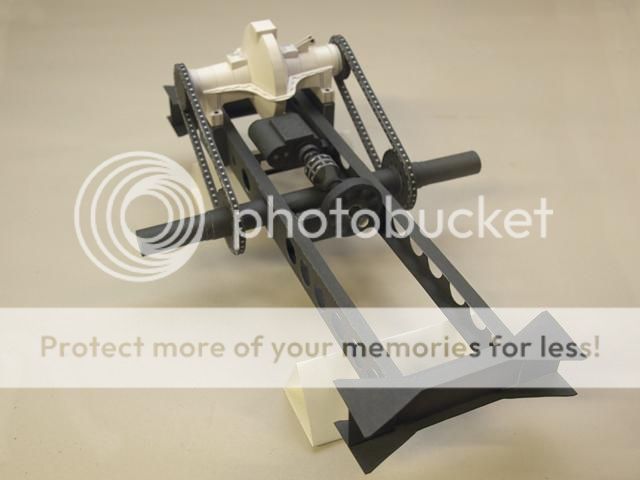
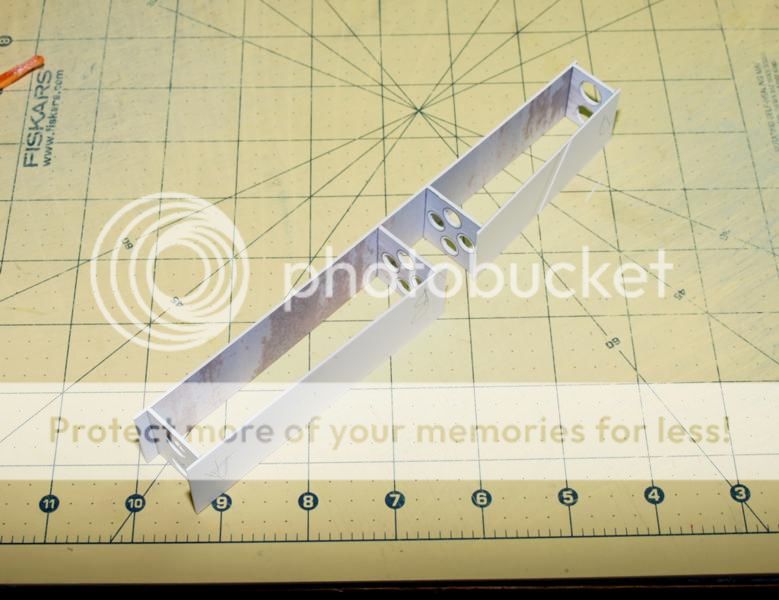
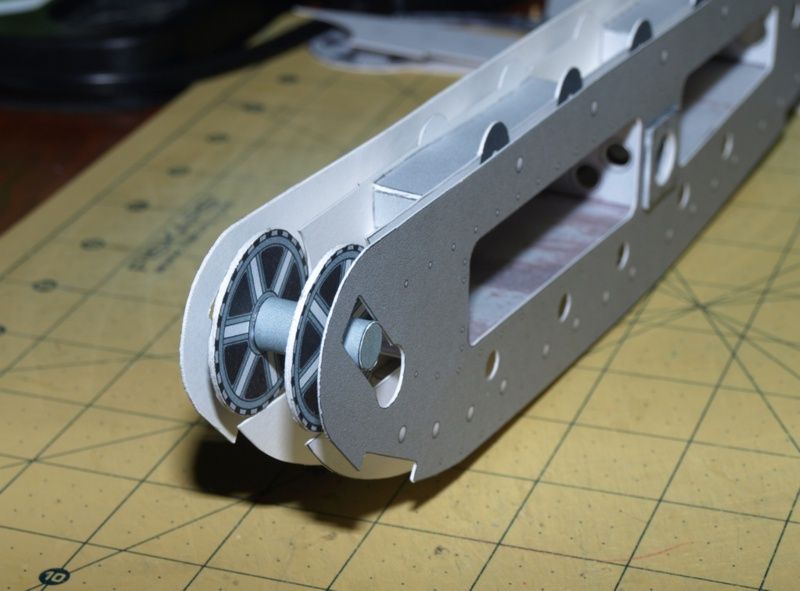
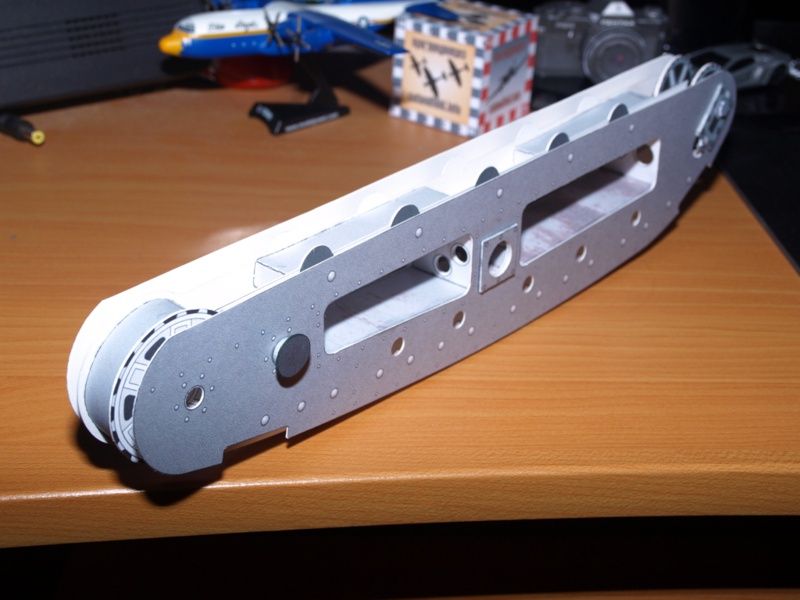
adding spacer and former parts as well as adjuster wheels and axles.
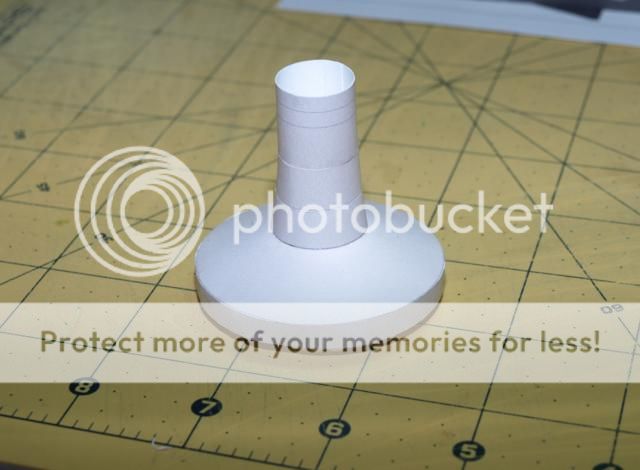
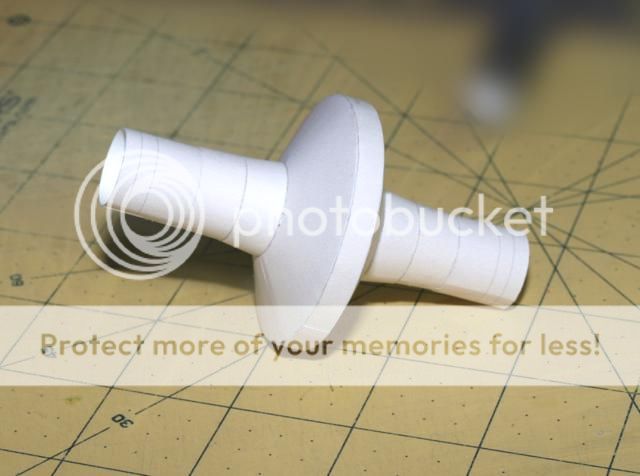
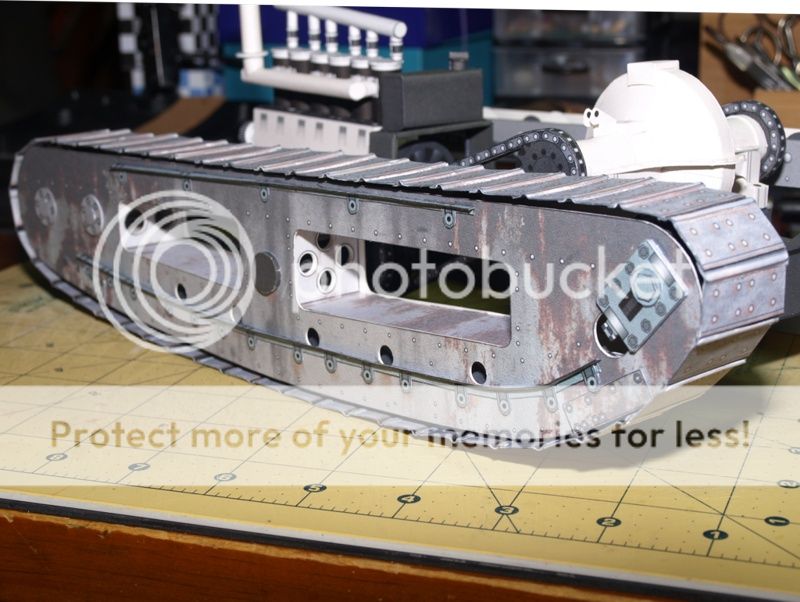
This is the forward end adjusting drive wheel. Just like on the real tank, this wheel slides to tension the track. I'm hoping that my track will fit nicely around the housing and then I will glue the tensioner into place.
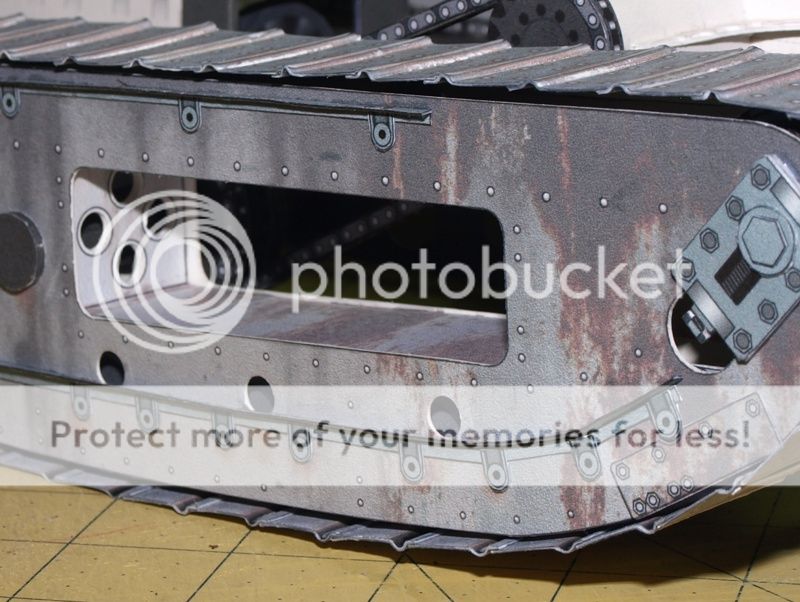
All of the supporting wheels are hidden inside the frame, so I saw no point in adding them. I also need to make sure the Track is supported and spaced properly away from the housing plates. The internal blocks and formers will create the proper spacing for the track and give the illusion of wheels and gears.� (Everything is still pretty light here...I have added more colour to these internal parts.)
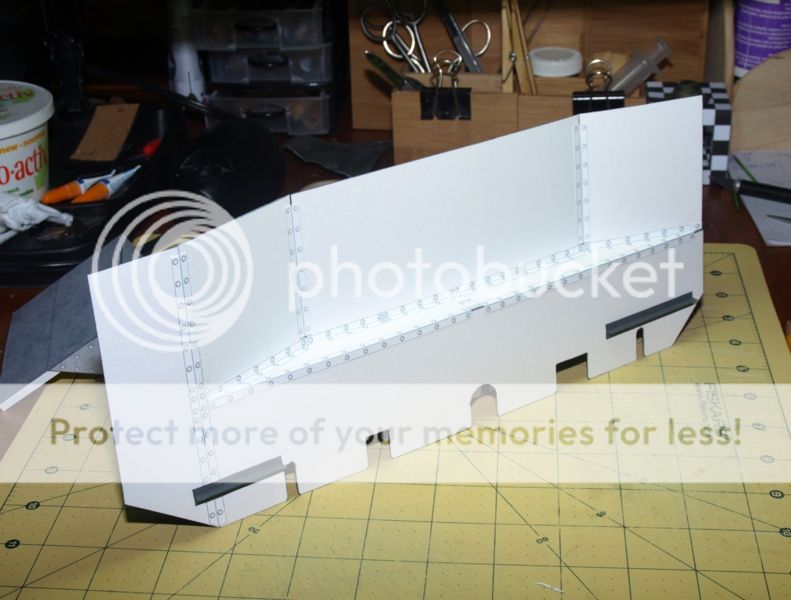
One more shot of the inside of the Track housing, shows the axle attachment for the drive sprocket/chain. This will just glue flat to the chassis installed drive chain sprocket.
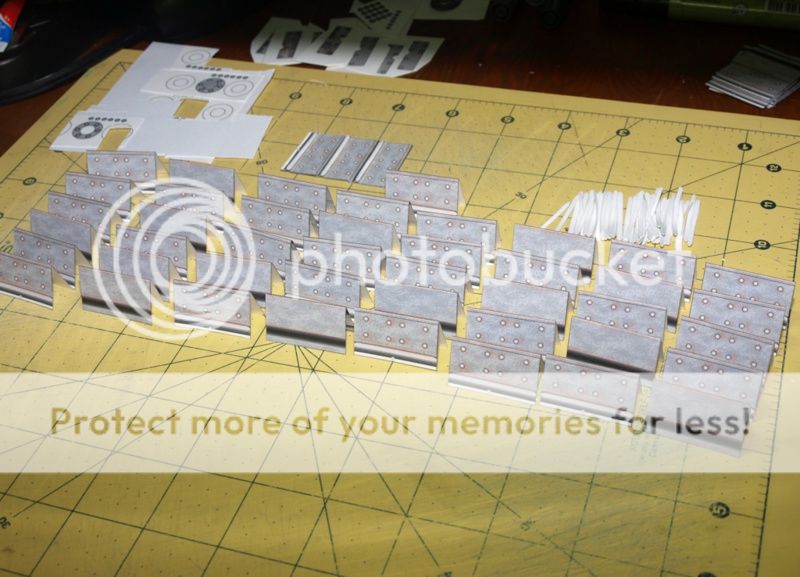
Need to finish up a few of the axle caps and then I can start on a Track. 46 Track plates/links make up each track...but I also have to design some Track guides. Maybe a guide element on every other track section? Just to keep the track centered.
Fantastic progress! It's amazing what can be done in paper/card; it's a very popular medium on the Continent, but never seems to have taken off so much here. You're doing a great job there.
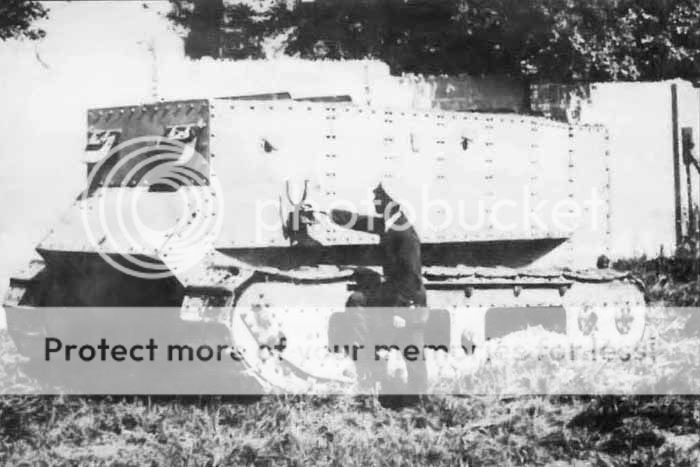
Just wanted to add something I forgot. Willie is of course on display at Bovington Tank Museum and has been given a fresh coat of gray paint. You can still see a lot of the surface pitting and damage through the paint. I'm glad they didn't try to smooth anything out with filler or anything else.
But I'm not sure the original tank was exactly that colour, if it was painted at all. It varies in tone in different photos.
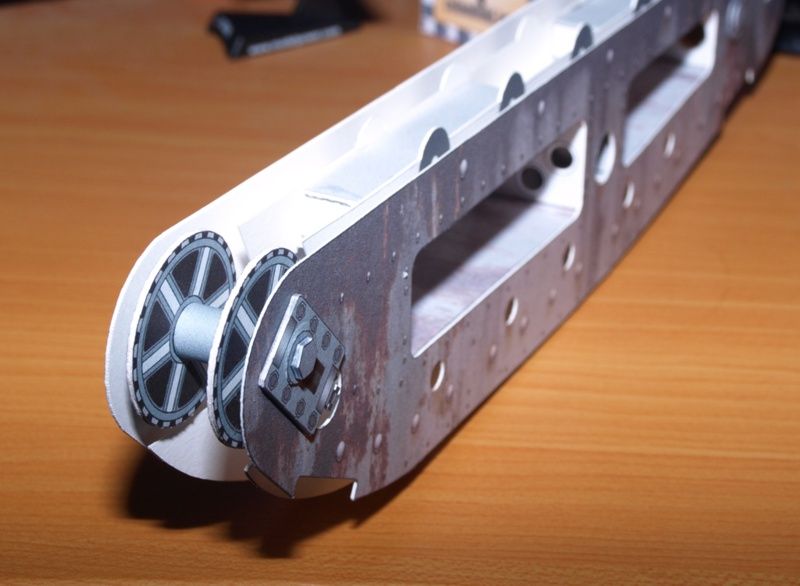
And after seeing the following photo, I was inspired to create a more weathered look, rather than a somewhat boring gray painted finish.
To me, it almost looks like the track Housings are painted white or a lighter colour which has deteriorated very quickly under those testing conditions. But I am guessing the main body is also painted, maybe a darker gray, since it appears to be scratched and flaking in many places.
Anyway, I didn't want to go too far...I didn't want to go overboard with the weathering, so I am applying a light "rusting" to the neutral gray finish.� I will do the same to the body, but not to this extreme...maybe just some rivet rusting.
But I will also make the main body a darker gray.
�
-- Edited by airdave on Monday 30th of July 2012 10:32:51 PM
-- Edited by airdave on Monday 30th of July 2012 11:02:41 PM
I like the weathered look you've applied to the track frame, I'd say you've struck a good balance there. If you stick to that degree of weathering it'll look great.
-- Edited by Roger Todd on Tuesday 31st of July 2012 01:10:30 PM
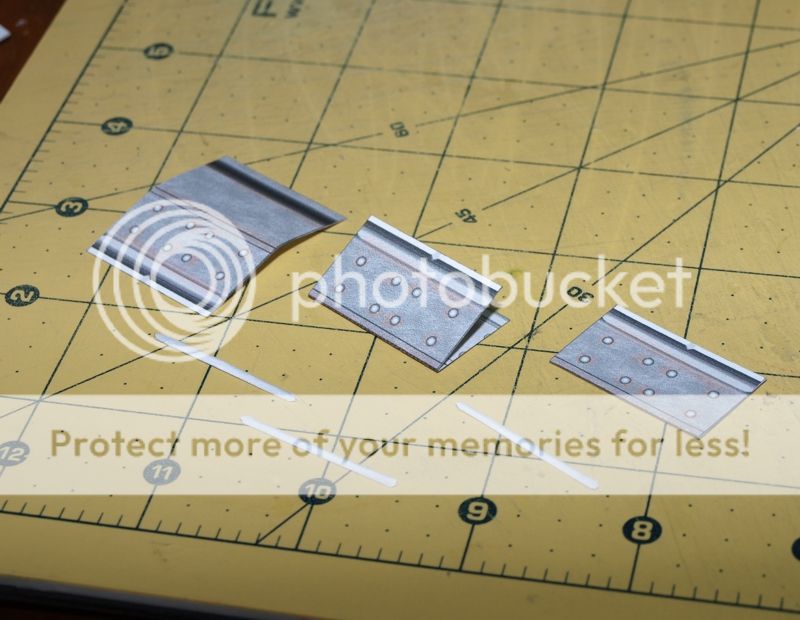
Track work continued last night with a full track assembly. Starting with cutting out, creasing and folding 46 plates.
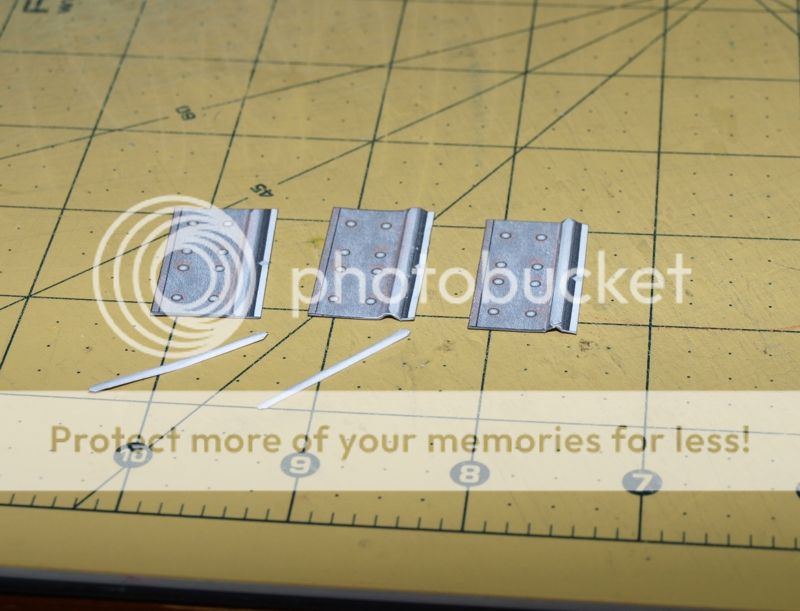
I decided to drop the additional raised "strip" in favour of creasing the ridge in the Track plate a little taller (and running a bead of CA glue into the crease from the back side).
After the CA glue had dried, I ran a bead along the ridge itself (topside) which gave it a slightly shiny look (good!) and toughened the ridge even more.
The add-on strips are so thin and hard to fold into shape and the look isn't any better than the newer crease and glue approach. I might leave the strips in the kits and leave it up to the builder.
Next step is to start gluing the Track Plates together. I glued three plates together, using one edge on the cutting mat to keep them in line.
After the glue had dried, I started attaching groups of three plates into longer sections.
And eventually into a full Track.
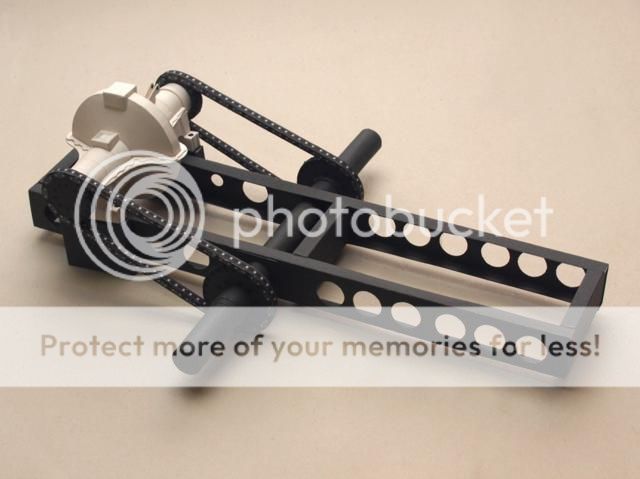
My calculations were good - the track slips over the Frames easily. And the front tensioner Wheels can be pushed out to tighten up the Track.
(I have a few other parts to sort out, so I haven't fixed the tensioners in place yet.)
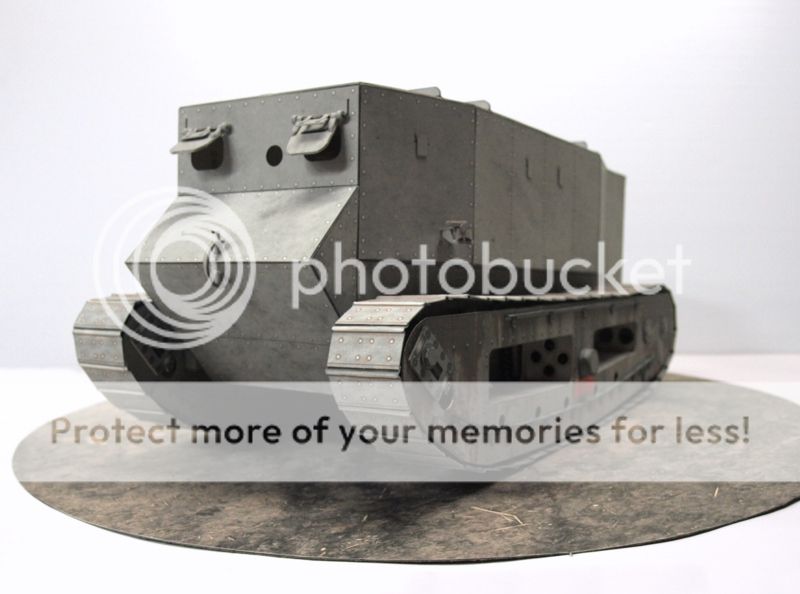
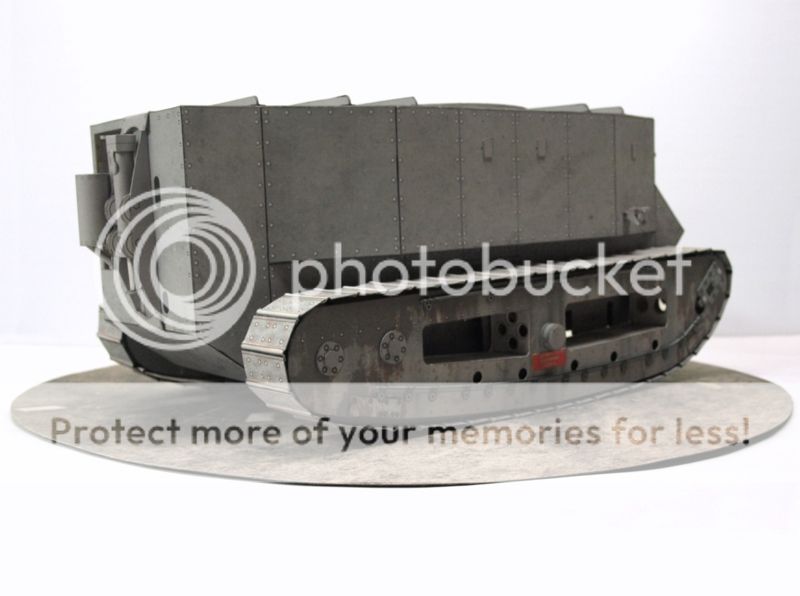
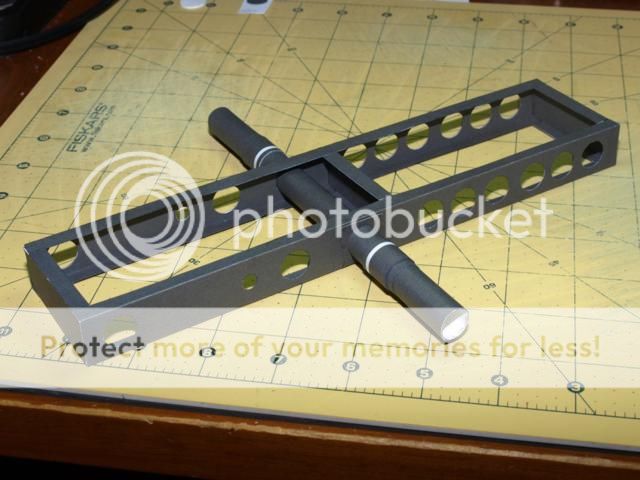
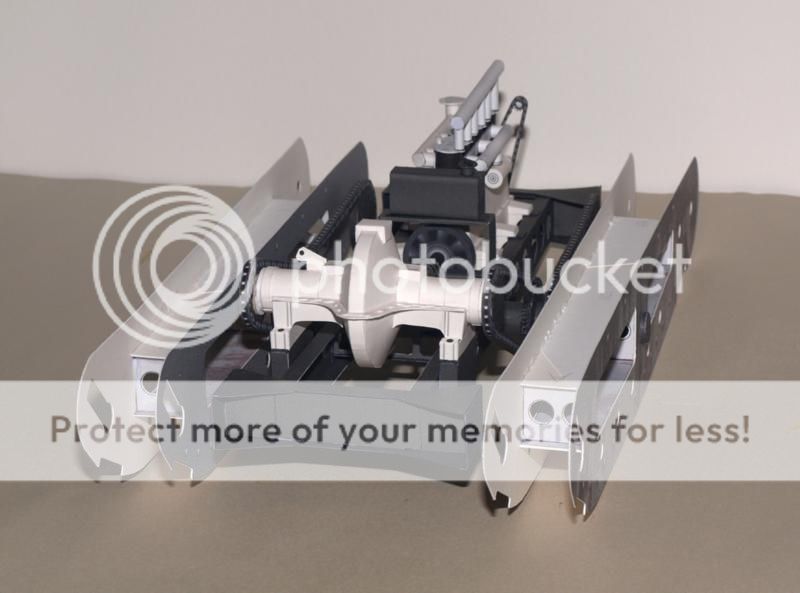
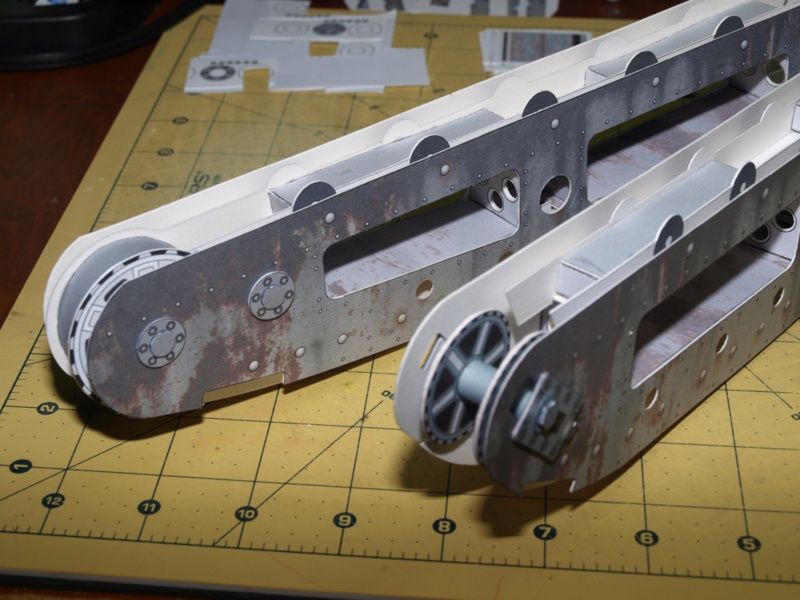
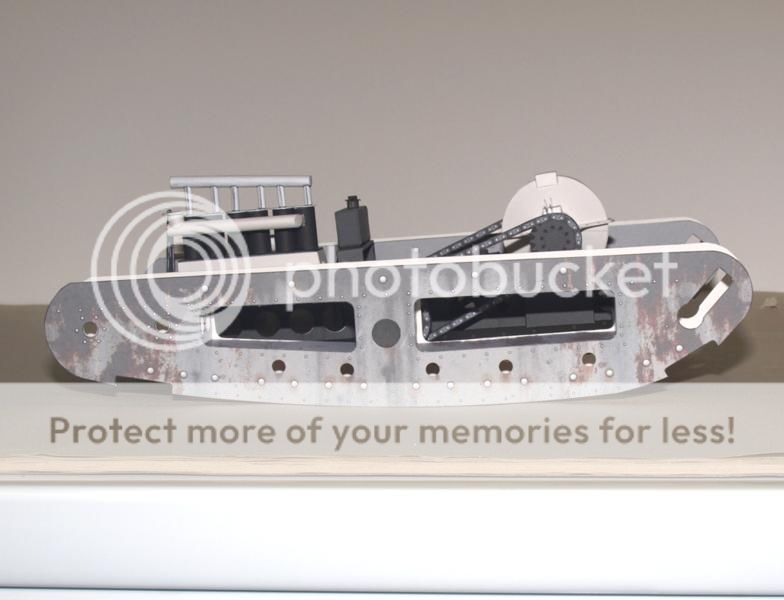
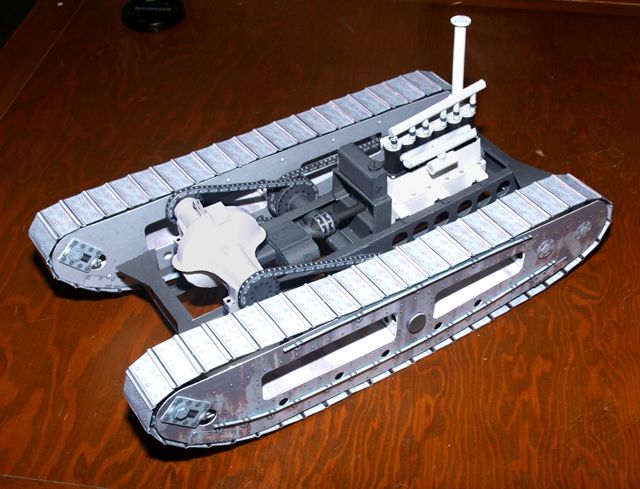
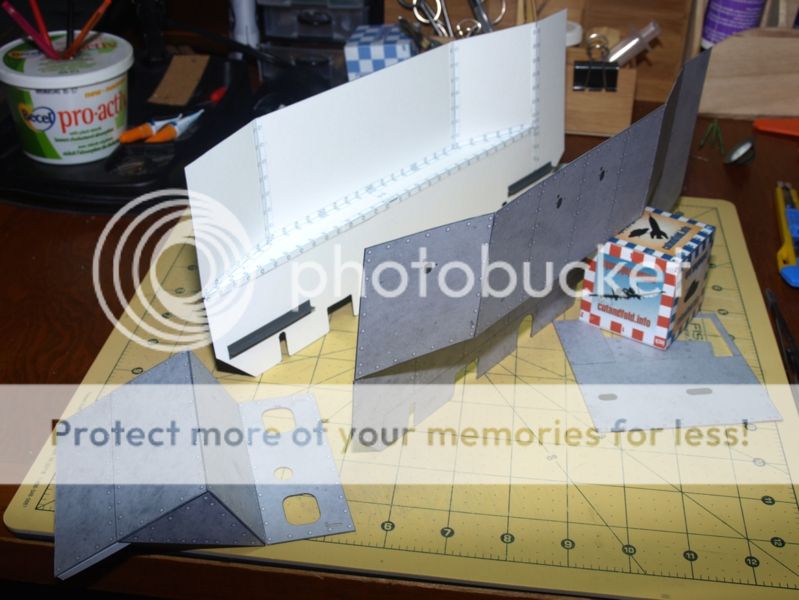
I finished up one of the Track Frames last night...
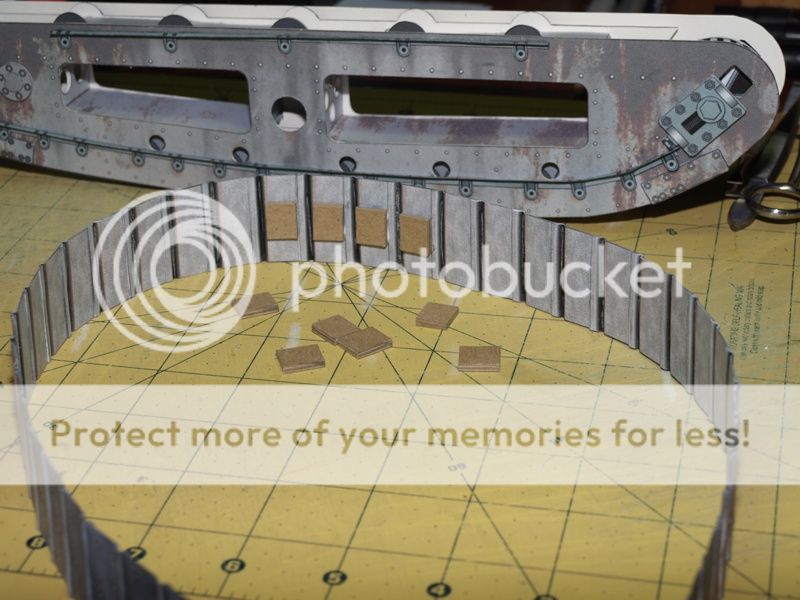
Before adding the Track to the Frame I fitted some small centering blocks. Four at the ends to line up with the large end Sprockets and three more along the bottom.
I also found I needed a couple of spacers at the front (adjustor end - not shown) to stop from crushing the side plates when gluing the tensioners. I'll add something to the kit.
Then slip the whole track over the frame, spin it into the desired position, tighten the track against the frame creating excess at the front and then extend the tensioner to take up the slack (and glue into place). -You need three hands for this, but it works!
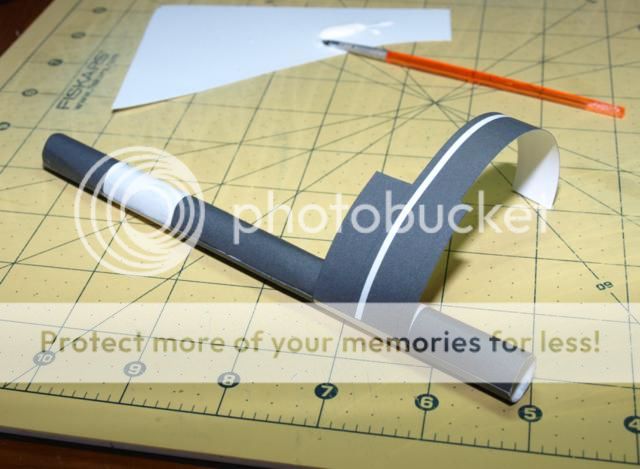
Lastly, adding the smaller details, the bracketry and supports for the Tracks wheels. Some small parts requiring some careful cutting, but the 3d parts are necessary here.
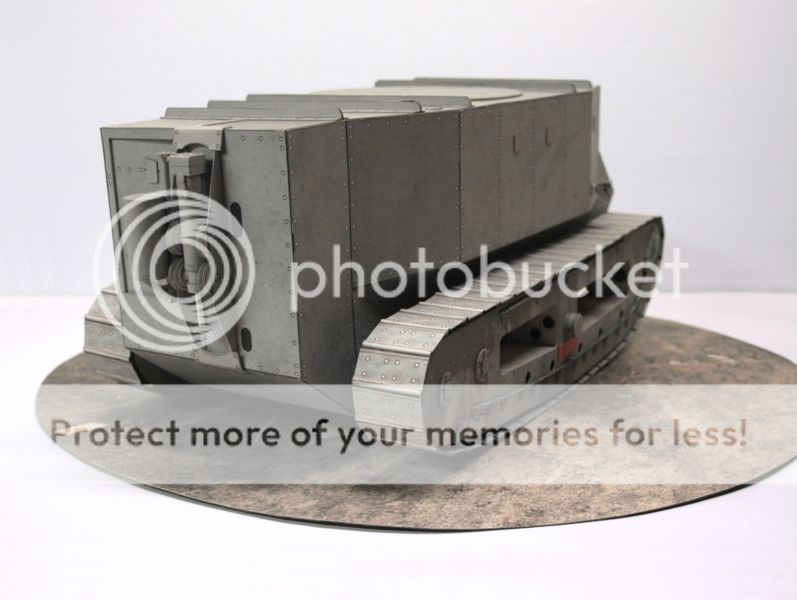
Final look is quite good I think...I'm happy with this. Now, to do it all over again for the other side! (sigh)
Re you comment copied below, I think that the difference in colour is due to good old British dried on mud, some photos of tanks in action have a ghostly impression due to the caked on mud.
�
To me, it almost looks like the track Housings are painted white or a lighter colour which has deteriorated very quickly under those testing conditions. But I am guessing the main body is also painted, maybe a darker gray, since it appears to be scratched and flaking in many places.
Anyway, I didn't want to go too far...I didn't want to go overboard with the weathering, so I am applying a light "rusting" to the neutral gray finish. I will do the same to the body, but not to this extreme...maybe just some rivet rusting.
But I will also make the main body a darker gray.
__________________
ChrisG
The cure for boredom is curiosity. There is no cure for curiosity(Dorothy Parker)
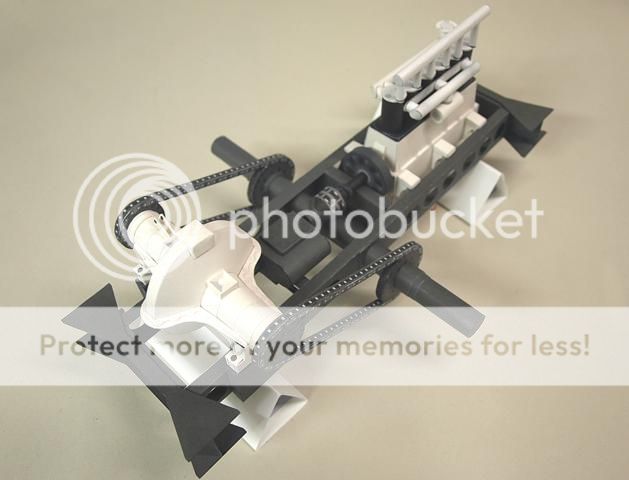
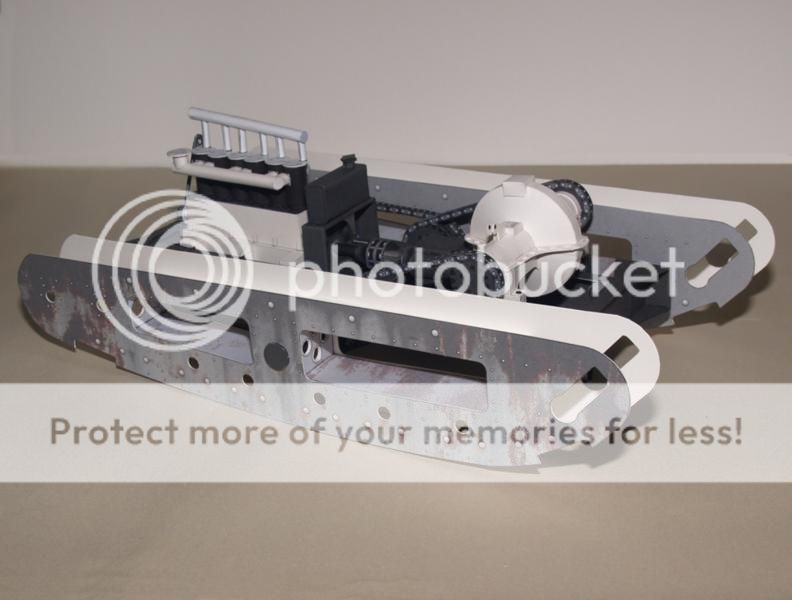
I have been working on Instruction diagrams, so not much else on the model yet. However I did finish the second Track for the tank.
I am going to add front seats, radiator and few other details, but those will install into the body. I've got a few more chassis related items to deal with, but I will move on to the body design very soon.
-- Edited by airdave on Monday 6th of August 2012 02:24:15 PM
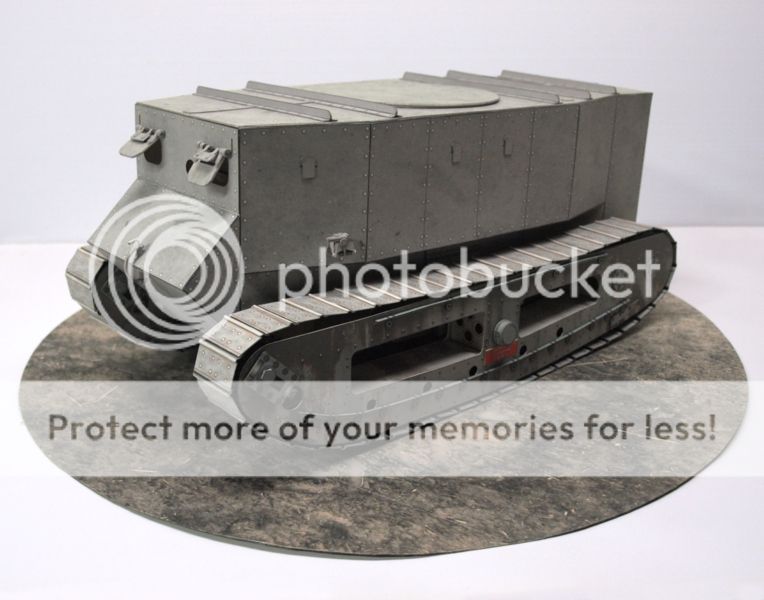
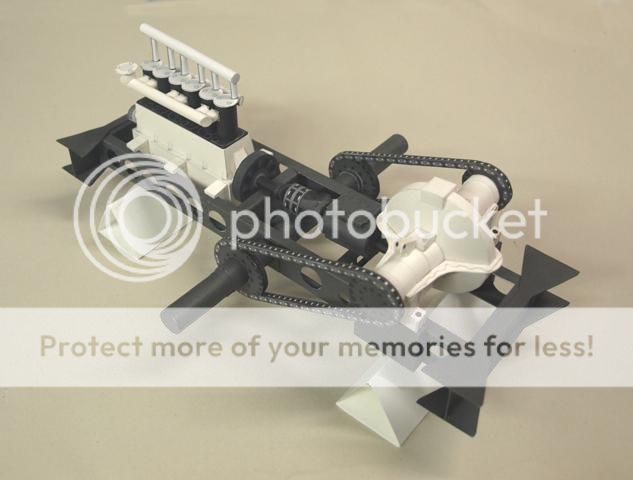
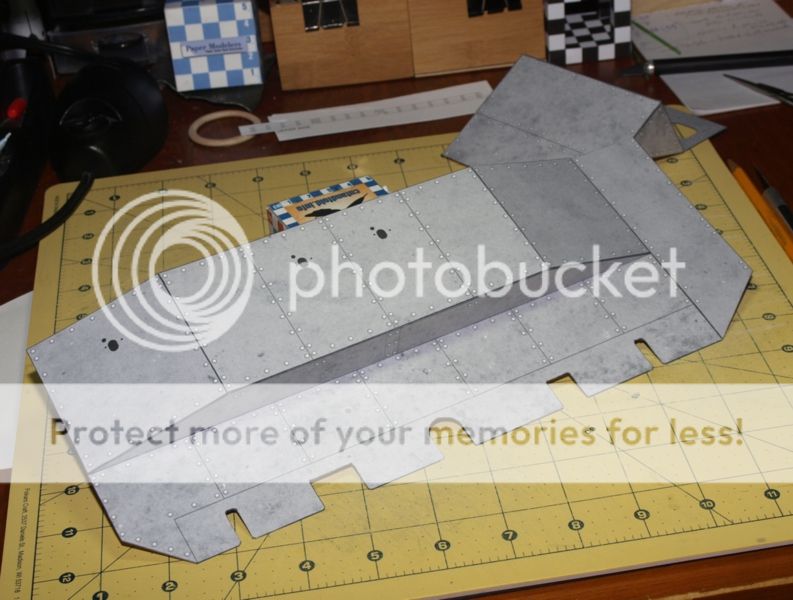
Since the last progress report, I have finished up the Track Sponsons by adding the final little detail parts. I feel as though there are some more parts to add to the Chassis, but I am trying to consider what may fit into the Body and what should attach to the Frame. Since I do not have accurate information about all the interior and its parts, and I want to limit the parts to basic shapes and objects (leave all the extra detail work up to the builder) I am reluctant to go too far with lots of little extras.
So, I am moving on to the Body for now...just to be sure the original design ideas still work.
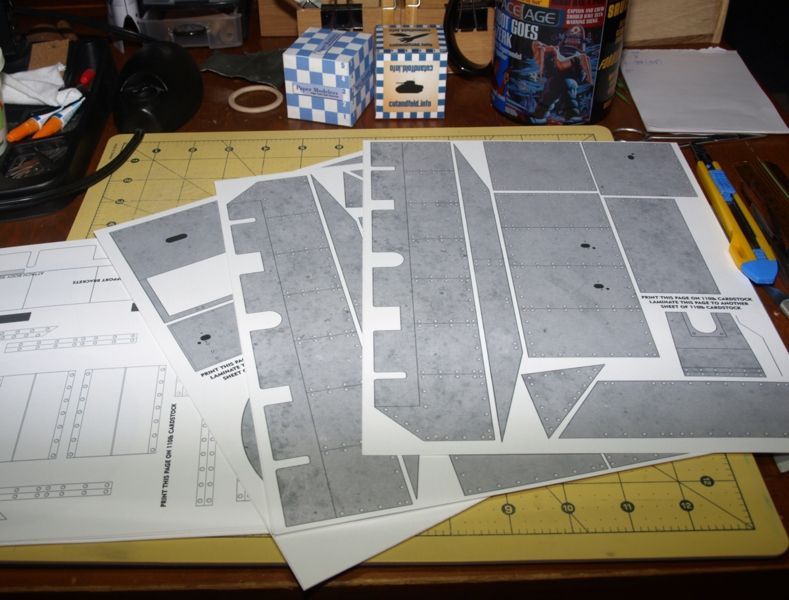
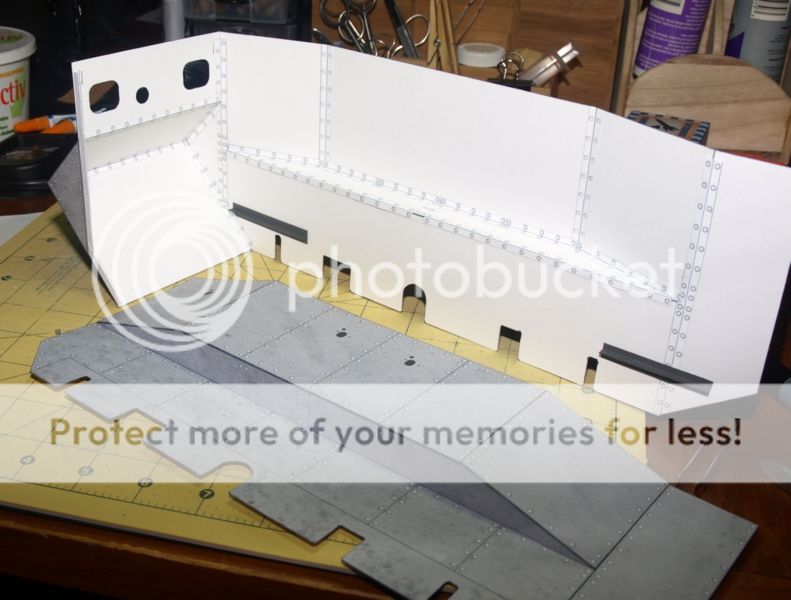
I have laid out all the basic Body panels and connecting strips. These are printed on 110lb cardstock and double laminated (roughly .55mm thickness)
This is my second print...the first using my original idea to print inside and outside panels. The inside panels were printed in an off-white colour (same as the big Differential Drive Unit) which is more like the painted interior in the real Willie Tank. Problem is it means cutting out two sets of parts, very accurately and twice the page count for the model.
I decided to use the paper white for the interior colour, so you print out only one set of outer panels and laminate the pages and cut out only one set of parts.
At this point, I am unsure of an assembly procedure, so I will start with the front end... the actual Tank is boilerplate steel panels fastened together with flat joiner plates and rivets.
I am now assembling the sides (as one full piece which I will later attach to the front and rear assemblies)
I have preplanned a simple bracket ledge that will sit onto the Frame. This is how the Body will sit on the Frame and some Floor parts will sit on top of those same brackets.
I will include a template that can be used to position the brackets. (You can see the template at the far right of the photo)
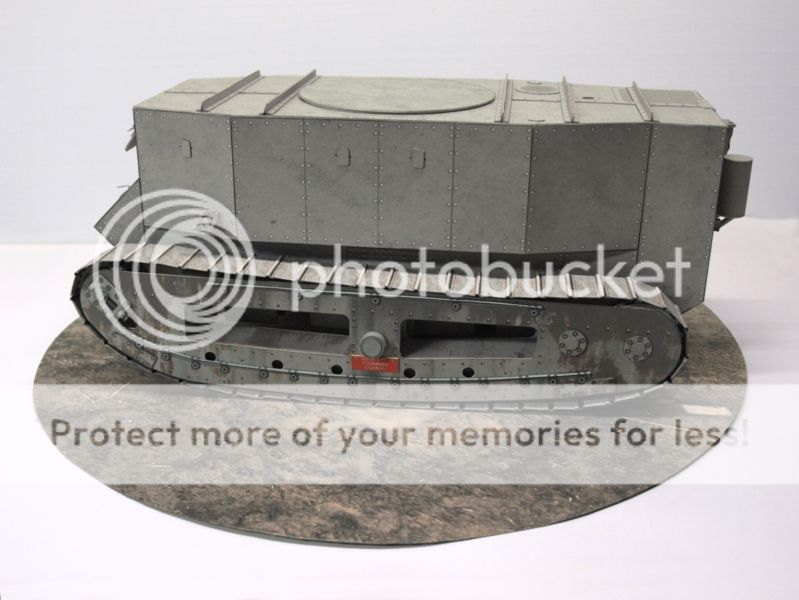
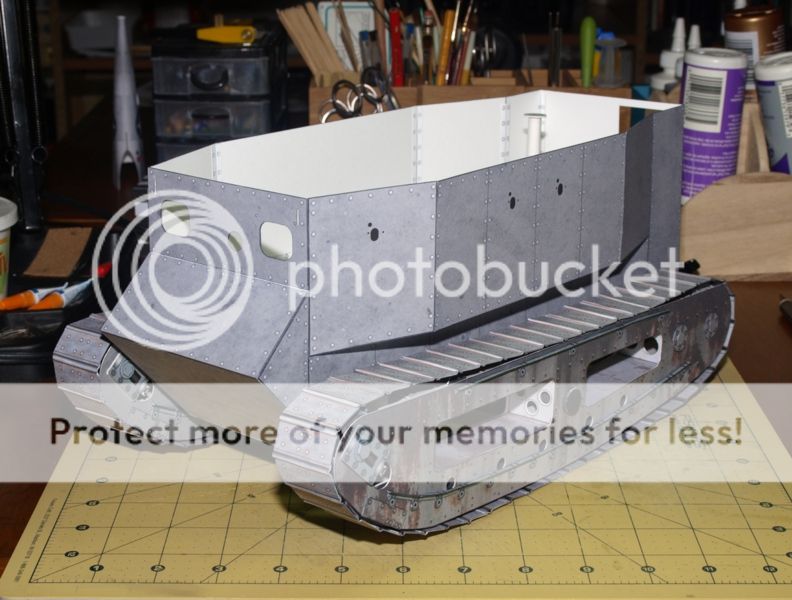
Heres the fully assembled side panel...minus some internal framing. I found its better to leave the frame/floor brackets until after the panels are all assembled.
And the same assembled parts, from the outside. The colour/texture of the outer panels was a bit of an issue. I originally wanted to go a little darker than the sponsons, but I settled on this mottled metal look over top of the same value of gray as the Bovington Museum Tank. I think it works, but I may go back in and add a little more surface weathering to the lower and underside areas...(?)
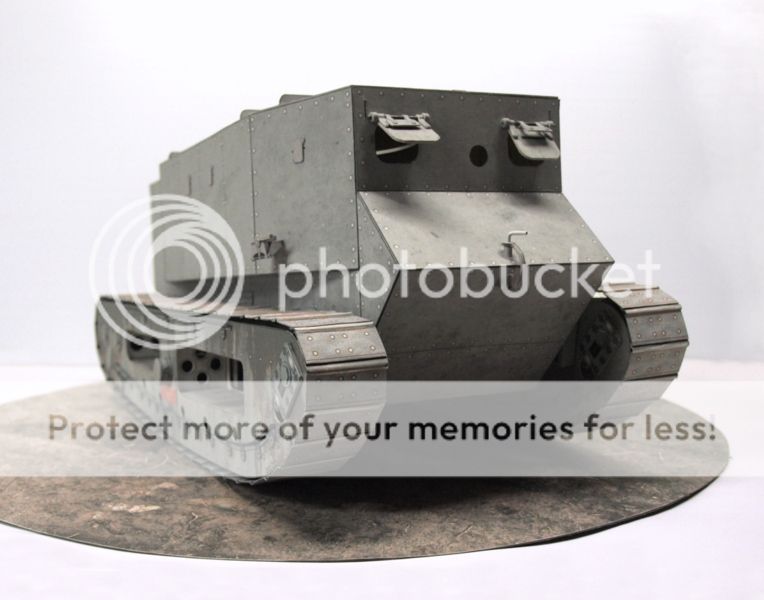
So, heres the four sides of the Body, ready to assemble... No real surprises...everything lined up okay. I have made one small adjustment to the lower rear plate that will be the last part to close when fitting the body to the chassis.
and here we go, assembling the parts. Like any box assembly, it requires a little fumbling to get the parts and sides together while gluing but it all sits nicely on a flat surface, so the assembly is not very difficult at all.
... Up to this point I have put a lot of thought into the assembly method and I have decided to make a change to my original idea of a "lift-off body".
Fitting the body to the chassis requires making some design changes to the original Tank and its actual assembly. Obviously the real tank was not designed to have a removable body... so plates were welded, bolted and riveted in place permanently.
I have to make some design changes to accommodate the "lift-off" body but it is becoming a little more of a challenge to make sure the Body, with all its internal components, will easily fit onto the finished Chassis (with all its components).
So, I have made a compromise...instead of the entire Body lifting off, I will make a "lift-off" ROOF. I'll use the angle brackets that go around the perimeter as the locator, and make the flat roof panel removable so you can view the interior.
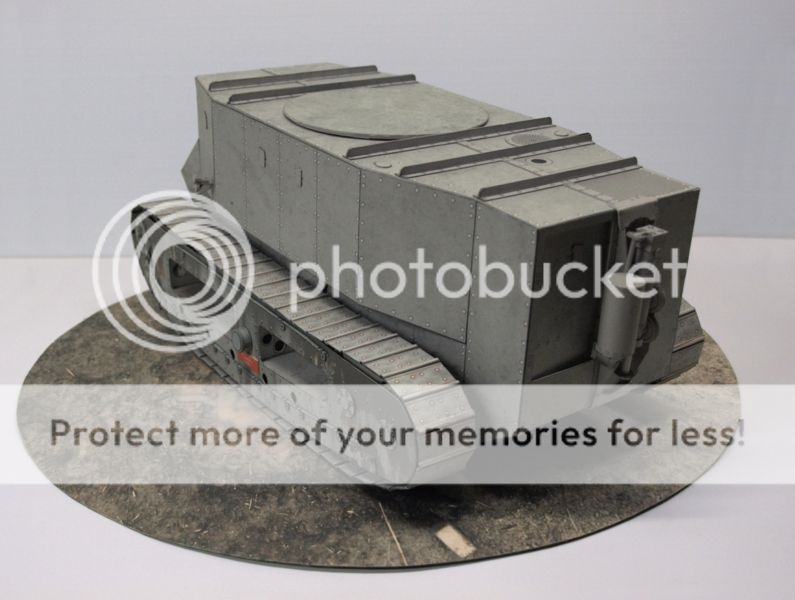
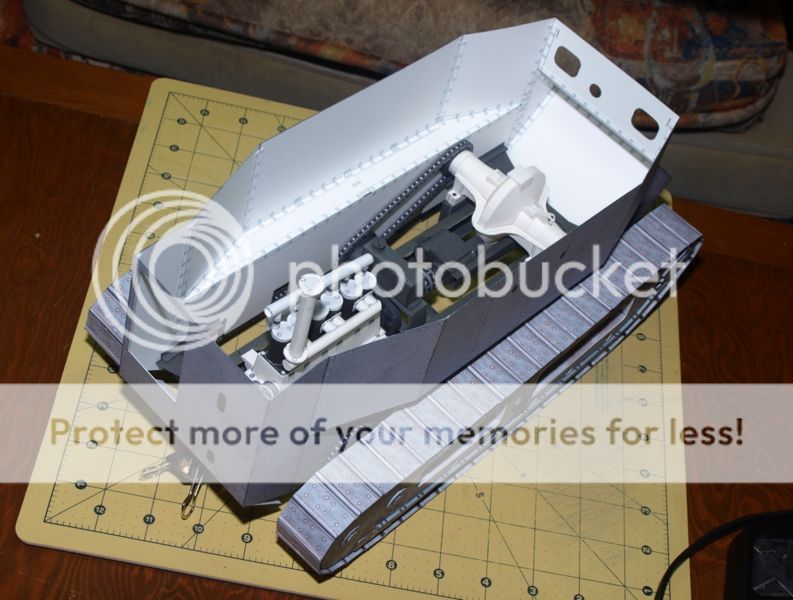
Anyway, heres the assembled body, test-fitted to the Chassis to check the alignment and clearance. Everything is still looking good. Clearances look good. Next step is to finish the internal ribs and framing and then fit the partial Floor.
�So sorry for the late update, but Willie is finished and the kit is completed. If you are interested, the 1/12 scale paper model kit is available at www.papermodelshop.com
�
(This is a digital mode, meaning you purchase a PDF file that you print out yourself (using your home printer or a Print shop)
-- Edited by airdave on Monday 15th of October 2012 12:38:32 AM
A small follow-up to this Little Willie model release...and to the subsequent "add-on" kit release (Little Willie's Steering carriage).
I'm not in the habit of stealing things to design models. I do extensive searching for help with reference material. And I credit people when credit is due. I'll pay for something if I have to...avoid it when I can...but always try to pay back.
I also am not in the habit of redistributing reference material without permission unless its obviously publicly available*. *to be honest, even with publicly available material, I usually just pass along a location for the material, as opposed to the material itself.
Anyway, I just finished modifying and replacing the cover pages on both of my Little Willie related model kits. (The kits come as PDF documents, that you print, cut and assemble)
When I created the cover pages for the Little Willie models, (which are more like small advertising posters, that I also use on websites for promotion purposes) I added a light, semi-transparent background to the artwork on the page ...it kind of looks like a technical drawing/blueprint of Little Willie behind some photos of the actual model.
And that background was created using Richard Harley's 1981 drawings of Little Willie.
I actually did not use Harley's drawings as reference in the design of my kit ...I had access to some nice CAD drawings and detailed plans, along with info I acquired from the folks at the Bovington Musuem.
But I need to first state that I have been given these drawings by numerous people on various occasions. The question "have you got Harley's drawings?" came up many times on forums such as this one. And to be honest, the drawings are common and easy to find in internet searches. I think everybody knows of them and most have got a copy of them!
Which makes this statement from Richard Harley a little odd.: "I don't know how you obtained copies of my drawings, which were last published in 1981..."
Anyway...Harley just contacted me and reminded me that I have used his drawing in a way he did not give permission for. And asked that I remove the backgrounds from the cover pages of my kits. ...and he is absolutely correct, for which I apologize and have since altered the kits.
I just wanted to share that info (here) because I work very hard within the paper modeling community combatting piracy of paper model designs. I also strive to be part of a fair and conscientious community and that means owning up to mistakes when they happen.
-- Edited by airdave on Saturday 16th of May 2015 09:58:52 PM
To be honest, I have considered adding to the WW1 stuff with a Mk.1
but there are so many Tanks and other AFVs I would love to do
and just not enough time to do them all.
I always have way too many projects on the go (lol)


 also the drive of the tracks, just by chains.