Landships II
| Post Info | TOPIC: MkI through Mk V tank construction | ||||||||
|---|---|---|---|---|---|---|---|---|---|
|
Lieutenant

|
|
||||||||
|
Legend

|
|
||||||||
|
Hero
|
|
||||||||
|
Legend
|
|
||||||||
|
Legend
|
|
||||||||
|
Lieutenant
|
|
||||||||
|
Legend
|
|
||||||||
|
Hero
|
|
||||||||
|
Lieutenant
|
|
||||||||
|
Major
|
|
||||||||
|
Legend
|
|
||||||||
|
Legend
|
|
||||||||
|
Field Marshal

|
|
||||||||
|
Sergeant

|
|
||||||||
|
Lieutenant
|
|
||||||||
|
Sergeant
|
|
||||||||
|
Lieutenant
|
|
||||||||
|
Sergeant
|
|
||||||||
|
Lieutenant
|
|
||||||||
|
Legend
|
|
||||||||
|
Lieutenant
|
|
||||||||
|
Sergeant
|
|
||||||||
|
Lieutenant
|
|
||||||||
|
Corporal

|
|
||||||||
|
Lieutenant
|
|
||||||||
|
Private

|
|
||||||||
|
|||||||||

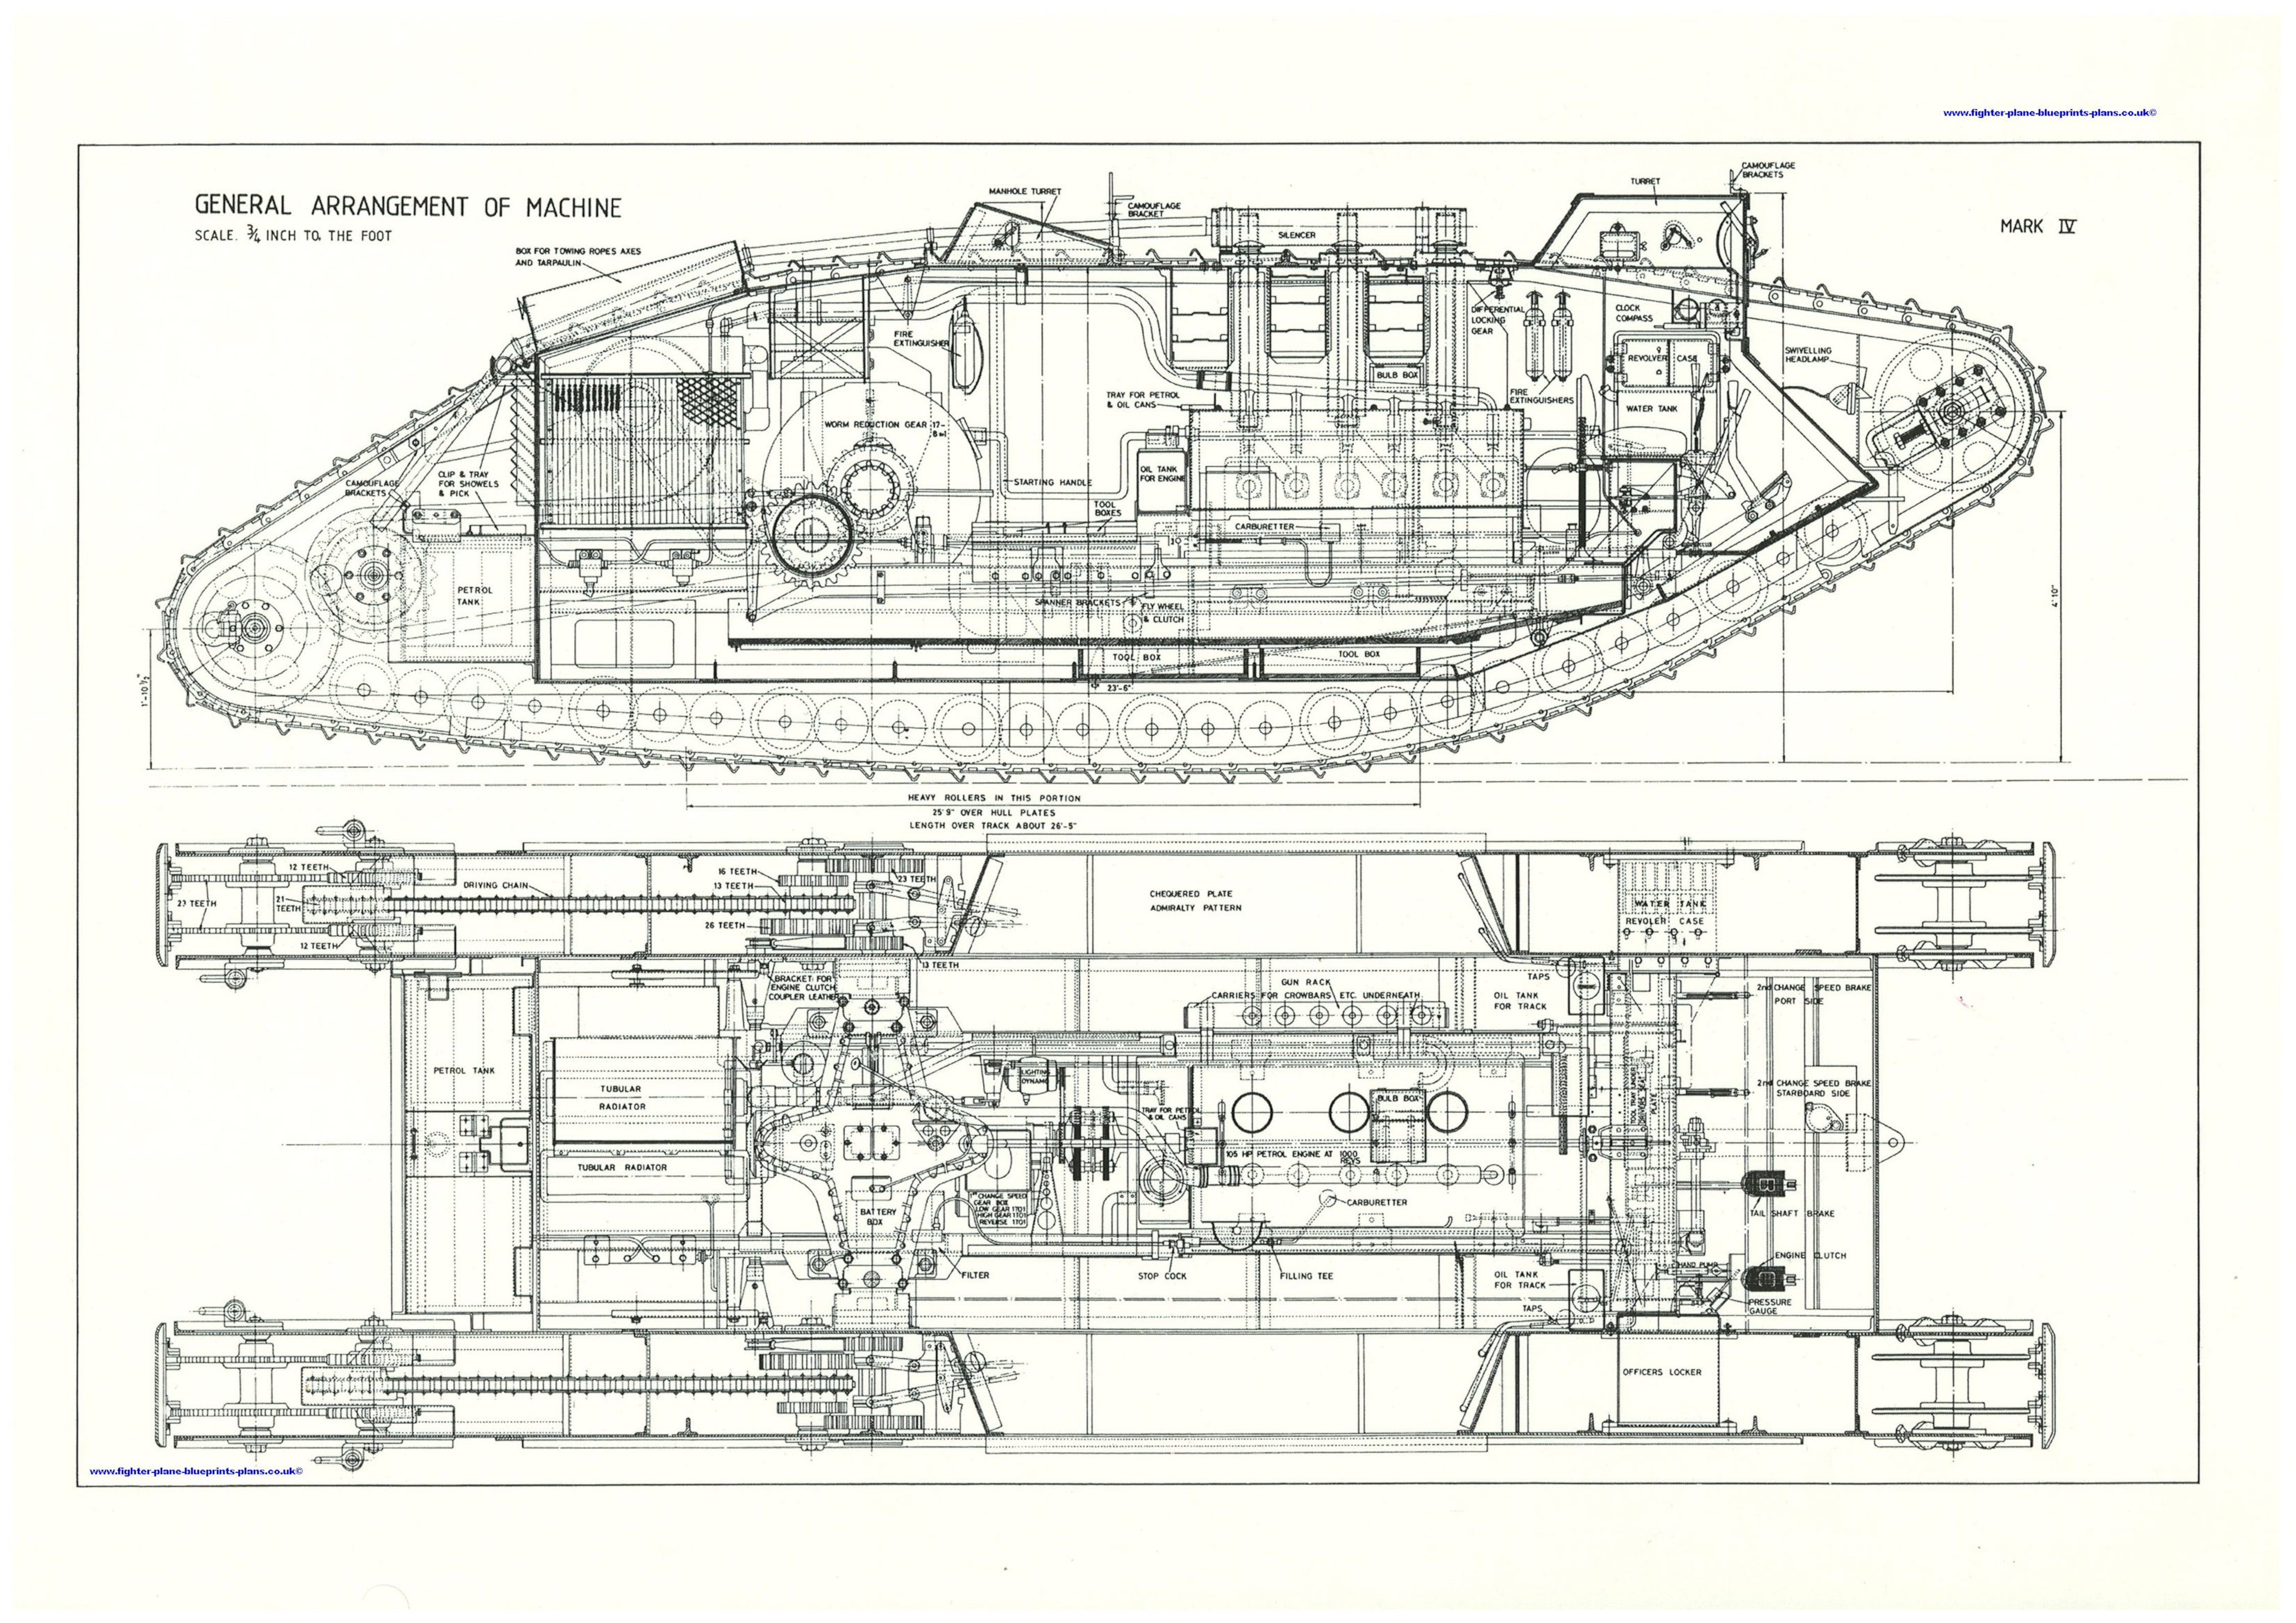 Huuuuge image...
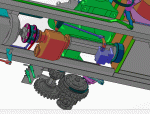
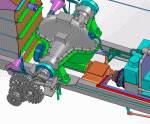
|
|
||


|
