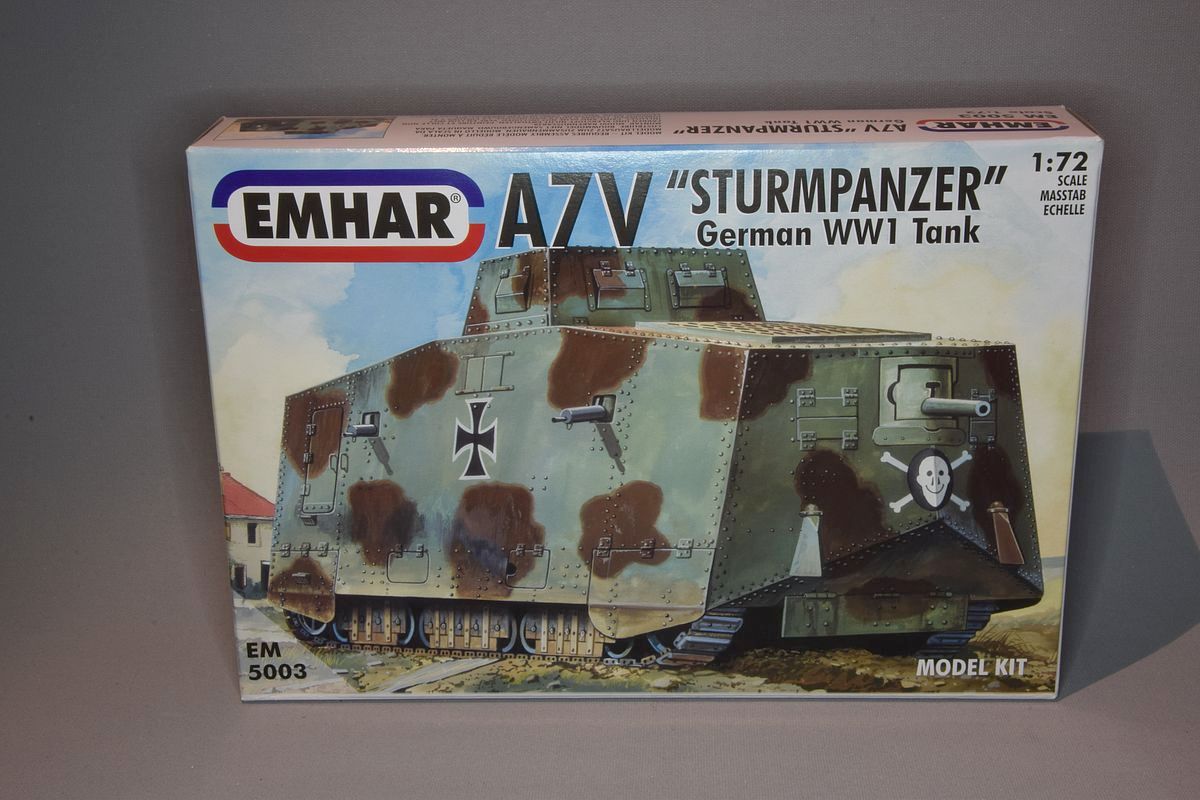
I bought two 1/72 scale A7V Tank's from Emhar. The plan was to build one Röchling and one Krupps armour tank.
While waiting for the kits to arrive I looked at the references to find out what would need to be changed on them. Dangerous stuff, references.
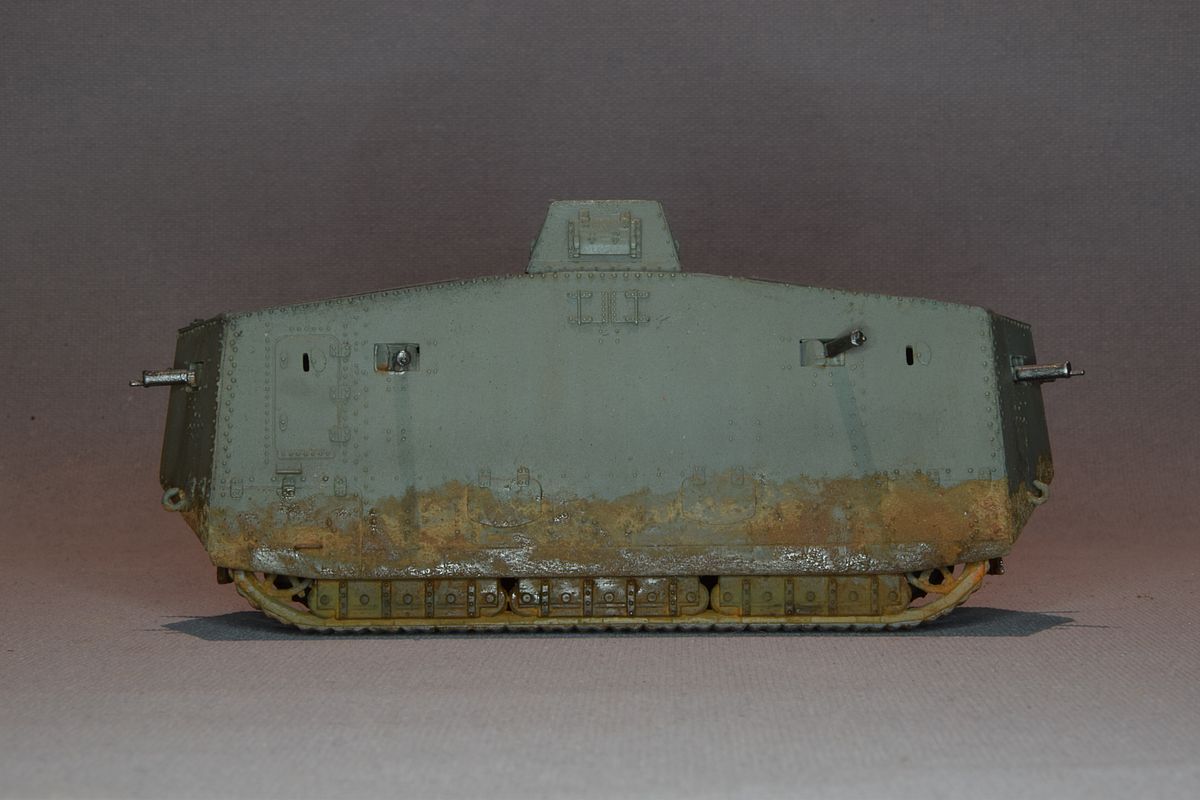
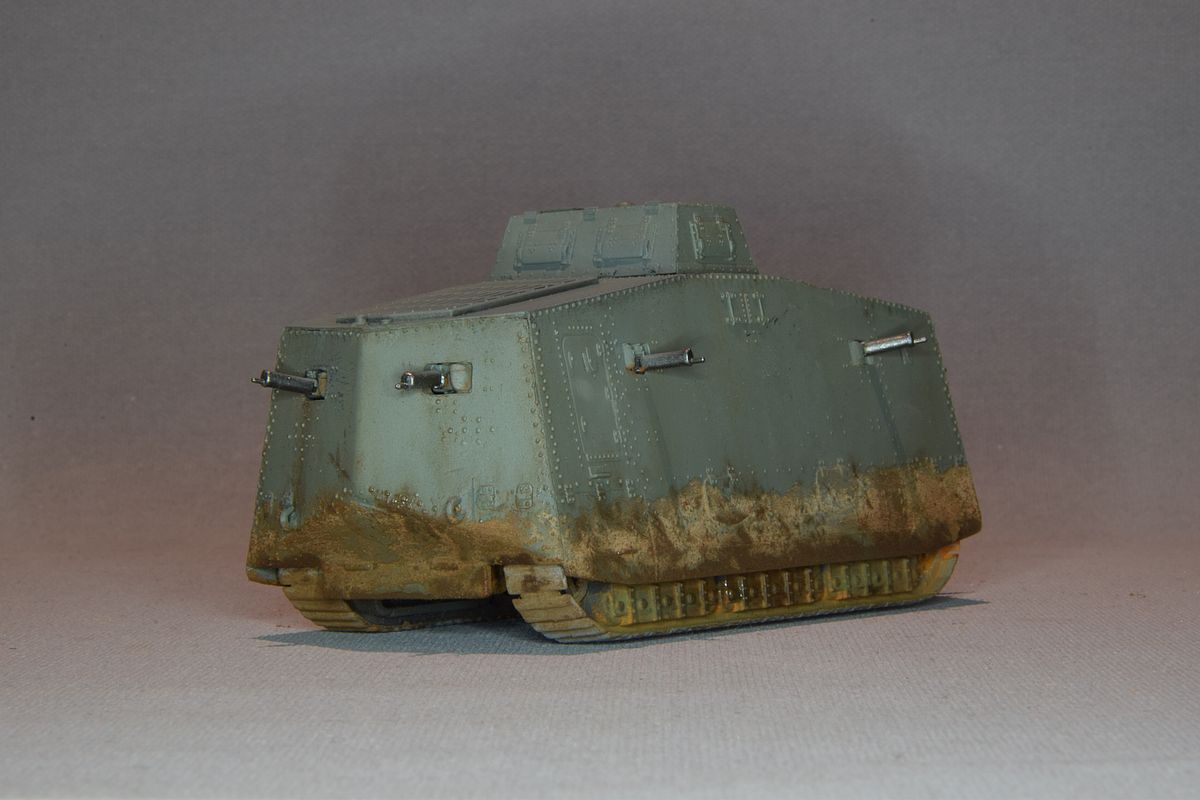
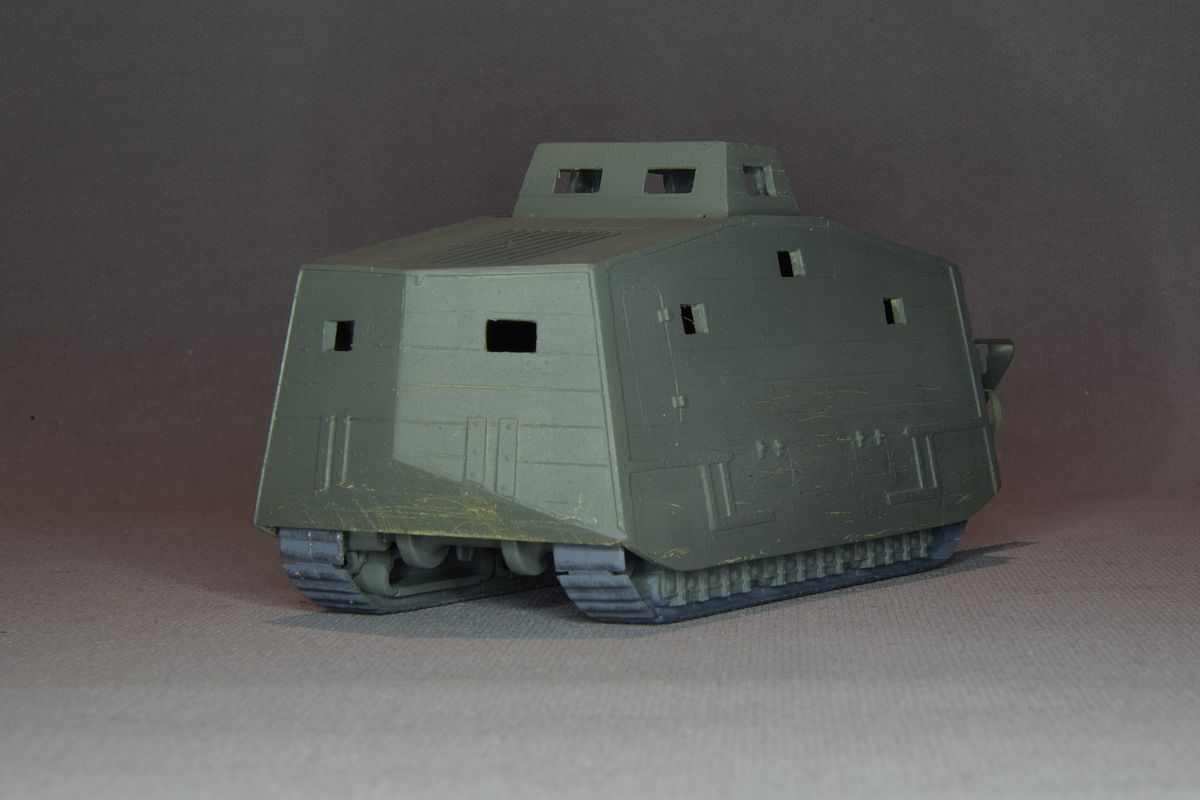
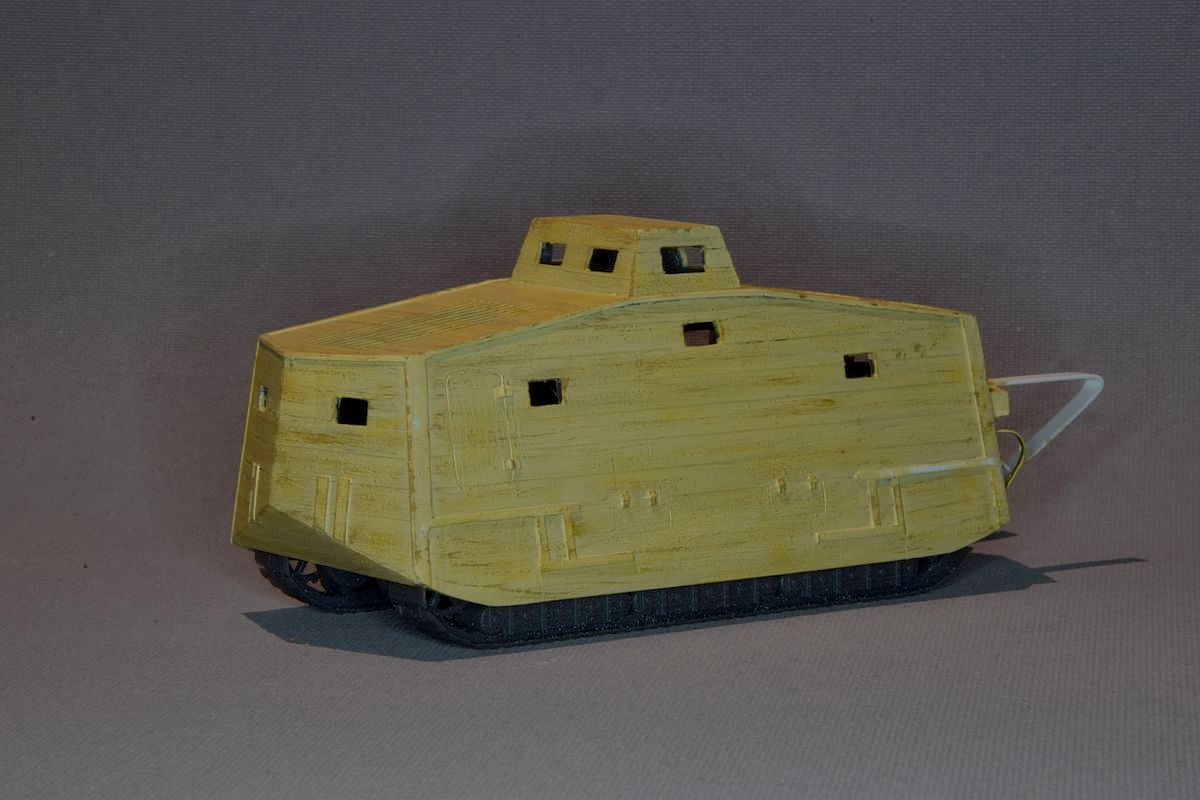
It gave me the great idea of building the only "female" tank built. The one without a gun in the front. For this I needed a new front plate with two machine guns instead of the gun. No problems. I have two kits, so I just liberated the second kit of the rear plate. A round hatch had to be removed from it but then I would be OK.
That gave me a problem. I was now missing a hull for the second kit. The tank was built on the chassis of the A7V Überlandwagen so that might be an option. I looked at the kit chassis and decided that it wasn't detailed enough but then I remembered an abandoned scratch project.
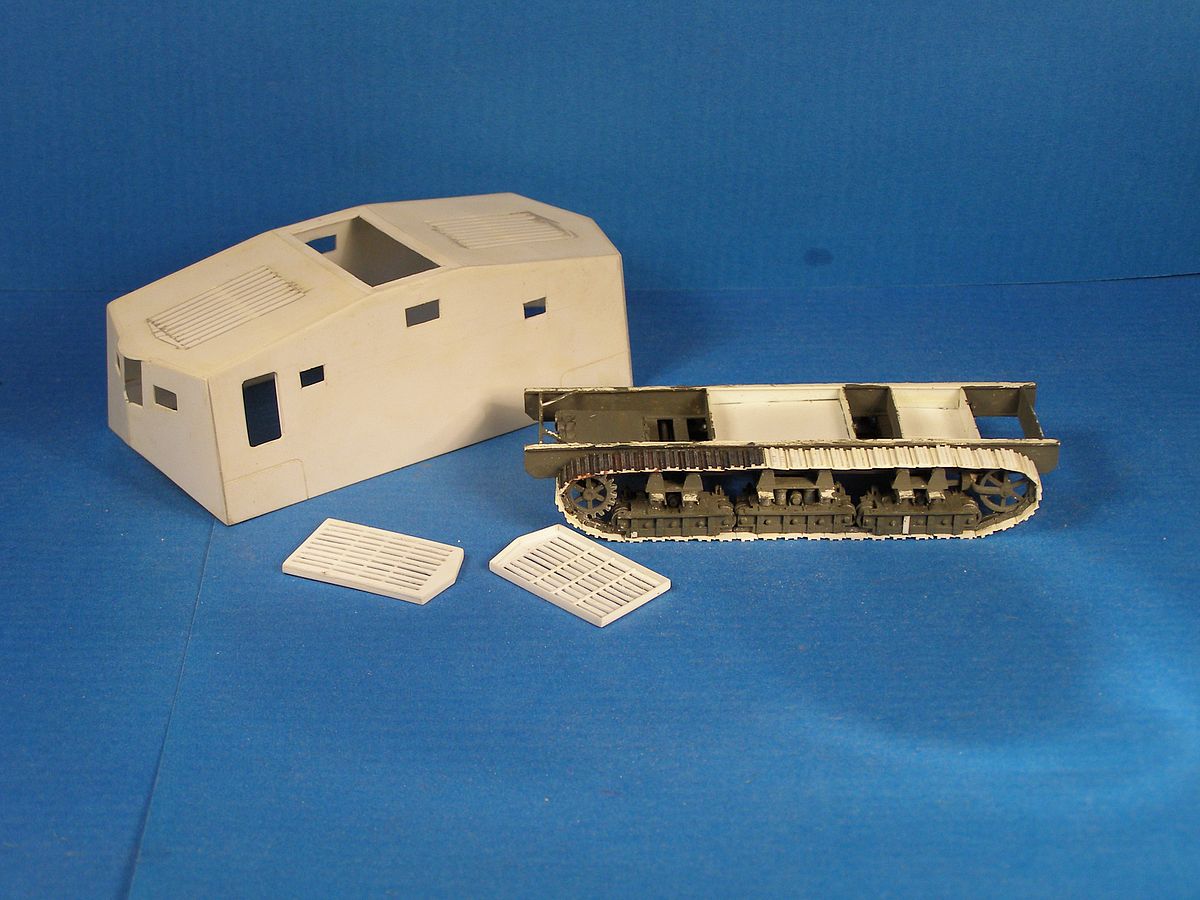
Once upon a time there were no injection moulded A7V in 1/72 scale. I had the awful 1/35 kit from Tauro and thought that I would use it as a pattern for scratch built 1/72 scale model. I started with the hull but then found the large book about the A7V and started using it as a reference instead. The result was that I started on a more detailed chassis. This is how far I came with the project before it died. The main reason was that Emhar released a kit of it
The hull was almost finished. Why not use it on the Emhar chassis. I could then use my scratch-built chassis for a Überlandwagen.
This idea ended when I compared my hull with the Emhar kit. Mine was much wider. I checked with drawings and found that my hull was of no use.
On to plan B or is it C?
Back to the remains of the second Emhar kit. Fill the holes for the gun in the front plate.
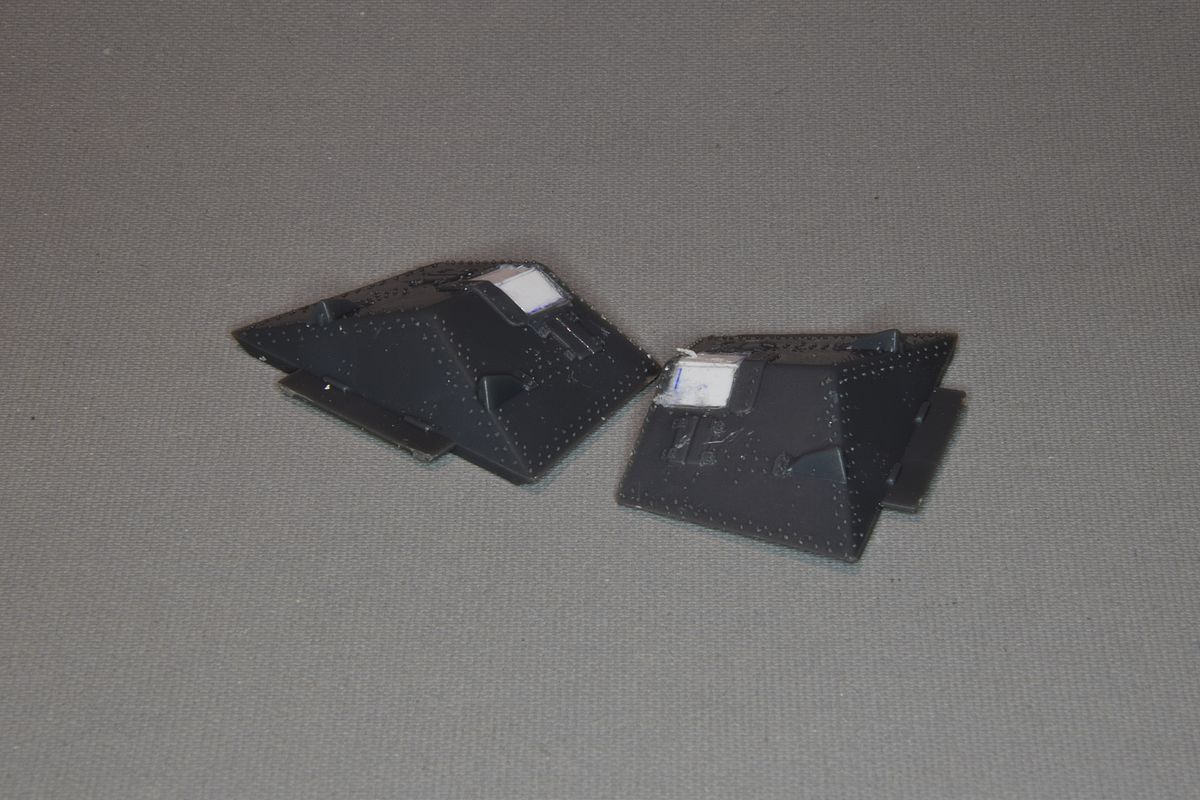
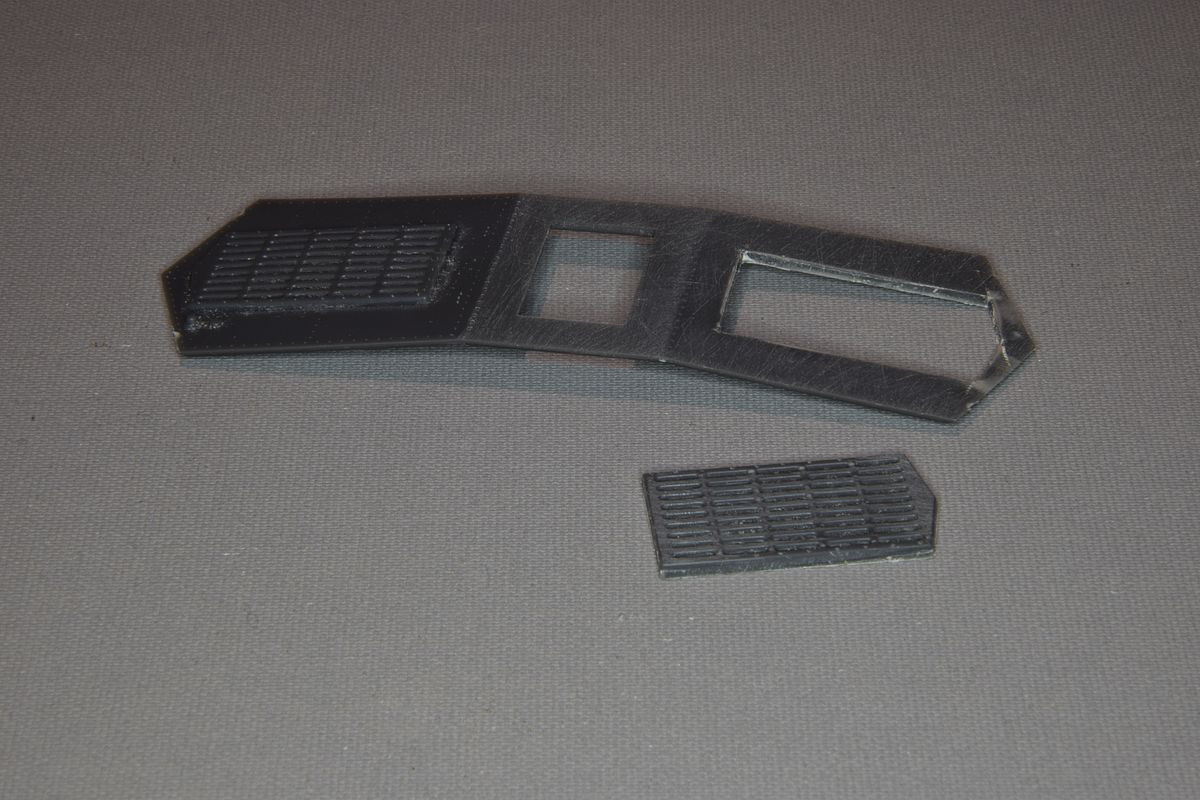
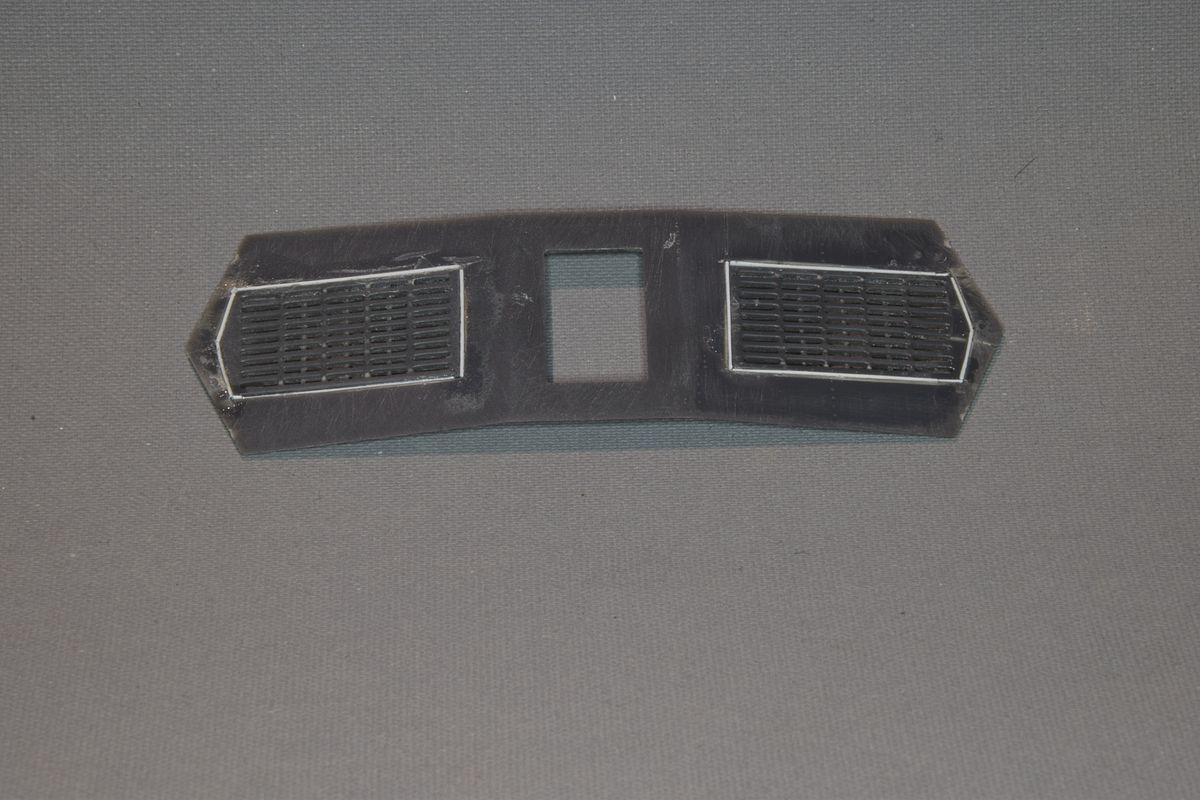
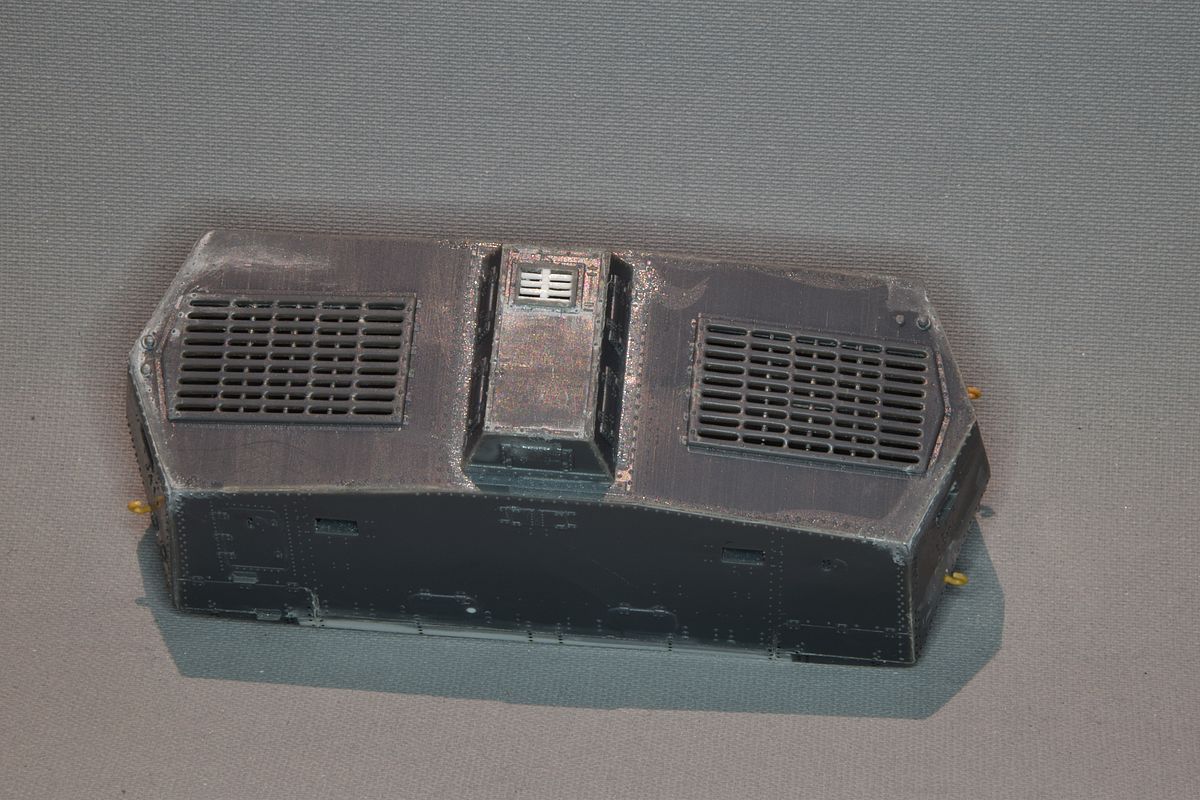
Cut the vents loose from the roof and lower them so they are in line with the roof.
Remove all hatches in the hull and cut the "windows" open.
Sand the hull flat and start scribing planks into it.
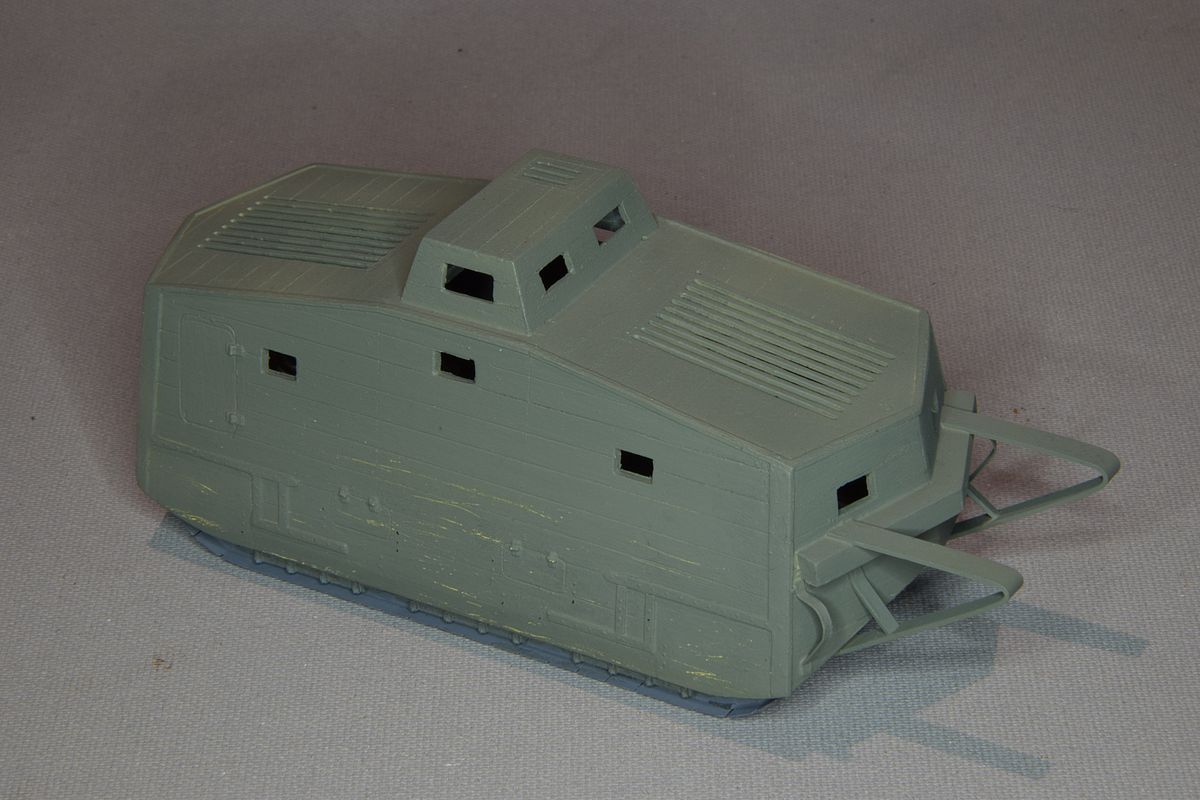
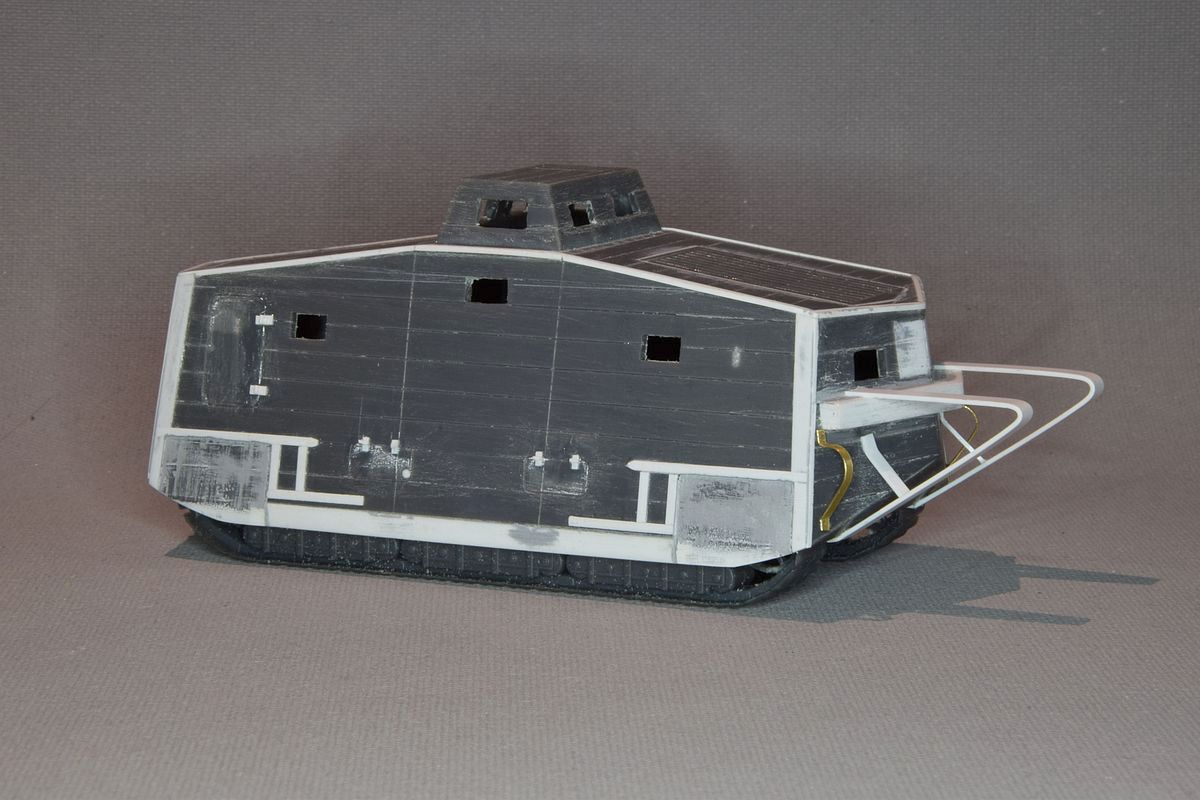
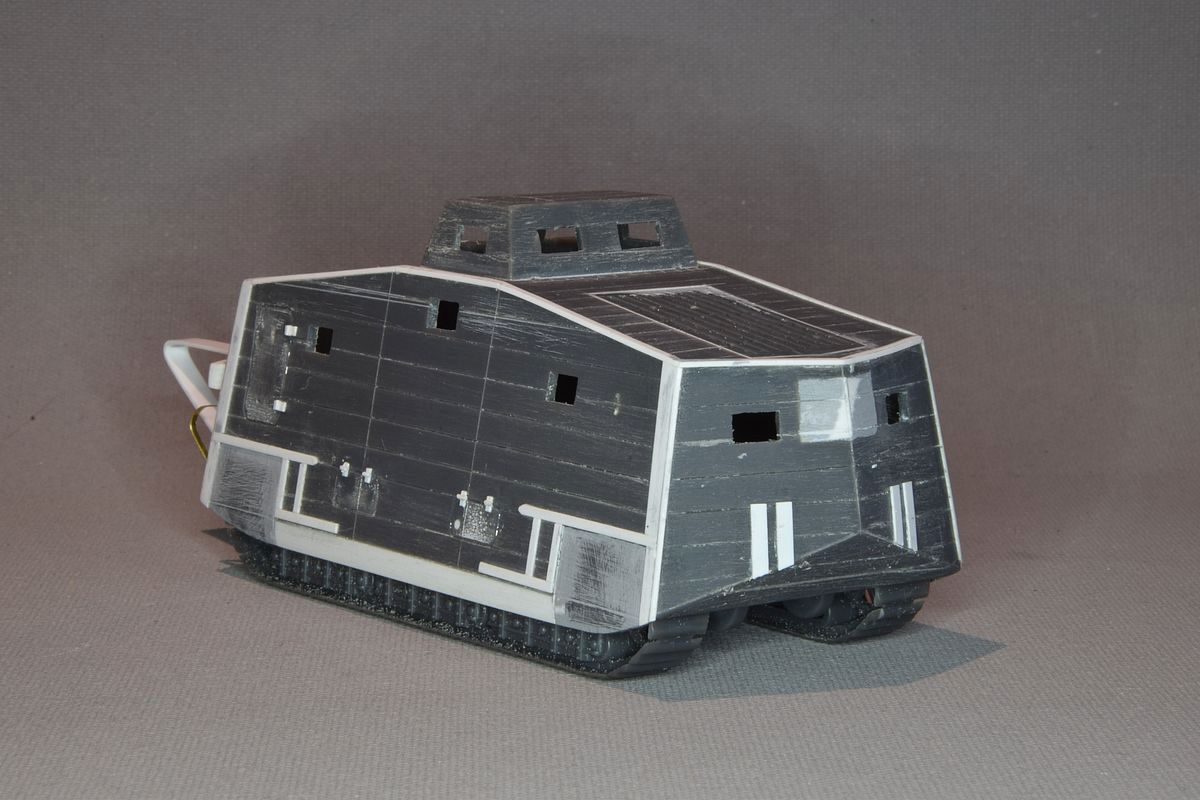
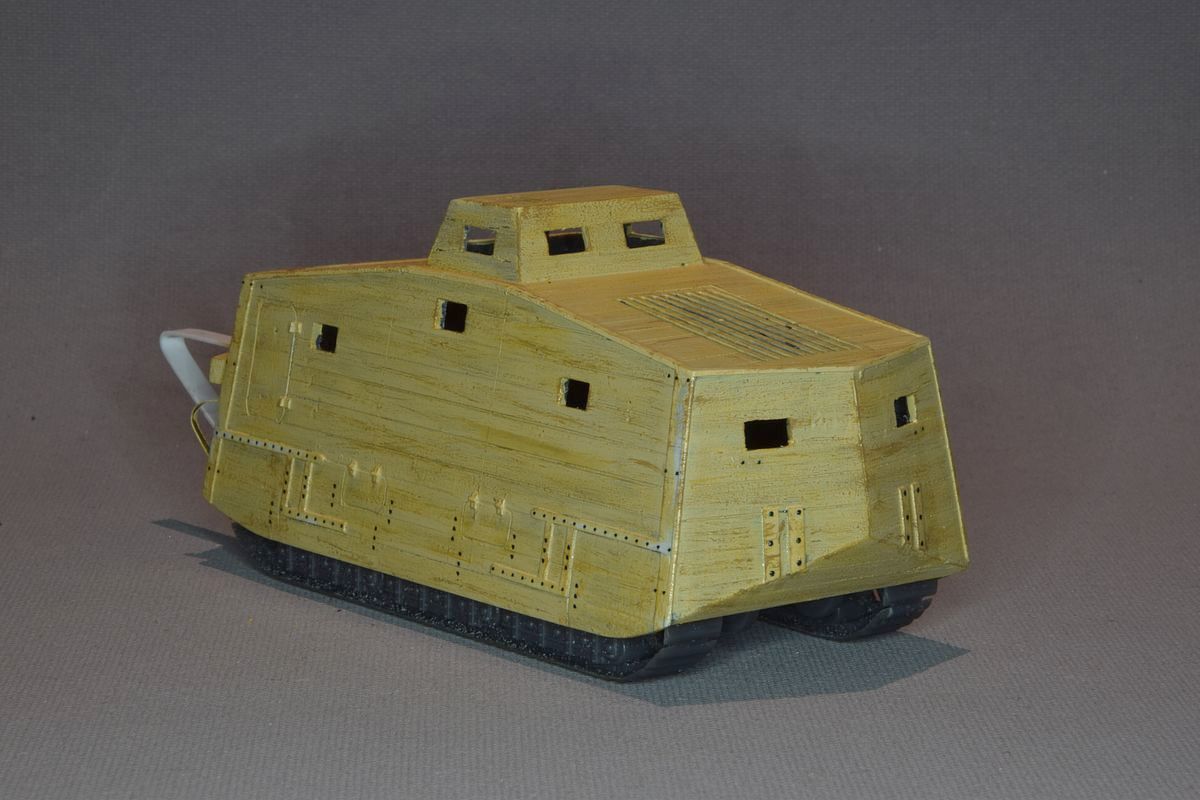
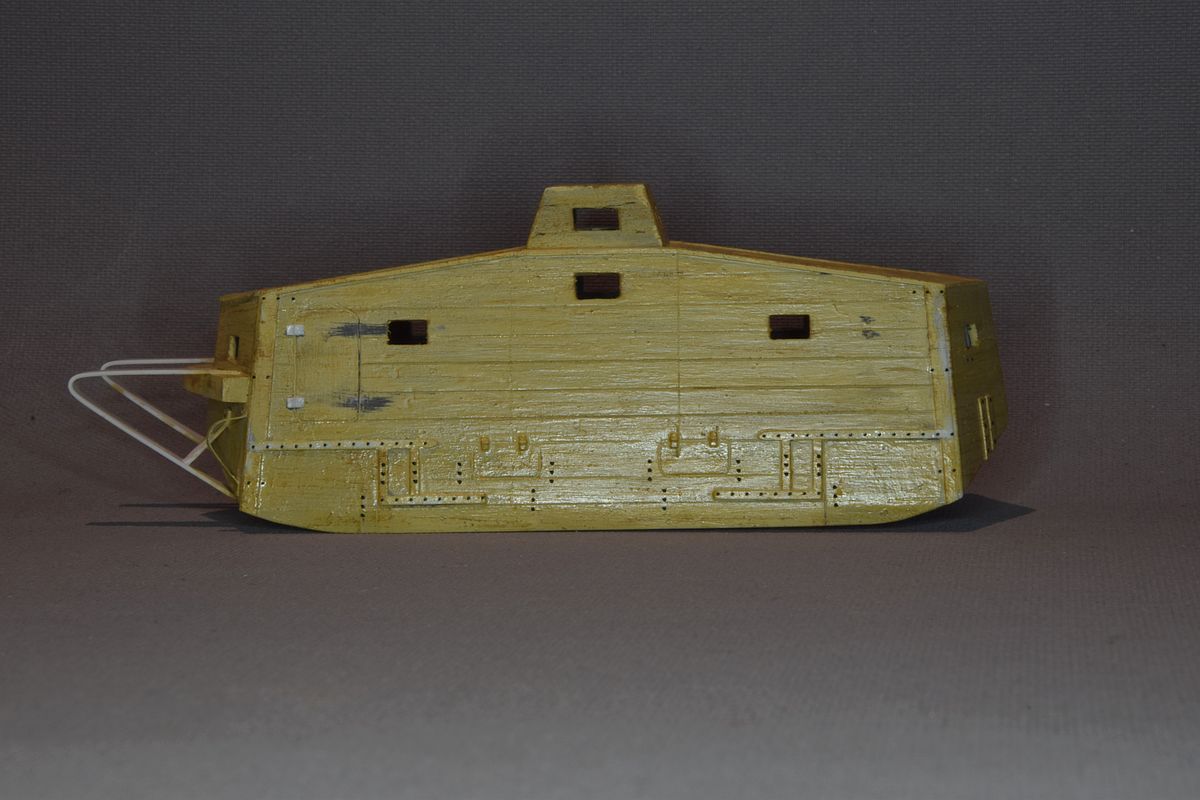
The aim would be the prototype that had a wooden body.
On this site I found a paper model for a 1/48 scale Überlandwagen that I printed out in 1/72 scale and will use it as a pattern to build one with my scratch-built chassis. So, nothing will go to waste, but I will need to buy two more kits and restart on my original plan for the kits.
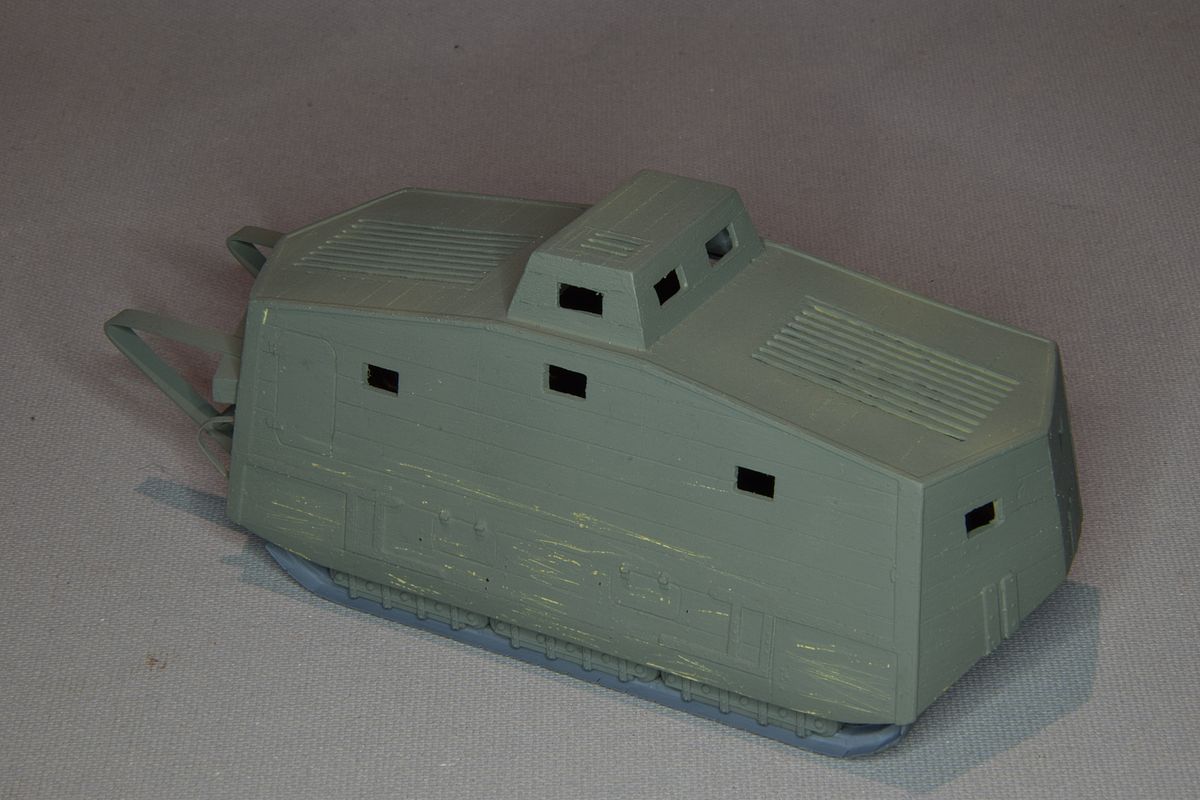
The Female "Gretchen" on the way.
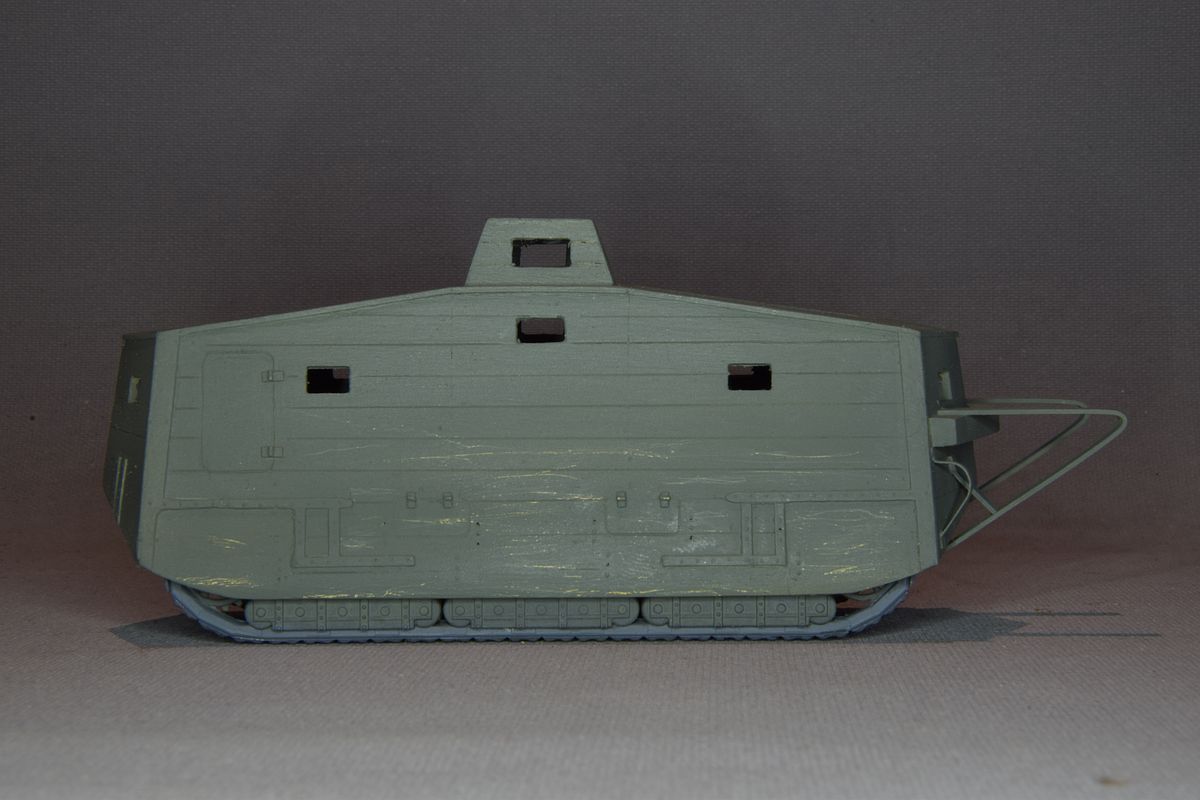
I removed the twin-hatch and doubled the number of vents on the other hatch. I decided to correct my old Emhar kit as well. Now things get really messy. I bought the A7V book from Tankograd and found some nice drawings in it. Among them the roof of the "turret"
As I understood it the last ten built had the configuration of the hatches as on the kit. The first five in the configuration that I converted to and the last five had both hatches as the kit but with eight vents. That made my version faulty as I only had six.
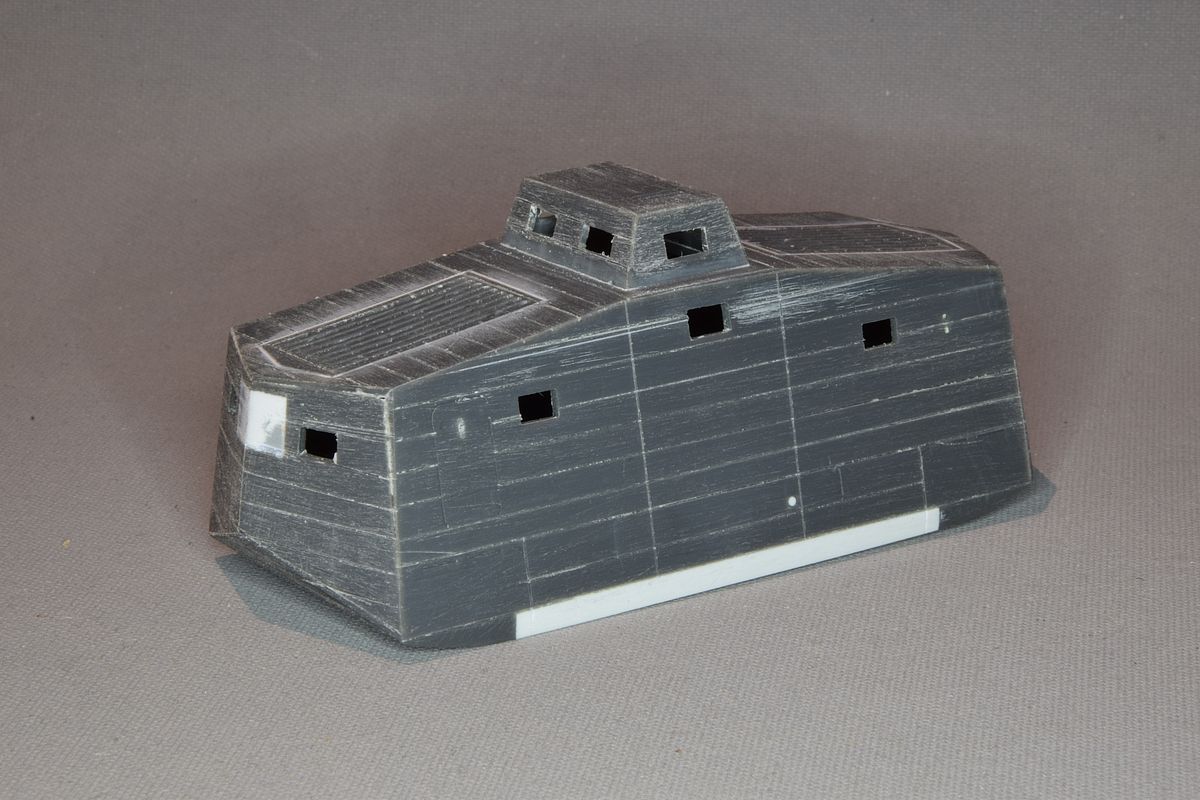
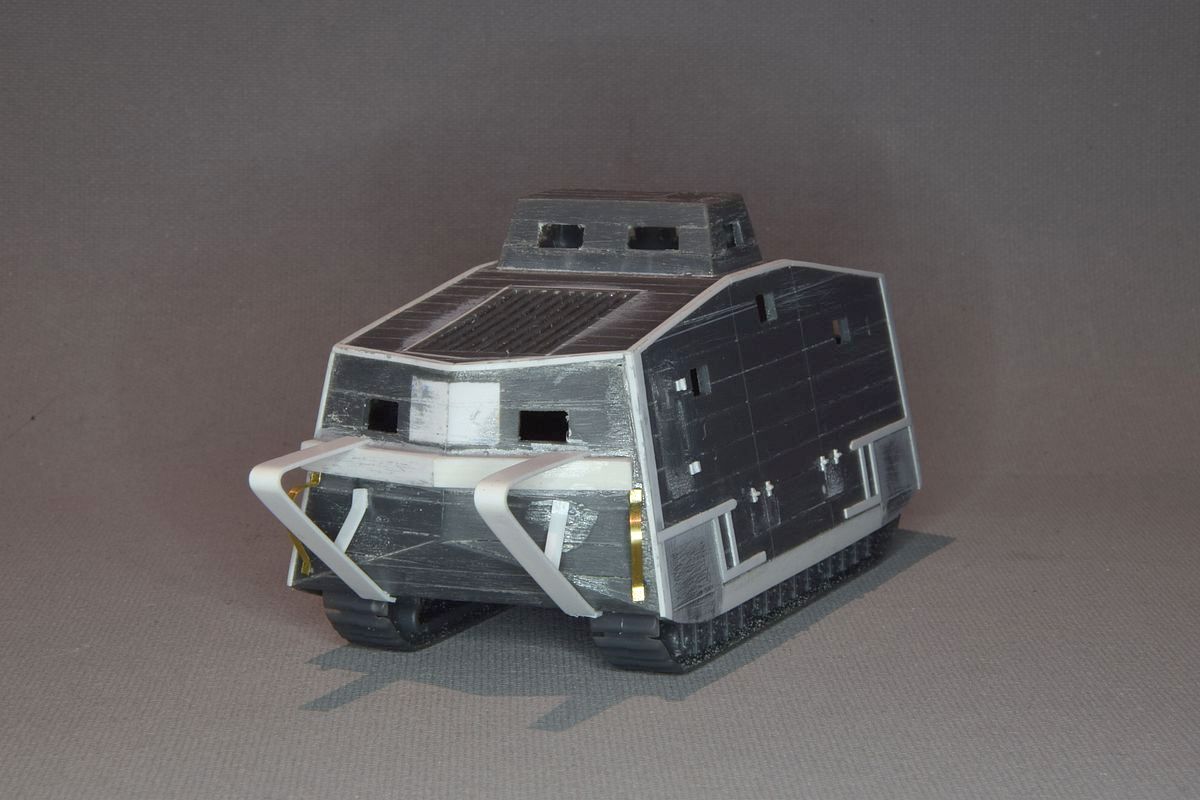
I also worked on the prototype adding some details
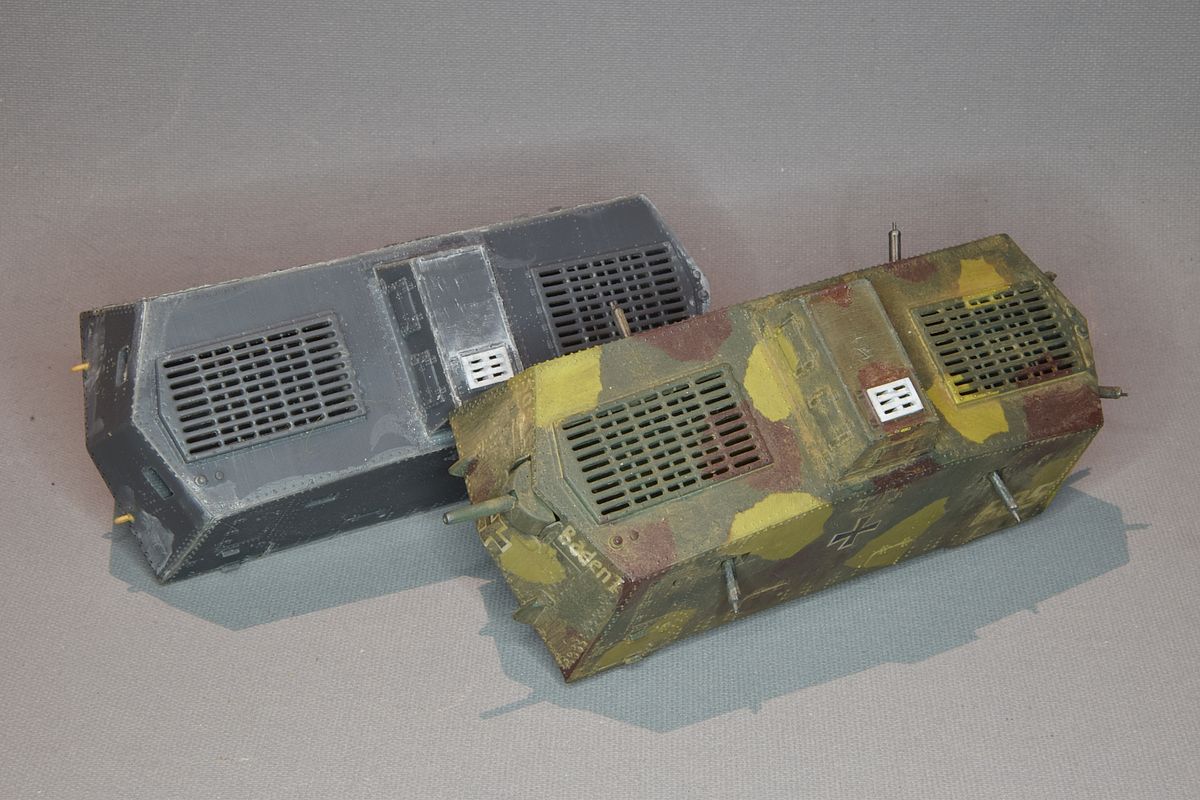
The female was also put together. Together with my old kit I will have three very different types.
More details added.
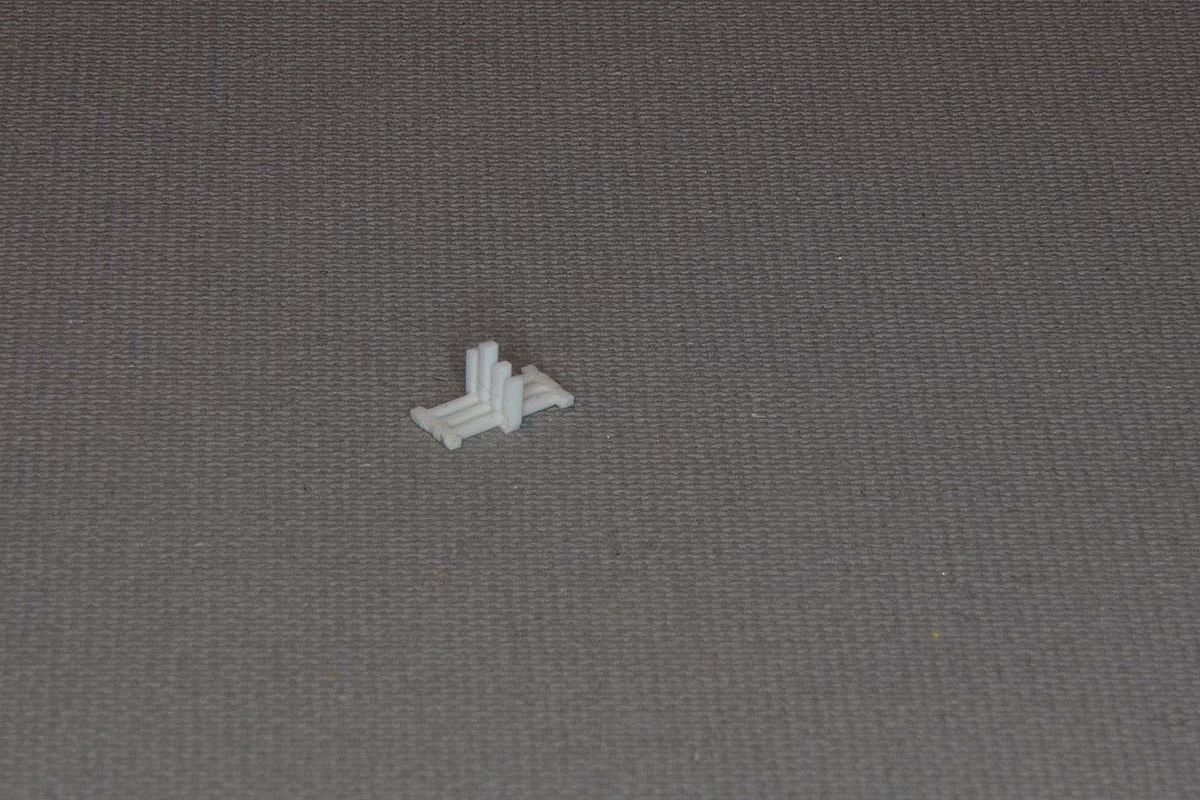
Time for door handles and rivets
After some discussions here I noticed that I put the hinges on the wrong side on the front door.
With first coats of paint on.
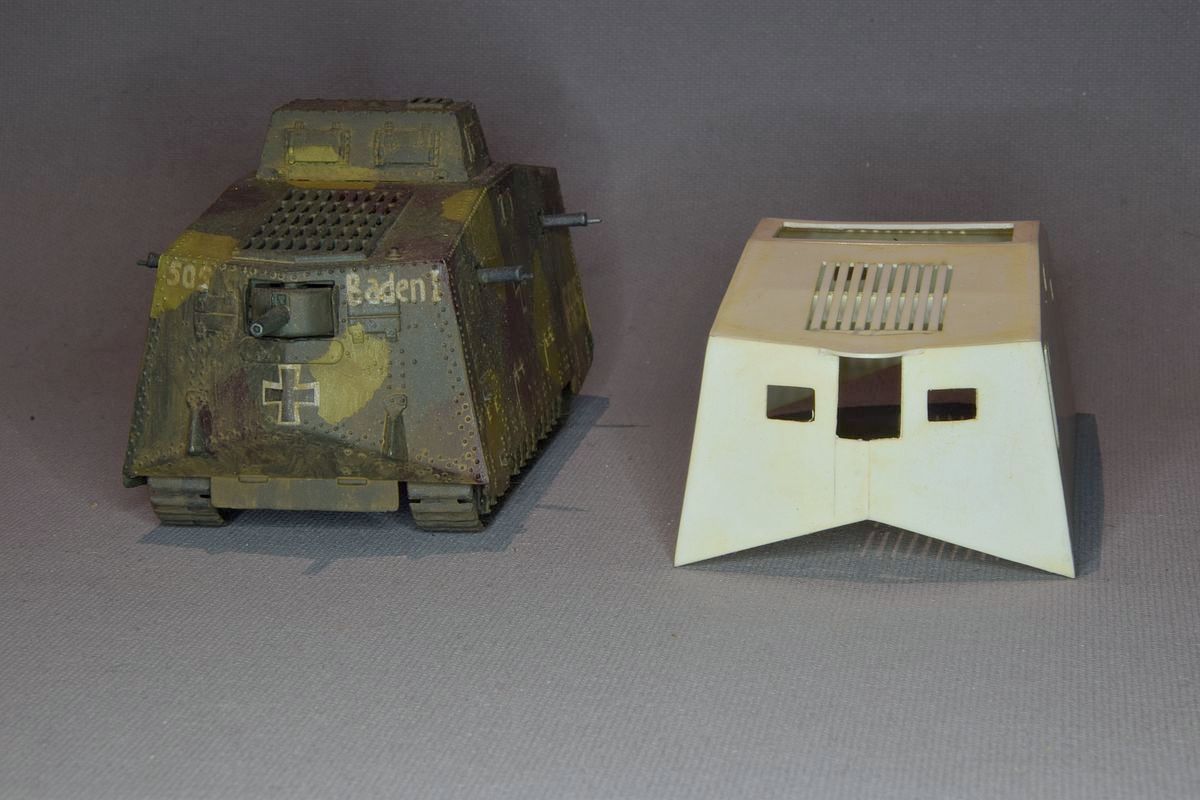
My old 505 had the roof cleaned for details,
and parts for the new vents has been started.
Gretchen also got new vents. Too bad that they are wrong. The nice drawings were wrong. There should only be six holes, so I must remove them again.
Rivets has been added to the prototype.
So, I guess it is ready for some paint. Gretchen will have some rivets added as well.
I had a discussion about "Gretchen" and found out that the door hinges are mounted to the front on both sides. Of course, I had got it wrong. For some reason the glue didn't bite so it was simple to break the sides loose. Now I need to remake the vents on 505 and move some hinges on the wooden prototype body.
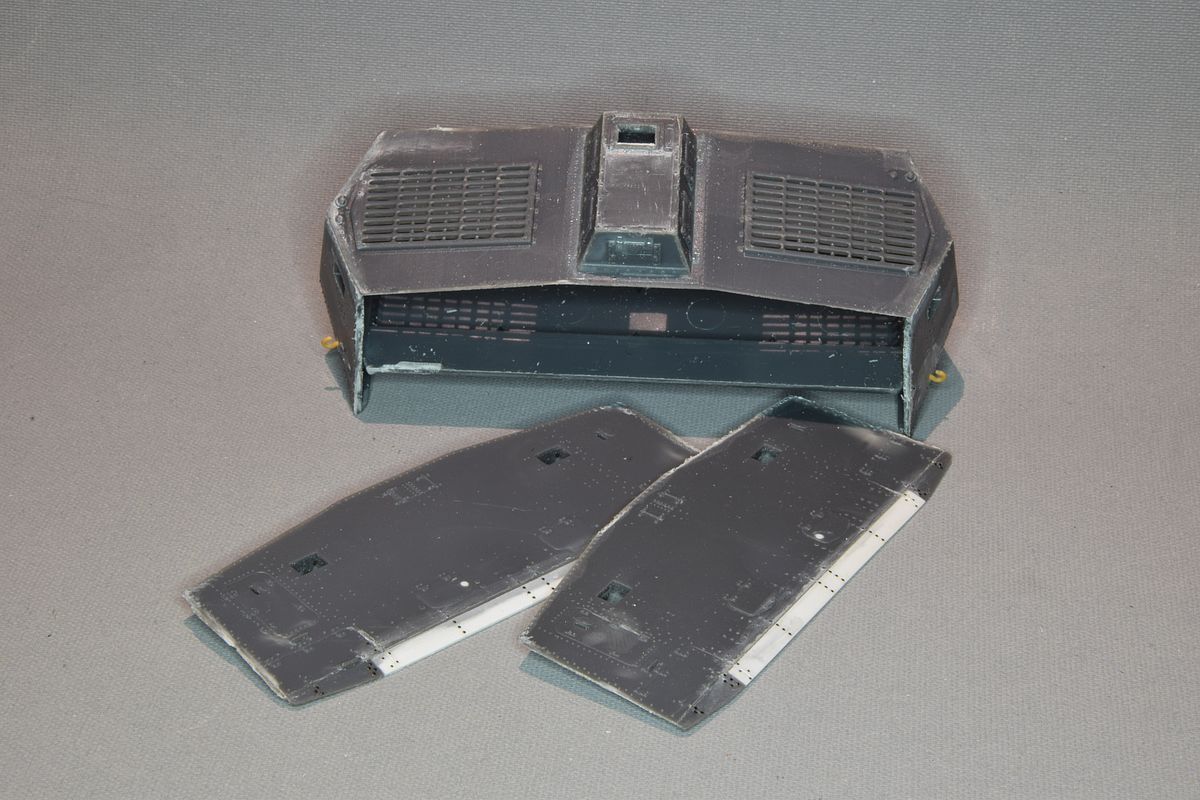
I found it hard to get the body parts to fit together as you must fit them to the chassis while assembling them. I would like to build the body first and then add the chassis but that is impossible, so I decided to make an experiment next time I build the A7V. As I had to pull the kit apart, I had a chance to test it now. I assembled the body without the chassis and that made it easier to align the parts. I then cut the chassis in two with an ~45-degree angle so I can slide the parts into the body. I found why the body was hard to get right in the first place. The front wall of the chassis interferes so I removed some of it to get a better fit.
With the hinges moved it is time to check out what else I have missed. I think that it is only the door handles now.
It turned out to be easier to build new hatches than trying to modify the old one. As I now distrust the drawings, I've started to suspect that the small circular vent should be present as well.
-- Edited by Orso on Monday 8th of June 2020 04:34:29 AM
In this case they draw the hatc upside down showing the inside. If I would have been more alert I should have catched this before I started to cut the model.
Besides it is the same hatch that should have been on the Mephisto to.


 Remove all hatches in the hull and cut the "windows" open.
 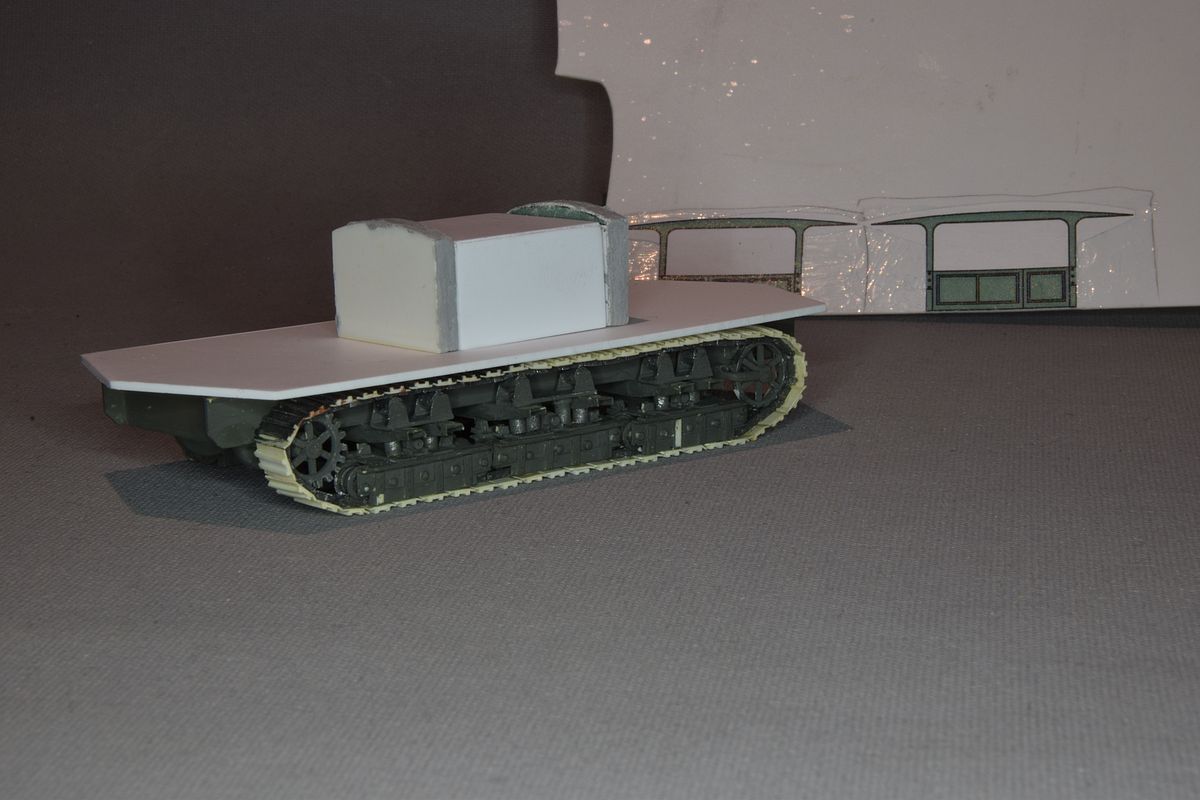 On this site I found a paper model for a 1/48 scale Überlandwagen that I printed out in 1/72 scale and will use it as a pattern to build one with my scratch-built chassis. So, nothing will go to waste, but I will need to buy two more kits and restart on my original plan for the kits.
 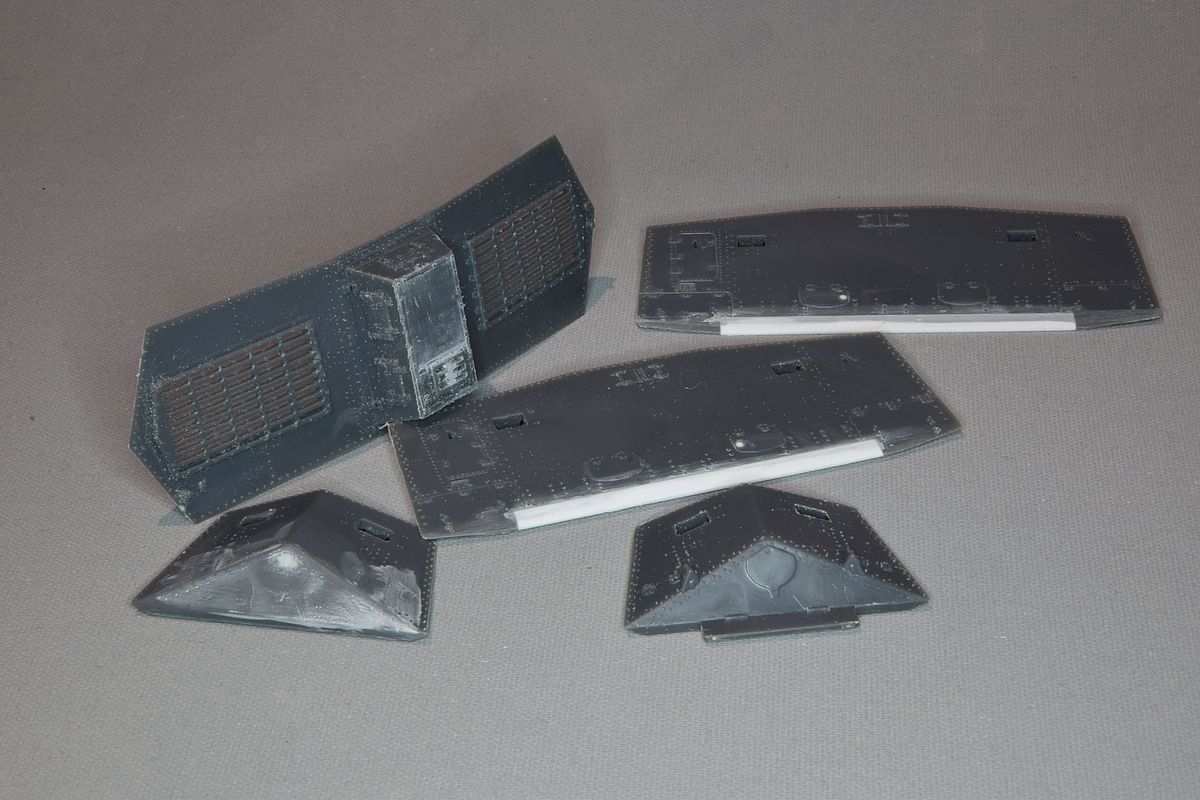 The Female "Gretchen" on the way.
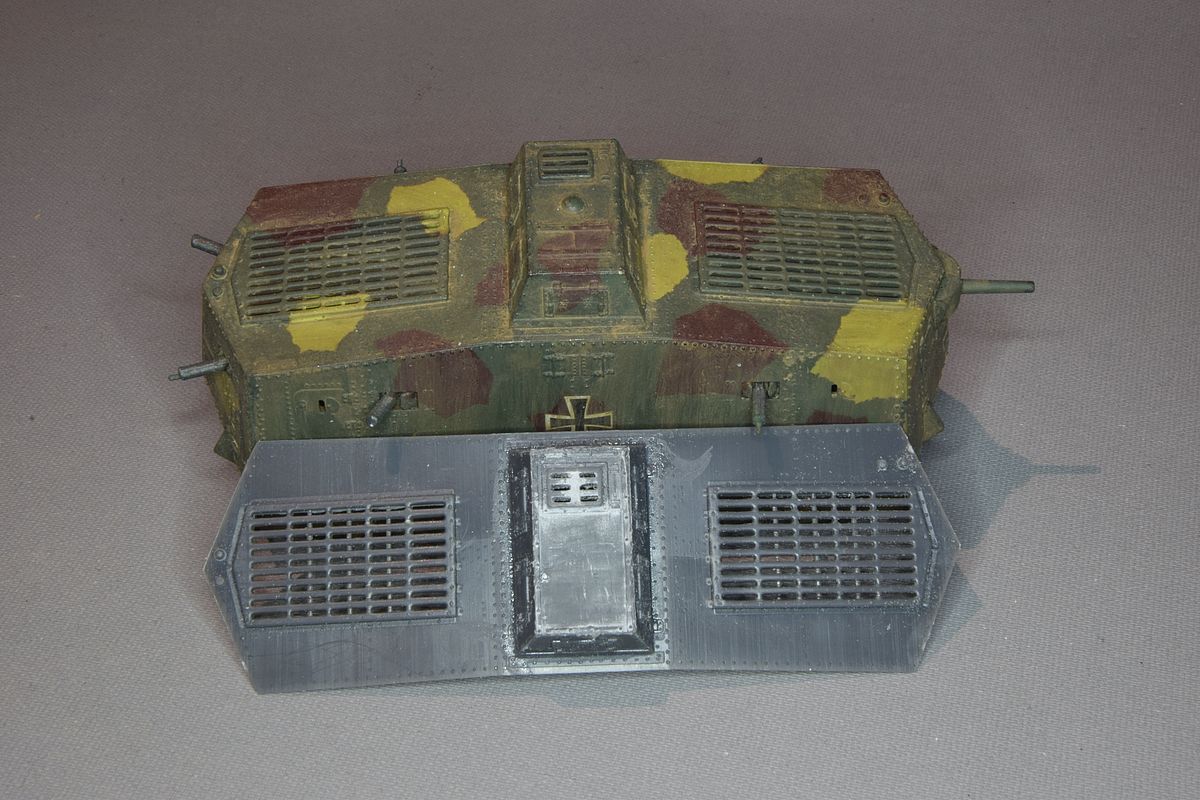
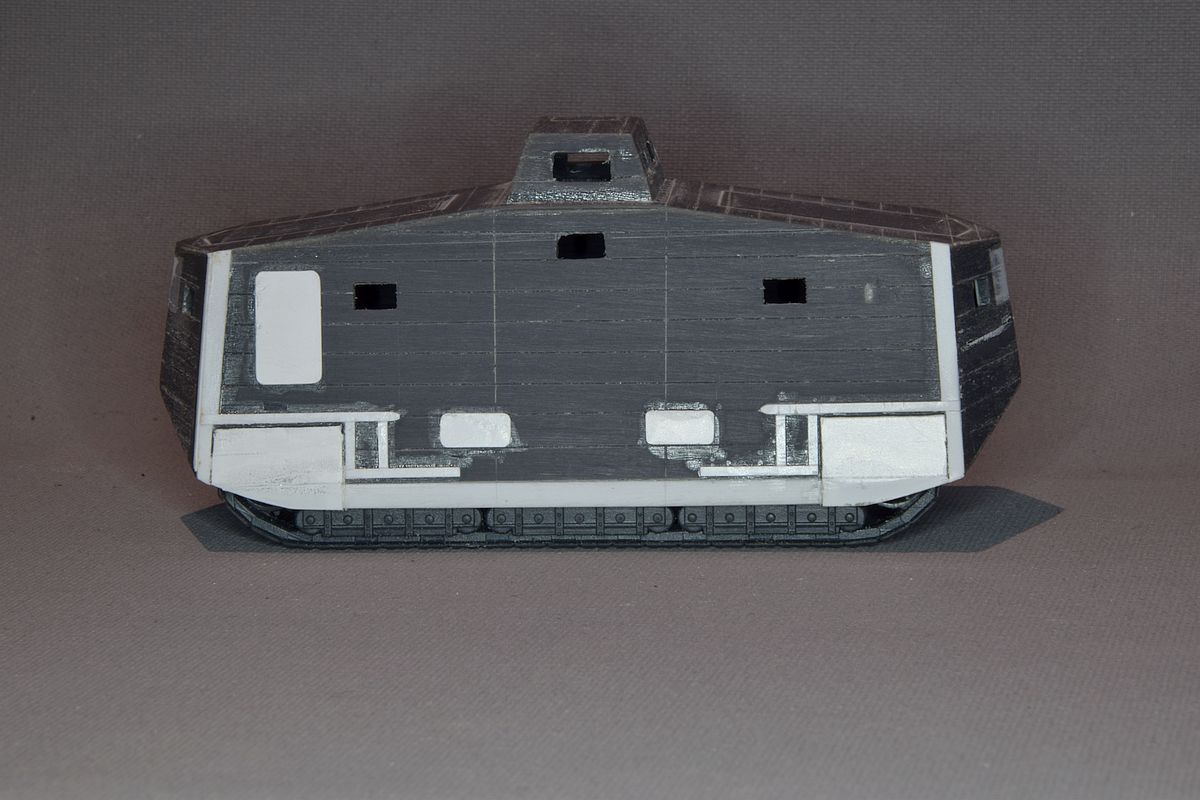
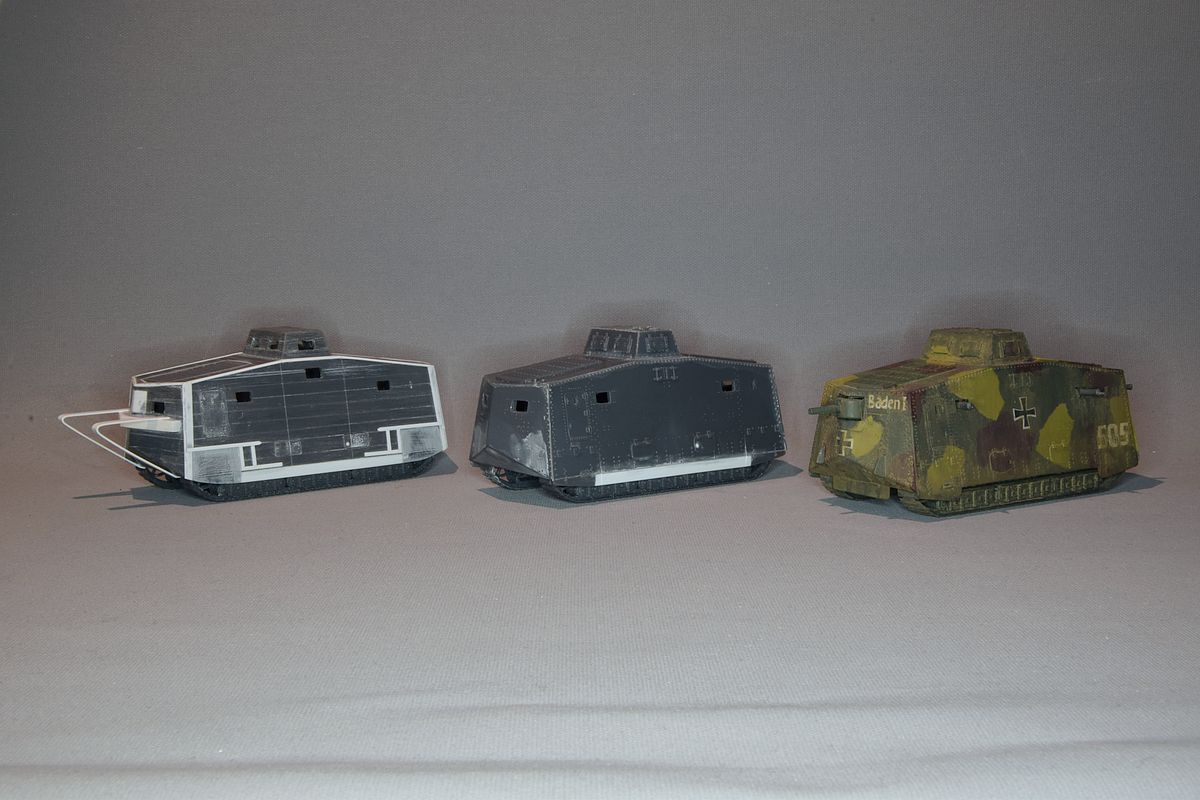

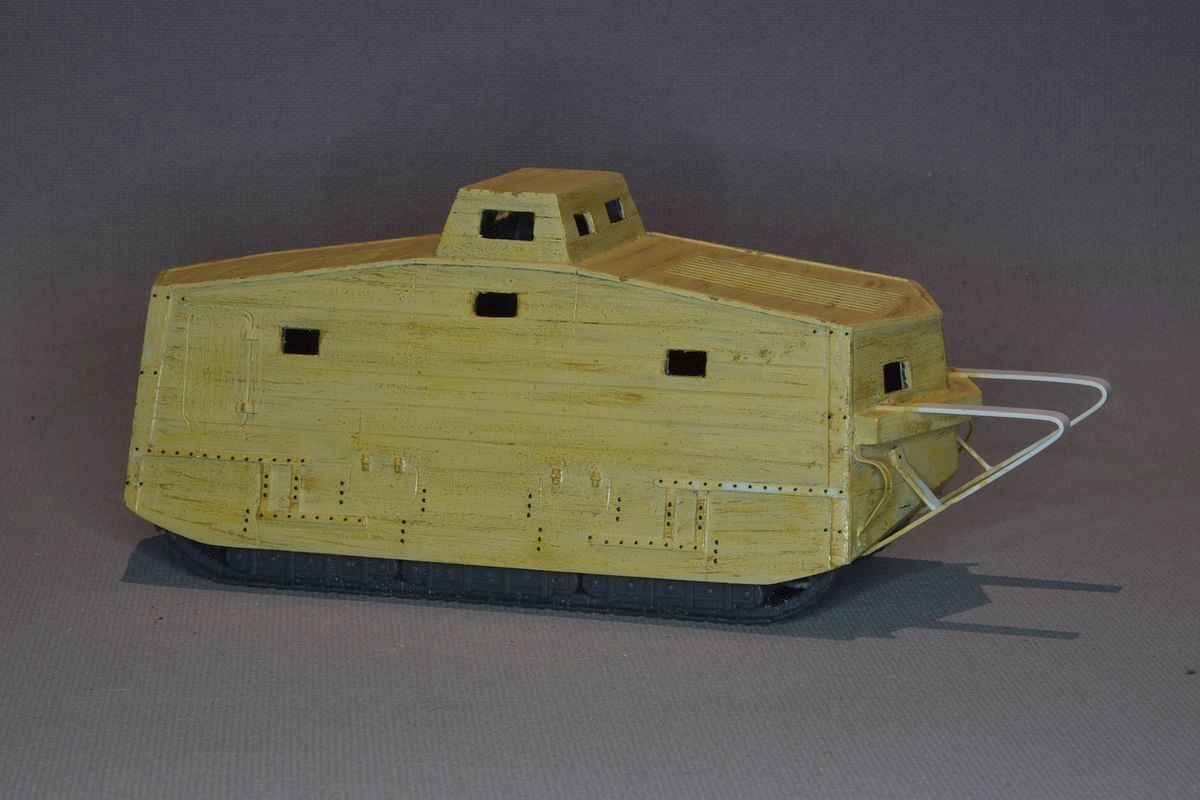


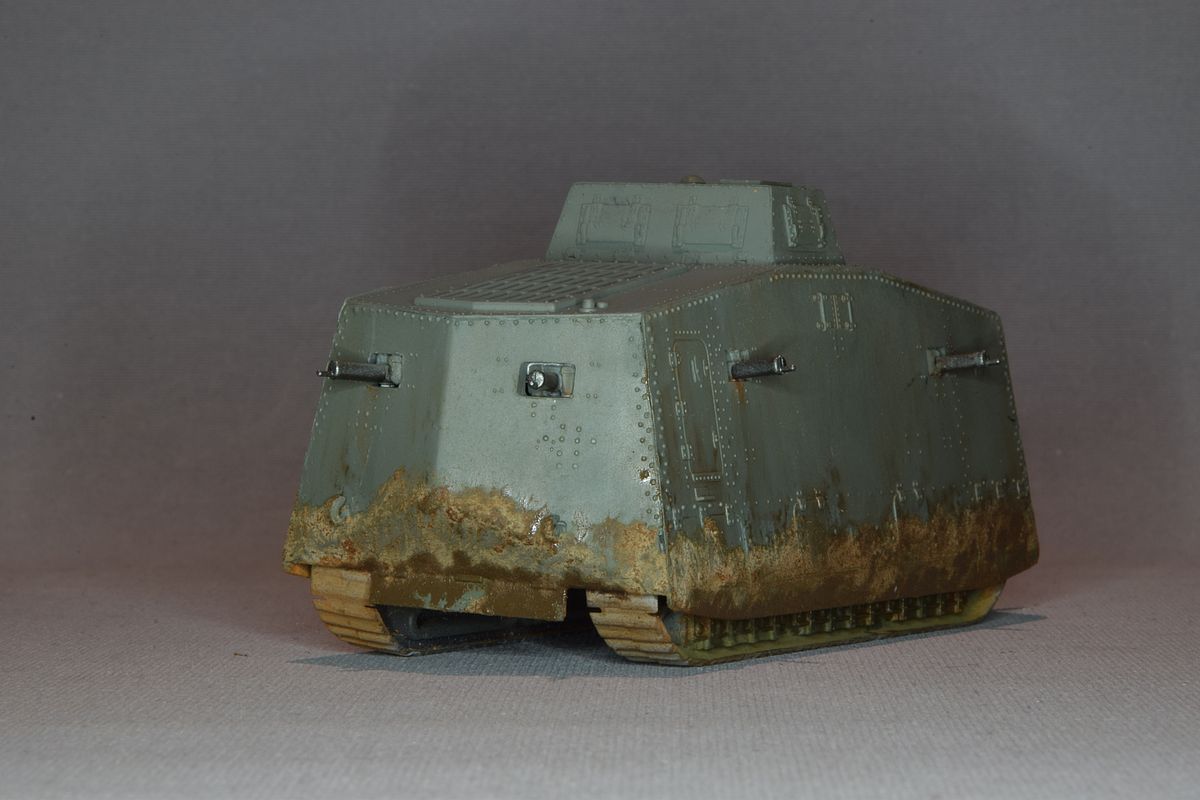
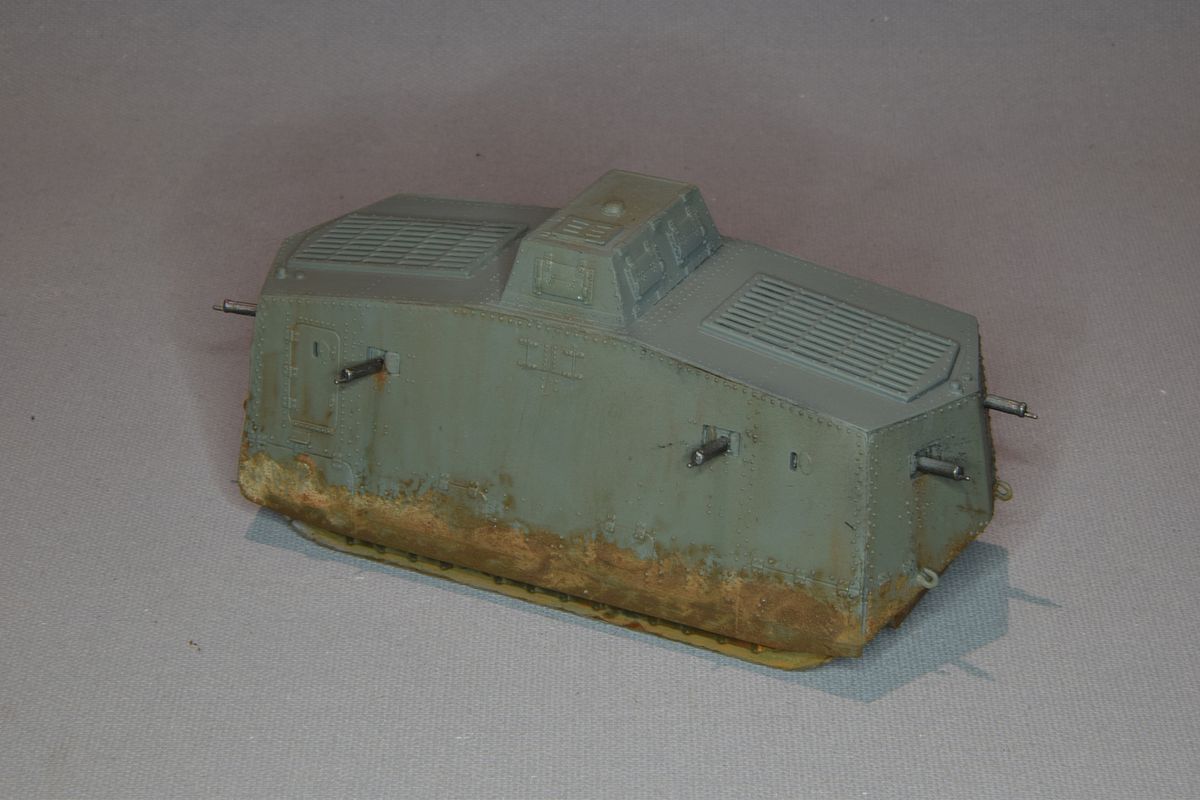
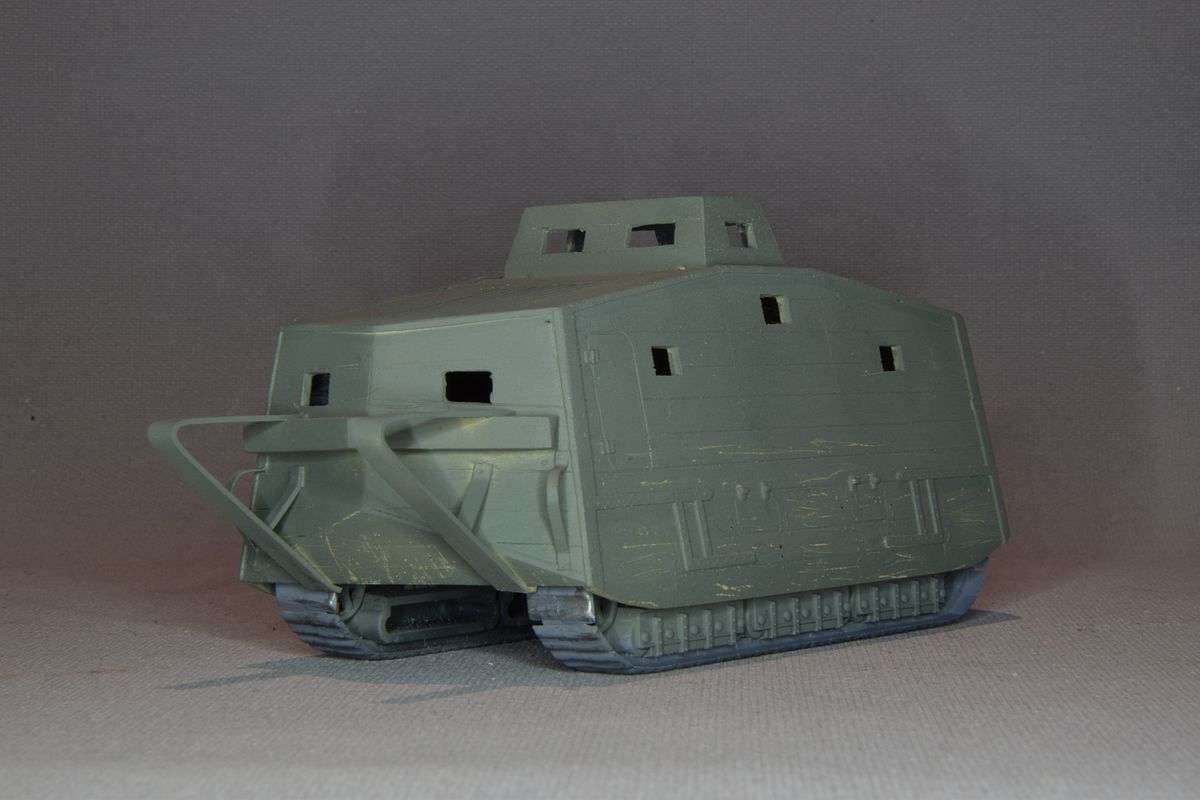
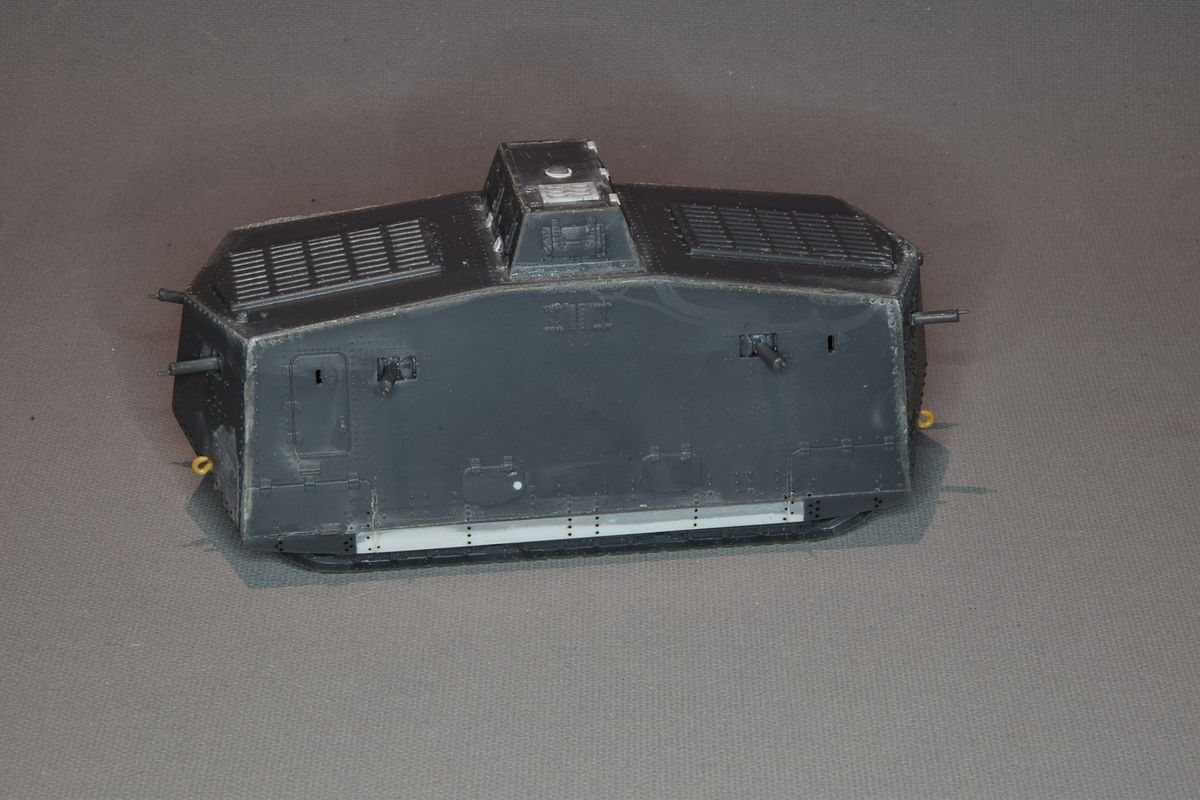 The last details has been added to Gretchen
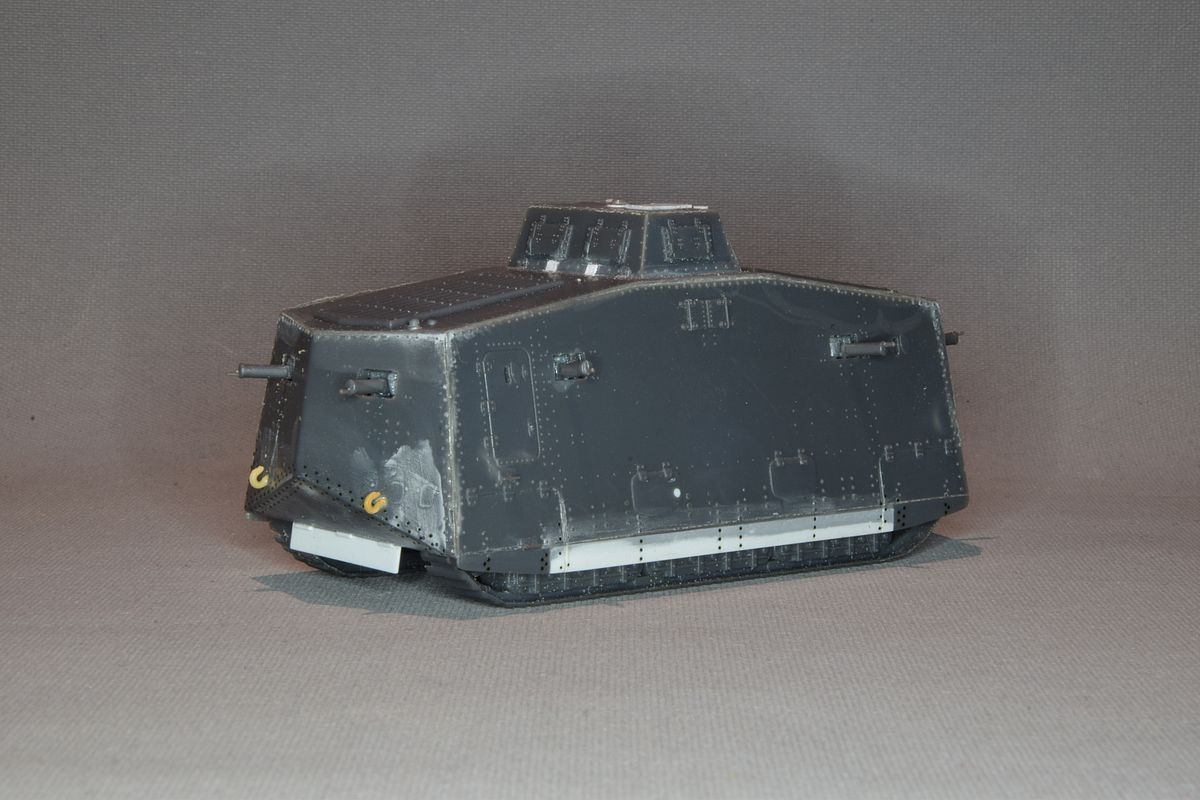
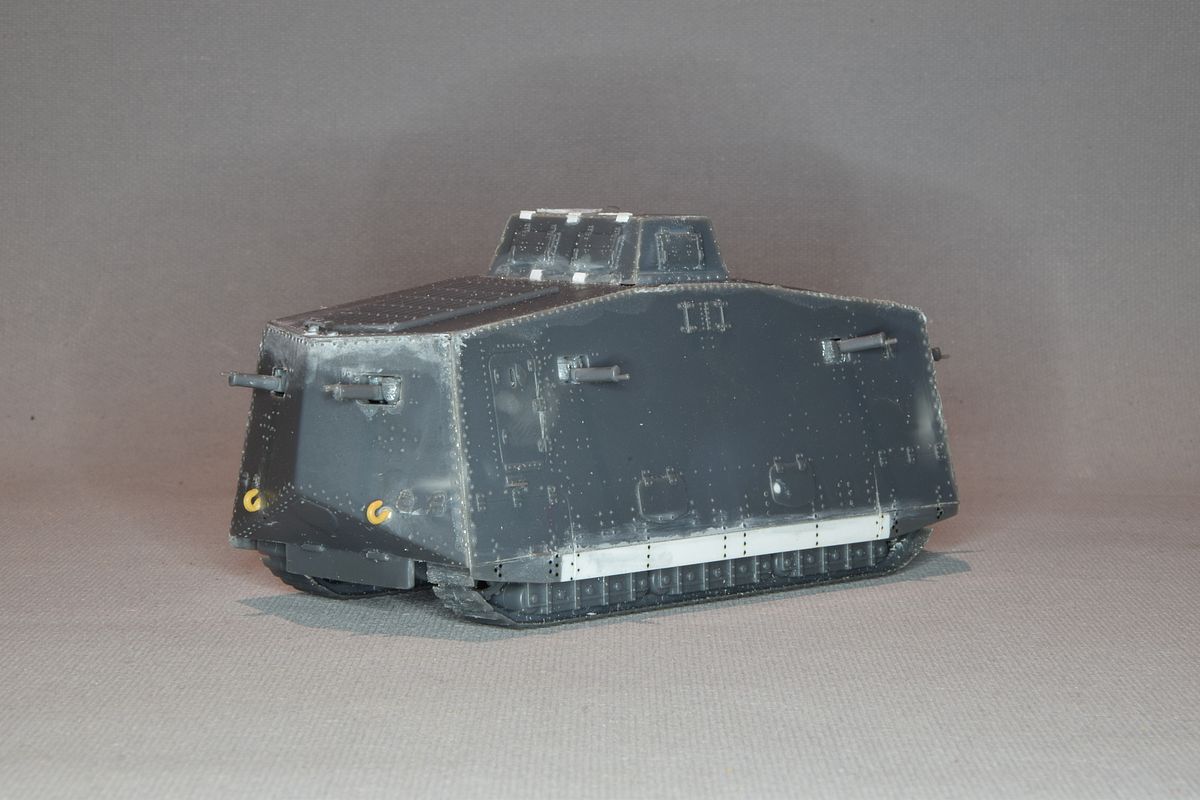 But looking at pictures made me realise that I goofed (AGAIN)