Glad to see you are posting a build on this kit. I have this one in the stash to start. The tracks from what I understand can be a real hassle. There is an upgrade set on ebay from the Chino Company I believe that can be purchased. I will be getting this set if the kits tracks are an issue for me, so I wanted to give you a heads up if they are an issue for you. I will be following your build here. Thanks for taking the time to photograph and post your work.
Thanks a lot. You have fun with this kit if you like to make some minor and major surgery here and there😅.I'm an old modeler, and I like it☺️. However, I think the real fun will be to paint and weather it🤞🏻
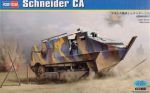
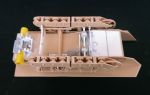
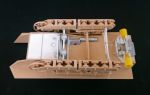
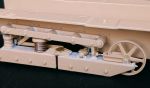
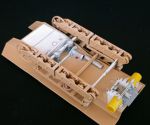
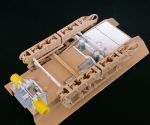
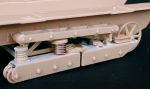
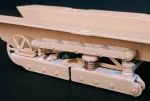
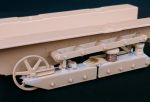
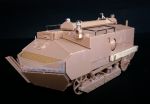
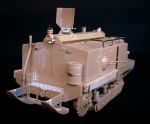
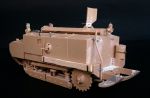
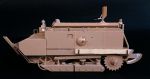
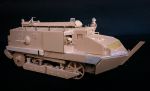
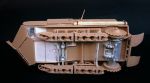
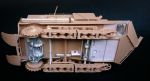
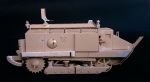
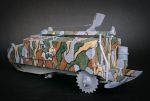
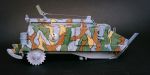
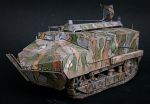
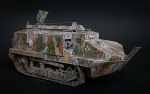
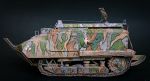
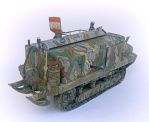
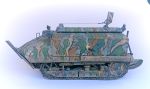
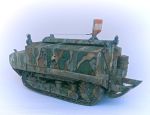
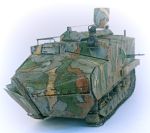
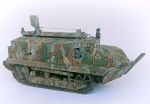
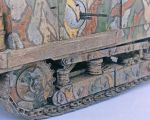
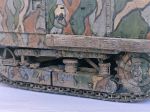
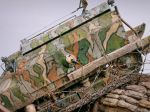
Here are pics of the finished Hobby Boss Schneider CA. I noticed that the axles of the sprocket wheels were a bit on the little side, hence I enlarged them and, consequently, the pieces related to them. You can see from the pics what kind of surgery I did on the model☺️
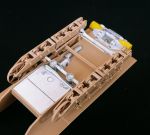
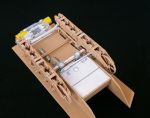
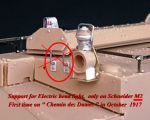
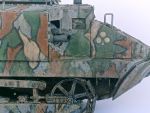
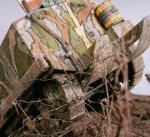
The thread that you see coming out from the armor plate on the right side operates the panneau d'appel and will be hidden, of course.
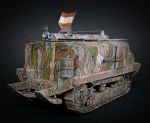
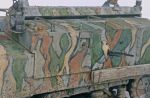
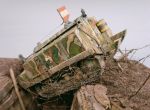
Hi brentprice... Thank you. The idea is to display it in a diorama, while trying to cross a trench. Let's see... But first of all want to have fun with the camo😊
Hi brentprice... Thank you. The idea is to display it in a diorama, while trying to cross a trench. Let's see... But first of all want to have fun with the camo😊
I have a question about your build. I see there is a string coming from the armor plate to one of the suspension springs. My question is, what is the string for?
I have been following this build for a while now and every post shows some really great work, especially the scratch building. Thanks for sharing your work again. I will continue to follow till the end.
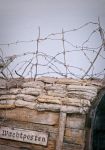
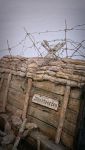
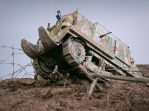
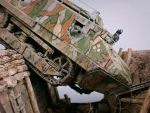
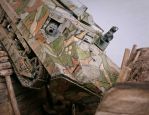
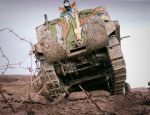
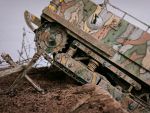
The Schneider dio eventually finished. The tank tried to get over the trench, or maybe it fell in it (because of a mechanical failure, or driver's fault...) and has just hit the opposite wall
-- Edited by Luca on Sunday 2nd of July 2023 07:03:54 PM
Hmm, sometimes I get the impression that only a few are still holding the fort here!?!
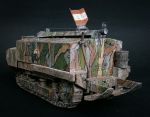
It’s a pity that you are receiving hardly any feedback on your wonderful work here. Although I don’t know anything on French camo I note with pleasure that your paintwork looks like painted with the brush – exactly what they did on the original vehicle. A lot of modelers falsely use the paintbrush.
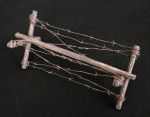
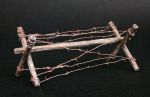
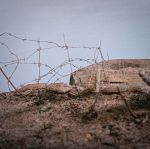
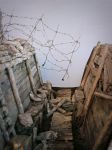
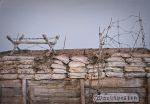
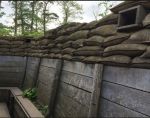
But what hit me first was your trench section – awesome work!!!
__________________
"Siplicity is the ultimate sophistication" -Leonardo Da Vinci-