Landships II

Members Login
Username 
 
Password 
    Remember Me  
Post Info TOPIC: Woodworking issues!?!


Hero

Status: Offline
Posts: 808
Date:
Woodworking issues!?!
Permalink   


Hi All,

Got this new cabinet from Ikea and it doesn't seem to have gone together right... it's ended up looking strangely familiar! confuse

Yeah I've been busy. ;)

3D printing

Helen x


Attachments
__________________


Hero

Status: Offline
Posts: 926
Date:
Permalink   

Heavens to Murgatroyd!!!!! That is awesome. Great Job!!!!!!

All the Best

Tim R.


__________________
"The life given us by nature is short; but the memory of a well-spent life is eternal"
-Cicero 106-43BC


Legend

Status: Offline
Posts: 1062
Date:
Permalink   

That looks great, Helen. You know, your joke about it being a cabinet actually makes me think that you could make a really cool book/DVD store for tank nuts - slot them in where the sponsons go, and along the top too! Or do I need to get out more?

__________________


Hero

Status: Offline
Posts: 808
Date:
Permalink   

TinCanTadpole wrote:

That looks great, Helen. You know, your joke about it being a cabinet actually makes me think that you could make a really cool book/DVD store for tank nuts - slot them in where the sponsons go, and along the top too! Or do I need to get out more?


 No you're not the only one... I was looking at it and thinking... simplify the shape with a more rounded base, use thicker ply and add a little seat... and hay presto a kids rocking tank!

Yeah we both need locking up. :)

Helen x


__________________


Legend

Status: Offline
Posts: 1062
Date:
Permalink   

A rocking tank? Why not! WW1 showed that cavalry had had its day, so why not replace the rocking horse with a rocking tank? smile


__________________


Hero

Status: Offline
Posts: 808
Date:
Permalink   

I am now officially impressed! I measered between two cutouts to make up an extra scale-ish bulckhead in the original sketchup 3D model... it came out as 71.4mm, the actual wooden model I measere the same spacing as 71.5-ish.

Considering it's a 1.3 meter glued togther wooden model by me... that's scary accurate!

I LOVE laser cutting!!!! xxxx


__________________
MRG


Major

Status: Offline
Posts: 121
Date:
Permalink   

Hi Helen,


Wow, wow and wow!

That looks really fantastic. I am so looking forward to see more of your project!


Best regards,


Martin


__________________


Legend

Status: Offline
Posts: 1062
Date:
Permalink   

Fantastic! If I may offer some constructive criticism though, pic 3 shows the risk of using spur gears to mesh with the teeth of the drive sprocket: any slight misalignment and the teeth are likely to jump out of position.

Since this is a large model which will have a considerable amount of torque being transmitted, I suggest beefing up the thickness of these gears and, since you weren't keen on cage gears (which the full-size original tanks used), a simple solution to preventing the teeth from jumping out of mesh would be to add a couple of sturdy discs to each side of each of the drive gears (the ones that drive the sprockets). These should be large enough in diameter to match or slightly exceed the diameter of the gear they sandwich (or are cast in one with) so that the teeth of the sprocket fit into 'pockets' and are restrained on either side, and should not require too big an alteration to your existing gear design.

HTH


-- Edited by TinCanTadpole on Monday 27th of May 2013 10:00:19 PM

__________________


Hero

Status: Offline
Posts: 808
Date:
Permalink   

Hi All,

Had a great day out with my friends at the Overlord Show in Denmead today. Made a good excuse to take the tank out to show off her first section of metal skin.

Helen x


Attachments
__________________


Hero

Status: Offline
Posts: 808
Date:
Permalink   

Hiya,

As far as I know the cage cog system was not used on the the Mk1&2 tanks. The bars between the gear plates are simply there to stop warping and hold them on their axles. The gears are visible through vision holes in the inner face and show tooth to tooth mesh. 

The gears I printed are not the best I must admit, the smaller gear with the chain sprocket in the middle should be double the thickness of the main drive gears, as on the original. Also I haven't fitted the spacer bars between the gears, so the they move around a bit as they're not glued to the axles yet. I'm still designing the gears so may give the disk idea a try.

Glad you like the model, I'm ordering a few thousand rivets this week. no

Good news though is that I have nearly finished the sponsons cutting plan, so two large wooden sponsons should be driving me mad with in a week or two.

Helen x


__________________


Legend

Status: Offline
Posts: 1062
Date:
Permalink   

No cage gears on the originals? I must check that out, but you may well be right; I don't remember if I have seen photos showing cage gears, or if my thoughts were just based on illustrations - which could be wrong or misleading!

In any case, yes, the model looks great and lots of us will look forward to hearing more.

__________________
MRG


Major

Status: Offline
Posts: 121
Date:
Permalink   

Brilliant!

I can't wait to see more.


Best regards!


Martin


__________________


Hero

Status: Offline
Posts: 808
Date:
Permalink   

Thanks guys x

One of the best bits of being at the show for me was speaking to a guy who used to play/climb over the second of Portsmouth's memorial tanks near Southsea Common as a lad. He said how it often became a kind of impromptu Speakers Corner, where self important men would climb on top and talk rubbish to anyone who would listen. :) I just wish I had more time to natter with him. He talked about it being taken away to Whale Island for parts to get their air defence tank running. Then he was off.

I love people like that, they bring my dusty history books to life. xx


__________________


Lieutenant-Colonel

Status: Offline
Posts: 179
Date:
Permalink   

smile I am sure that your work in progress continues to be a delight to many. As progresses, I can only congratulate you on the prototype, which will enable you to use the techniques to be deployed in the 1:1 plywood and metal variant, which will be an admirable habitation for you and your family...biggrin


__________________


Hero

Status: Offline
Posts: 808
Date:
Permalink   

Hmmm... a MK1 Motorhome... could be a winner!  Mind caravans are unpopular enough on the roads, I think a 4mph one that's 4 meters wide would create a bit of hate mail. :)


__________________


Lieutenant-Colonel

Status: Offline
Posts: 179
Date:
Permalink   

Roads? Did I mention roads? Just think of the cross-country capabilities, and how well it could redress the balance of power and influence on "Top Gear".

(I know. Rather too provocative.)no


__________________


Legend

Status: Offline
Posts: 1062
Date:
Permalink   

You could add a turbo for improved performance - 
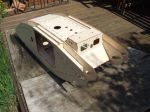
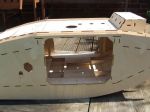
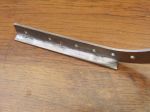
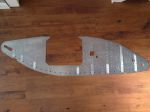
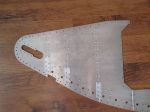
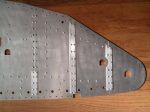
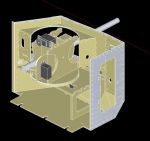
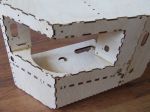
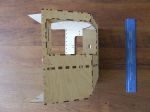
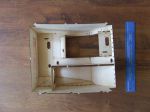
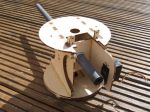
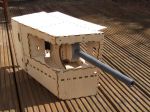
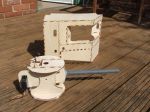
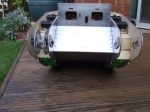
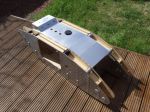
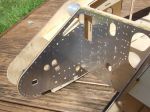
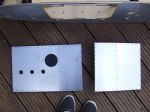
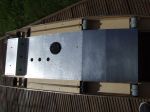
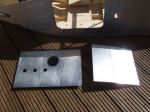
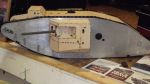
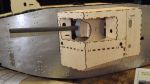
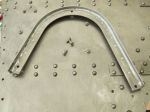
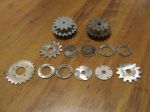
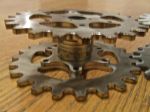
of course, you might need sprung seats in the cab!

__________________
MRG


Major

Status: Offline
Posts: 121
Date:
Permalink   

That is a great achievement! I doubt I could have done it better.

No metal is more difficult to solder than aluminium. And I know, because I learnt that stuff - with brass, I take the easy way out... solders like a dream. wink

For the girders flanking the end wheels, I took L-shaped profiles and bent them round with another helper I devised for the purpose. Of couse, with the scale your'e making you would need considerably more force to bend them, but it would be possible, I think.


Best regards


Martin


-- Edited by MRG on Wednesday 5th of June 2013 05:37:52 PM

__________________


Hero

Status: Offline
Posts: 808
Date:
Permalink   

Just had to post this..........      I managed to solder two pieces of aluminium together!! Yeah ME!!!  I'm one happy bunny today. :)

OK so it's not the best of soldering you will ever see, but I did it and it just made a key part of the model a whole lot cheaper and stronger.

The piece I am talking about is the 'L' shape strengthening section that goes around the edge of the side panels. I was dreading that I was going to have to get them pressed some how... it would have cost as it would be something i can't do myself. So now being able to solder it I can jig it all up and do it myself. An added bonus is that a 'T' shape will be stronger and protect the edge of the ply.

Happy, happy, HAPPY!

:)


Attachments
__________________


Hero

Status: Offline
Posts: 808
Date:
Permalink   

Pah! brass is the easy route!! it was though my next option if the Ali test failed. :)

My Dad was a Forman at Vospers many years ago when they first started using aluminium, also one of my brothers was a welder, so I'm getting lots of advice. I did though make sure that neither of them was around when I did my test.. didn't want to upset them by rudely telling them to leave. ;)

I did remember the talk about bending the 'L' beams into shape. But I like this way as I can get all the parts with rivet holes already in them.

One side effect of soldering the parts together I liked, was the patination caused by the flux. I'm trying figure out if  I could spray the metal parts with a flux and heat them to get the same effect. Warping is the obvious risk, but want to see if it is possible.

Helen x


__________________


Hero

Status: Offline
Posts: 808
Date:
Permalink   

Hi All,

Not much to add at the moment... added some rivets and glued the test Ali sheet to the side... it got me away from computer work for a bit.

The last pic is a wind swept me at the Overlord show in Denmead trying not to look cold.

The DXF files for the sponsons were emailed today, so maybe another woodworking challenge this weekend. :)

Helen x


-- Edited by MK1 Nut on Wednesday 19th of June 2013 11:01:49 PM


-- Edited by MK1 Nut on Wednesday 19th of June 2013 11:03:02 PM

Attachments
__________________


Legend

Status: Offline
Posts: 1062
Date:
Permalink   

Tank looks great, Helen - I'm wondering how big a load it will be able to pull when complete!

Are you planning on fitting BB/paintball guns to the cannons?

__________________


Hero

Status: Offline
Posts: 808
Date:
Permalink   

BB/paintball guns!!!! you're such a kid! :)

I'm sure someone will, but not our intention. The debate is between a pyrotechnic one off charge in the end of the barrel... or... my fav... gas and fullers earth, combined with light effect and sound. Never going to be as good as a pyro charge, but a lot safer and less limitations where you can use it. Final setup may involve both being possible, if only to stop any sulking and handbags at dawn... and that's just the guys. :D

It looks like the sponsons will be here late next week... part of me can't wait... the sensible part of me realises the coffee table is about to get 'very' wide. no

Helen x


-- Edited by MK1 Nut on Thursday 20th of June 2013 10:15:48 PM

__________________


Legend

Status: Offline
Posts: 1062
Date:
Permalink   

The coffee table??!! I hope you use coasters...! smile

As for the paintball matter, well - I'm 32 and according to a recent news article, men don't grow up until 43! I was really asking if you had some sort of effects in mind, as it would be a shame to have servo operation of the barrels but nothing more. Whatever you choose, you've answered my question, and as you say the safety side is important too.


-- Edited by TinCanTadpole on Thursday 20th of June 2013 11:31:03 PM

__________________
MRG


Major

Status: Offline
Posts: 121
Date:
Permalink   

Oh, good - then I have another year before I grow up. I always wondered when that would happen to me.  biggrin

And BB guns in tanks sounds perfectly sensible. I converted a 1/16 scale T34/85 RC tank model from WSN to do exactly that...


Awesome, Helen - I will stay tuned to this channel.


Best regards,


Martin


__________________


Hero

Status: Offline
Posts: 808
Date:
Permalink   

Wooden sheets to build sponsons are here!!!!! :)

Photos to follow.

Helen x


__________________


Hero

Status: Offline
Posts: 808
Date:
Permalink   

Hi,

Just had to go put a sponson together last night... should have waited as the ply wasn't flat and effected the build. no Having said that, still looks pretty good and only three faults found in the sponson design. Although I haven't put the gun side of it together yet. 

The upper and lower plates will have to have some kind of wooden brace to keep them flat, but as I haven't yet finalised on how the sponsons will hold in the side of the tank, that can wait.

As ever the laser cutting is spot on, and leaving little 5mm gaps in the cut lines, so the parts didn't fall out, worked. A quick run of a stanley blade over each side and the parts were free. 

The wood has been flattening over night, so better go put the gun mechanism together. :)

Helen x


Attachments
__________________


Legend

Status: Offline
Posts: 1062
Date:
Permalink   

Looks great Helen, and adding lugs onto the top and bottom plates to support the sponson in its opening is a brilliant idea. Are the curved shields going to be done in aluminium only, to get the curve without major hassle?

__________________


Hero

Status: Offline
Posts: 808
Date:
Permalink   

Not much time at the moment, so just a few more recent photos.

Helen x


Attachments
__________________


Legend

Status: Offline
Posts: 1062
Date:
Permalink   

Nice, keep posting!

__________________


Hero

Status: Offline
Posts: 808
Date:
Permalink   

Awww ok then, just for you! :)

Not recent pics, but they show the tank with its sponsons on and 3D printed guns.

Just started soldering up the Ali edging strips. I've done one and it looks nice, will get some photos up sunday night... working tomorrow. no

Helen x


Attachments
__________________


Field Marshal

Status: Offline
Posts: 446
Date:
Permalink   

nothing else to say really, it's that impressive!


__________________

Has anyone else noticed "new and improved" seems to mean it doesn't work as well as it used to?


MRG


Major

Status: Offline
Posts: 121
Date:
Permalink   

Hi Helen,

I am very impressed! Great pictures, thank you!

As the tracks remain my biggest problem, I am very much looking forward to seeing your progress with that issue.


Best regards,


Martin


__________________


Hero

Status: Offline
Posts: 808
Date:
Permalink   

Thanks guys x

The track is still the biggest headache. There is a firm who do CNC, plastic moulding AND metal stamping here in Portsmouth, I'm hoping to take the now more finished looking tank to them and see if I can get some interest in track production. I really don't want to go down the chain and plates route if I can at all help it.

This is my 3D printed piece of track I would like to turn into Ali and steel plate.

I have a backup idea for making the track plates i will draw up and see what you think. It might help you out to.

Helen x


Attachments
__________________


Hero

Status: Offline
Posts: 808
Date:
Permalink   

Just a little update... now adding the reinforcement strip around the edges of the tanks horns. In the end I went with soldering laser cut Ali plate into a 'T' section, then epoxy and pinning it to the model. Very pleased with the outcome, it really strengthens the horns up.

Helen x


-- Edited by MK1 Nut on Wednesday 25th of September 2013 12:14:22 PM

Attachments
__________________


Legend

Status: Offline
Posts: 1062
Date:
Permalink   

Looks good, Helen. Have you slathered any wood-preserve (or similar) onto the ply? Being a large, outdoors model, the wood will need protection from water.

__________________


Hero

Status: Offline
Posts: 808
Date:
Permalink   

TinCanTadpole wrote:

Looks good, Helen. Have you slathered any wood-preserve (or similar) onto the ply? Being a large, outdoors model, the wood will need protection from water.


 Hi, Not yet, can't make my mind up... white primer or a varnish to show the wood. Probably a white primer as it is more in keeping with the real tanks.

H x


__________________


Hero

Status: Offline
Posts: 808
Date:
Permalink   

Had an interesting delivery today... Cogs are here! :)

I was struggling to get around how to do the gears without lots of lathe work. My solution was to make them up from layers of steel.

So today gears and spacers in 3 and 4mm stainless steel arrived from the people at Cutting Technologies Ltd. Apologies in advanced for my fuzzy photos, better ones will be taken once I clean the parts up and assemble them.

The photos show the original 3D printed gear with its metal version as parts and stacked up to give an idea of final look.

This tank is about to get a whole lot heavier! no

H x


Attachments
__________________


Legend

Status: Offline
Posts: 1626
Date:
Permalink   

There a special wood floor treatment from a company called Osmo its very good much better then varnish or paint, it penetrates the wood and dries hard, its waterproof, hard wearing and very long lasting, I can recommend it.

http://www.osmouk.com/previewpage.cfm?bookid=book001&chapter=57&page=116

its actually meant for natural wooden floors in bathrooms and kitchens.

Or this although I havn't used it yet: 

http://www.osmouk.com/previewpage.cfm?bookid=book001&chapter=5&page=112


Regardssmile


__________________

"Ash nazg durbatulûk, ash nazggimbatul, ash nazg thrakatulûk, agh burzum-ishi krimpatul"


Legend

Status: Offline
Posts: 1062
Date:
Permalink   

Cogs look good, though personally I would replace a couple of the packing layers on the smaller drive gear with larger circular discs - to sit just inside the gear teeth and prevent movement sideways of the sprocket teeth, just in case the torque causes any problems. It may be unnecessary though.

As for the wood, I agree with Ironsides: don't use primer or varnish that just sit on the surface, you want a waterproofing treatment such as the one he suggested or a timber preservative that soaks into the wood and still protects if the surface gets scraped.

__________________
1 2 35  >  Last»  | Page of 5  sorted by
 
Quick Reply

Please log in to post quick replies.

Tweet this page Post to Digg Post to Del.icio.us


Create your own FREE Forum
Report Abuse
Powered by ActiveBoard